Choosing Dental Inlay Instruments with Confidence
This guide explains how dental professionals can evaluate 인레이 기구, the instruments used to prepare, place, adjust, and finish indirect dental inlays. It covers instrument categories, material compatibility, clinical workflow, ergonomics, infection control, maintenance, and procurement considerations. Rather than treating an instrument set as a fixed kit, the article examines how selection should reflect restorative material, cavity design, operator technique, laboratory communication, and applicable clinical standards.
What 인레이 기구 Means in Contemporary Dentistry
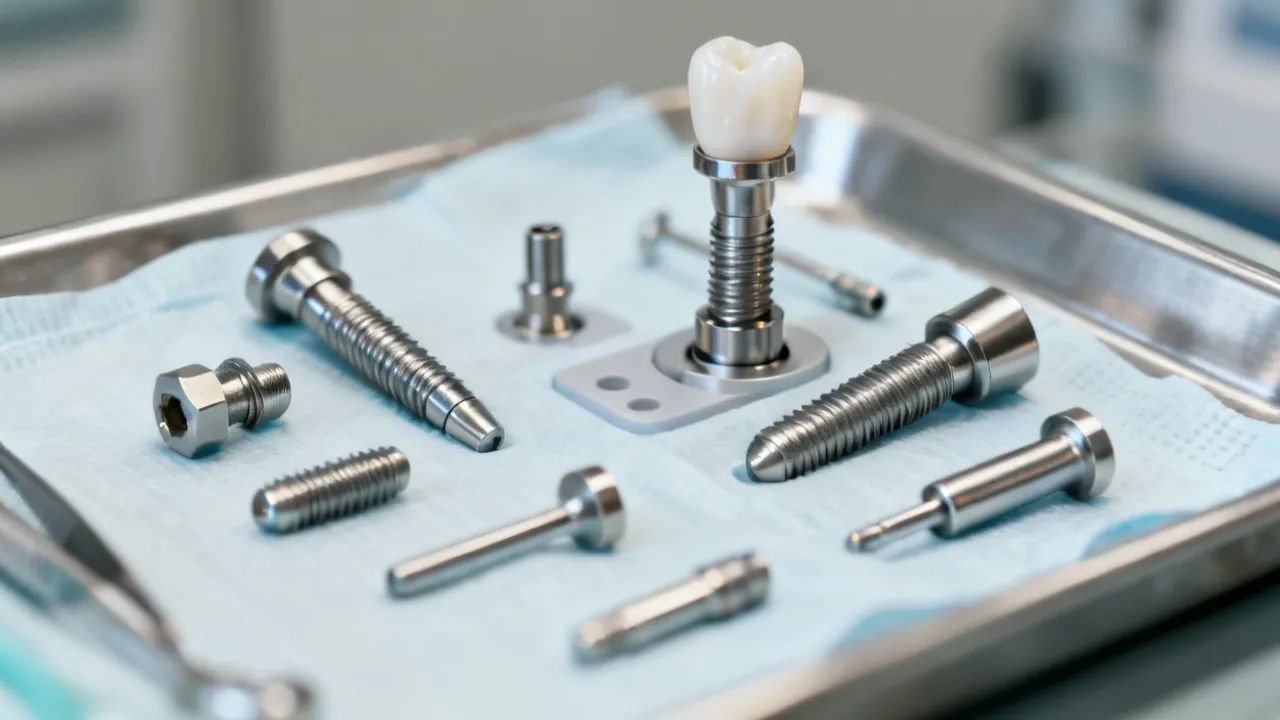
In Korean dental terminology, 인레이 기구 generally refers to the instruments and accessories used during the planning, preparation, try-in, cementation, adjustment, and finishing of an indirect dental inlay. An inlay is a custom-made restoration fabricated outside the tooth and subsequently bonded or cemented into a prepared cavity. It is usually positioned within the cusps, whereas an onlay may extend over one or more cusps. The distinction matters because the preparation design, isolation requirements, finishing sequence, and instrument selection may differ.
From an industry perspective, the most important conclusion is that there is no universally correct “inlay instrument set.” A reliable selection begins with the restorative material and clinical workflow. Ceramic, composite, and cast-metal inlays have different preparation, handling, adjustment, and finishing requirements. A clinician who selects instruments solely by appearance or by the number of items in a kit may acquire tools that are poorly matched to the procedure.
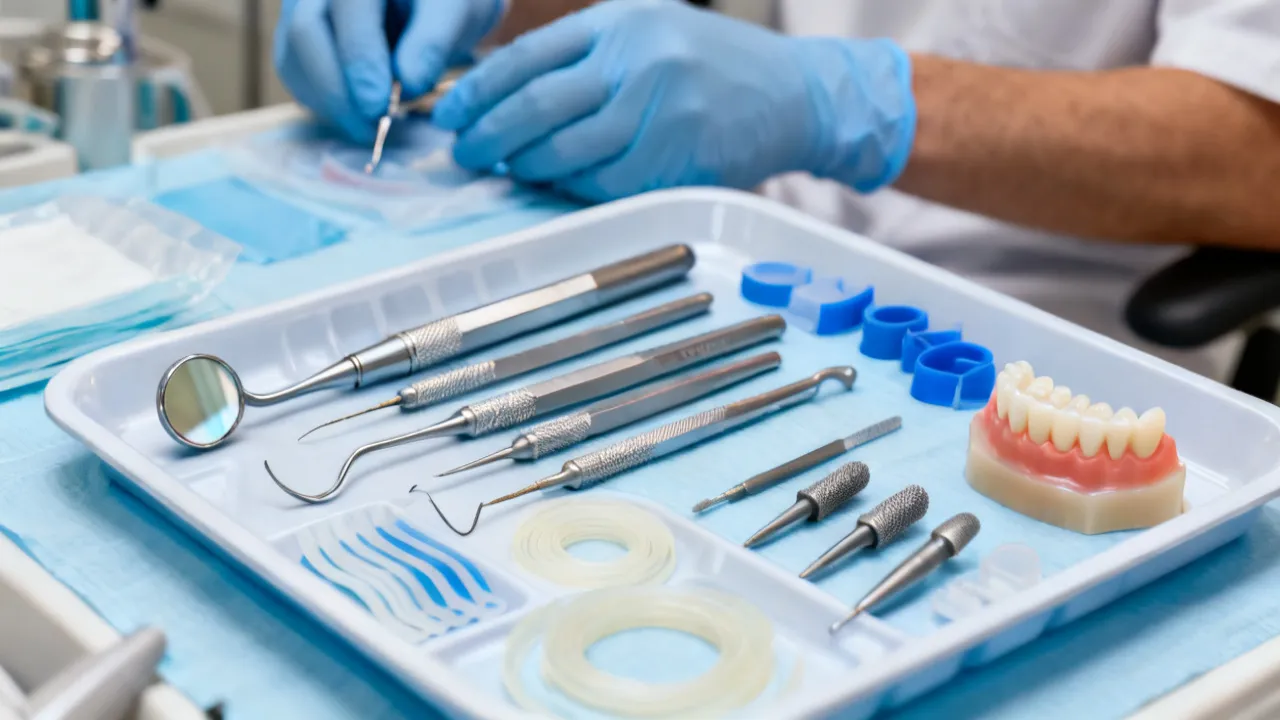
A practical 인레이 기구 system normally combines diagnostic instruments, isolation equipment, preparation instruments, impression or scanning accessories, try-in tools, cementation supplies, finishing devices, and maintenance resources. Some components are reusable stainless-steel instruments, while others are single-use or consumable items such as burs, polishing discs, matrix materials, microbrushes, and mixing tips.
The objective is not to maximize the quantity of equipment. It is to establish a controlled sequence that supports conservative tooth preparation, accurate seating, effective moisture control, predictable occlusal adjustment, and safe reprocessing. These goals should be considered alongside the manufacturer’s instructions for each material and device, as well as applicable national infection-control and medical-device requirements.
The meaning of 인레이 기구 may also change according to the context in which the term is used. In a dental clinic, it may describe a tray prepared for a particular procedure. In a dental laboratory, it may refer to finishing instruments, polishing systems, or accessories used after fabrication. In a purchasing context, it may describe a packaged product category rather than a single instrument. For this reason, a buyer should clarify whether the term refers to a complete clinical set, a preparation kit, a ceramic adjustment system, or a collection of general-purpose restorative tools.
Why Instrument Selection Influences Inlay Outcomes
Indirect restorations require greater coordination than many direct restorative procedures. The tooth must be prepared to provide a suitable path of insertion, adequate material thickness, smooth internal and external geometry, and margins that can be recorded accurately. Once the restoration returns from a dental laboratory or milling workflow, it must be inspected, tried in, adjusted when necessary, bonded or cemented, and finished without damaging either the restoration or the tooth.
Each stage depends on instruments that provide control. A sharp explorer can assist with margin inspection, but it is not a substitute for magnification or radiographic assessment when those are clinically indicated. A fine diamond bur may refine a ceramic restoration, but it must be selected and used according to the ceramic manufacturer’s recommendations. A thin articulating paper can reveal occlusal contacts, yet it cannot by itself determine whether a restoration is fully seated.
The professional value of an instrument is therefore linked to its role in the workflow. Important characteristics include:
- Compatibility with the restorative material and bonding or cementation protocol.
- Ability to support conservative and clearly visible preparation geometry.
- Ergonomic design that permits controlled movement and reduces hand fatigue.
- Reliable performance after repeated sterilization, where the device is designed for reuse.
- Traceable instructions for use, cleaning, inspection, packaging, and sterilization.
- Availability of replacement components and a consistent supply chain.
- Suitability for the operator’s magnification, handpiece, isolation method, and laboratory workflow.
Instrument selection should also account for the patient’s circumstances. Limited mouth opening, a sensitive gag reflex, deep proximal margins, heavy occlusal loading, or difficulty maintaining isolation may alter the clinical plan. The equipment should support sound clinical judgment rather than encourage the operator to force a predetermined procedure.
Instrument design can influence the consistency of preparation. A bur with excessive vibration may produce an uneven internal surface, while a well-balanced bur can allow smoother movement and more predictable reduction. Handle texture matters as well. A slippery handle may encourage excessive grip force, whereas a textured surface can improve control when gloves are wet or when the procedure lasts for an extended period.
The effect is not limited to the dentist. Dental assistants need to identify the correct bur, prepare replacement accessories, maintain a clean workflow, and recognize when an instrument is damaged or unsuitable. A clinic that evaluates instruments as part of a team system will generally obtain more consistent results than a clinic that treats instrument selection as an individual purchasing decision.
Core Categories of 인레이 기구
Diagnostic and Access Instruments
The initial group includes a mouth mirror, explorer, periodontal probe, college tweezers, cotton pliers, and appropriate diagnostic aids. These instruments are basic, but their role in inlay treatment is substantial. The operator needs to evaluate existing restorations, caries risk, cracks, marginal integrity, occlusal relationships, and periodontal conditions before preparation begins.
A mouth mirror with a clear reflective surface and a handle that supports a stable grip can improve indirect vision. An explorer may assist in examining a margin or detecting a rough surface, although excessive force should be avoided on weakened enamel, newly bonded restorations, or fragile ceramic edges. A periodontal probe is useful when the cervical margin approaches the gingival tissues and when periodontal considerations may influence isolation or restorative design.
Magnification and illumination are not usually described as instruments in a narrow catalog sense, but they are part of the practical system. Loupes, a microscope, a coaxial light, or a well-positioned operatory lamp can improve visualization of preparation walls and margins. The appropriate magnification depends on the clinician’s training, posture, visual needs, and procedure complexity.
Radiographic equipment and photographic accessories may also support case assessment. A bitewing radiograph can assist with evaluating proximal caries and existing restorations, while intraoral photographs can help communicate preparation details to the laboratory. These aids do not replace clinical examination, but they can improve documentation and reduce ambiguity when several people participate in the case.
Isolation and Moisture-Control Equipment
Moisture control is central to adhesive inlay treatment. A rubber dam system may include a rubber dam sheet, frame, punch, clamp forceps, clamps, floss ligatures, and sealing accessories. Additional tools may include a saliva ejector, high-volume evacuation tip, cheek retractors, cotton rolls, absorbent pads, and retraction cord instruments.
Isolation instruments must be selected with attention to the tooth’s position, crown shape, contact areas, and periodontal condition. The clamp should provide stability without unnecessary trauma. Floss ligatures can help secure the dam and identify the clamp before removal. In some situations, a combination of rubber dam isolation and localized gingival retraction may be needed to expose a cervical margin.
For adhesive procedures, an instrument that maintains a dry operating field is often more valuable than an additional finishing accessory. Contamination by saliva, blood, crevicular fluid, or uncured material can compromise the protocol specified for the bonding system. The exact consequences vary by material and technique, so the clinician should follow the relevant product instructions rather than relying on general assumptions.
Isolation should be tested before the tooth is prepared. The clinician and assistant can verify that the dam is sealed, the suction tip is positioned, the clamp is stable, and the patient can tolerate the arrangement. If the seal is inadequate, it is usually more efficient to correct it before conditioning or cementation than to continue and attempt to manage contamination later.
Preparation Burs and Handpiece Accessories
Preparation instruments are commonly organized by bur shape, abrasive particle size, shank type, and intended stage of use. Common forms include round burs, pear-shaped burs, fissure burs, tapered burs, chamfer or shoulder finishing burs, and fine-grit diamonds. The suitable geometry depends on the restoration design, the tooth, the material, and the laboratory or digital design requirements.
Coarse or medium abrasives may be used to remove existing restorative material and establish the primary preparation. Fine and extra-fine instruments are generally used for refinement, margin smoothing, and finishing. The terms “coarse,” “medium,” and “fine” should not be treated as interchangeable across manufacturers because grit ranges and labeling systems may vary.
Handpiece compatibility is essential. A bur intended for a high-speed turbine should not be used in a low-speed contra-angle unless its instructions specifically allow that application. The operator should verify shank configuration, maximum speed, cooling requirements, runout, and recommended pressure. Water spray may be necessary to control heat, remove debris, and protect the pulp, although the precise cooling method depends on the handpiece and procedure.
Worn, bent, damaged, or contaminated burs should be removed from service. A dull bur can increase cutting pressure and reduce control. Excessive pressure may create unwanted heat, chatter, or irregular surfaces. A structured bur replacement policy is therefore part of quality management, not merely an inventory preference.
Many preparation systems are organized in a sequence, such as initial reduction, extension, refinement, and margin finishing. The sequence can help standardize treatment, but it should not be followed mechanically when anatomy or existing restorative material requires a different approach. The clinician must maintain control of the amount of tooth structure removed and continually reassess the preparation.
Hand Instruments for Margins and Cementation
Inlay procedures may require hand instruments for removing temporary material, clearing excess cement, placing retraction cord, manipulating matrix systems, and inspecting margins. Examples include excavators, margin trimmers, scalers, composite placement instruments, cement spatulas, condensers, interproximal finishing instruments, and specialized placement tools.
The choice should reflect the restorative material. A sharp metal scaler may be useful for removing set excess at a safe stage, but it can damage a ceramic margin if used aggressively. Plastic-coated or resin-compatible instruments may be preferred when the clinician wants to reduce the risk of scratching certain surfaces. A thin, non-stick composite instrument can help handle resin cement or restorative material, but the instrument must be cleaned promptly according to the manufacturer’s instructions.
Instrument geometry also influences access. A posterior proximal box may require a slender instrument with a suitable angulation, while a broad occlusal surface may be easier to manage with a wider blade. Handle diameter and surface texture affect tactile control, especially during prolonged procedures.
Interproximal finishing instruments deserve particular attention because excess cement can remain in areas that are difficult to see. Floss, finishing strips, specialized blades, and narrow instruments should be selected according to contact tightness and gingival anatomy. The objective is to remove excess without opening the contact unnecessarily or injuring the papilla.
Try-In and Seating Accessories
Before final cementation, the restoration should be assessed for fit, proximal contact, marginal adaptation, shade where relevant, and occlusal relationship. Try-in materials may include dedicated try-in pastes, water-soluble media, seating instruments, interproximal floss, and articulating products. A restoration should be handled carefully because thin ceramic extensions and delicate margins can be vulnerable to chipping.
A seating instrument should permit controlled pressure without concentrating force on a fragile cusp or unsupported edge. Some clinicians use a small cotton pellet, a specialized placement tip, or a silicone accessory, depending on the restoration and cementation system. The instrument must not interfere with complete seating or leave debris in the internal surface.
Proximal contact evaluation usually involves dental floss and visual inspection. However, floss resistance alone does not establish complete seating. If the restoration does not seat fully, the clinician should systematically evaluate the preparation, internal surface, contact area, debris, temporary material, and possible laboratory or manufacturing discrepancies.
Try-in accessories should be kept clean and organized because contamination can affect both shade evaluation and bonding. If a restoration is removed after try-in, the internal surface may require cleaning or reconditioning according to the relevant instructions. The clinical team should never assume that a restoration can be cemented immediately after an uncontrolled try-in procedure.
Finishing, Polishing, and Occlusal Adjustment Instruments
Finishing equipment may include fine diamonds, carbide finishing burs where appropriate, abrasive strips, polishing discs, rubber points, cups, brushes, diamond-impregnated polishers, and material-specific polishing systems. The correct sequence depends on whether the restoration is ceramic, composite, or metal.
Ceramic adjustment requires particular care. The clinician should avoid unnecessary removal of material and should use water cooling where recommended. After adjustment, a suitable polishing protocol can reduce surface roughness. For some ceramics, a manufacturer-approved polishing system is preferable to a generic abrasive sequence. A surface that appears smooth under ordinary lighting may still require careful finishing at the microscopic level.
Composite inlays can often be adjusted and polished with systems designed for resin-based materials. Cast-metal inlays require different instruments and finishing considerations. The operator should not transfer a ceramic polishing protocol to metal or resin without confirming compatibility.
Articulating paper, shim stock, occlusal indicator films, and digital occlusal analysis systems may be used to assess contacts. These tools provide information, but they are not identical in sensitivity or interpretation. Occlusion should be evaluated in maximum intercuspation and relevant excursive movements when clinically appropriate. Adjustment should be conservative, particularly when the restoration is thin or when the opposing enamel and restorative surfaces have different wear characteristics.
After occlusal adjustment, polishing is not merely a cosmetic step. A rough surface may contribute to plaque retention, patient discomfort, antagonist wear, or staining. The final polishing method should produce a surface appropriate to the restorative material and should preserve the intended anatomy as much as possible.
Material-Specific Considerations
| Restorative material | Instrument priorities | Key cautions |
|---|---|---|
| Resin-based composite | Fine finishing burs, resin-compatible polishing discs, silicone points, non-stick placement instruments, and adhesive cementation accessories. | Heat, aggressive finishing, and contamination can affect surface quality or bonding. Follow the restorative and cement manufacturers’ instructions. |
| Glass-ceramic | Material-appropriate diamonds, water cooling, ceramic polishing systems, try-in accessories, and careful occlusal indicators. | Excessive pressure or unsuitable abrasives may cause chipping, overheating, or a rough surface. |
| High-strength ceramic | Compatible adjustment diamonds, dedicated polishing instruments, and accessories specified for the ceramic and bonding protocol. | Surface treatment depends on the ceramic chemistry. Do not assume that one etching or polishing method applies to every ceramic. |
| Cast metal | Metal finishing burs, abrasive stones or discs, interproximal finishing tools, and cement cleanup instruments. | Contact and margin adjustment should be controlled to avoid unnecessary removal of the restoration or tooth structure. |
This comparison is a planning framework rather than a substitute for product instructions. Material categories include numerous formulations, and manufacturers may specify different surface-treatment, speed, pressure, cooling, and sterilization requirements.
Material selection also affects the sequence of clinical decisions. With a glass-ceramic restoration, the clinician may place greater emphasis on internal-surface treatment and careful post-adjustment polishing. With a resin-based restoration, the clinician may focus more heavily on finishing the margin and achieving a smooth, stain-resistant surface. With a cast-metal restoration, the priorities may include precise proximal contact adjustment, margin adaptation, and controlled polishing.
The restoration’s thickness and design should also influence instrument pressure. Thin extensions and narrow marginal areas are more vulnerable to damage. If a restoration requires extensive adjustment, the clinician should consider whether the problem is actually a seating issue, design discrepancy, or inaccurate preparation rather than simply a need for more aggressive grinding.
Evaluating an 인레이 기구 Set
Clinical Completeness
A clinically complete set should support the entire intended procedure, not only tooth preparation. Review whether it includes instruments for examination, isolation, preparation, provisional management, try-in, cementation, excess removal, occlusal adjustment, and polishing. If the set omits essential accessories, the operator may need to improvise with instruments that are not designed for the task.
At the same time, completeness should not be measured by the number of pieces. A large kit can increase sterilization workload, storage demands, and the possibility of selecting an unsuitable instrument. A smaller, well-organized selection with clearly defined uses may be more efficient in daily practice.
Ergonomics and Tactile Control
Handle shape, diameter, weight distribution, grip texture, and working-end angulation affect operator comfort. Instruments should allow a relaxed modified pen grasp where appropriate and should support stable finger rests. Excessively narrow handles may increase pinch force, while overly thick or heavy handles may reduce fine control for some users.
Dental teams should evaluate the instruments in the context of their own posture and treatment positions. A tool that feels comfortable during a brief demonstration may become tiring during repeated posterior procedures. The best assessment includes simulated or supervised use, with attention to wrist position, visibility, access, and the amount of force needed.
Ergonomics is especially relevant to high-volume practices. Small differences in handle balance, bur vibration, and instrument weight can accumulate over many procedures. A purchasing committee may therefore ask clinicians to test instruments over several cases rather than judging them from a single demonstration.
Manufacturing Quality and Traceability
Reusable instruments should have clear identification, documented material information, and instructions for cleaning and sterilization. Burs and abrasive accessories should be packaged and labeled in a way that allows staff to identify their intended use, size, grit, and compatibility. A supplier should be able to provide technical documentation appropriate to the product category.
Clinics should distinguish between a manufacturer, an authorized distributor, and a marketplace reseller. Supplier evaluation may include regulatory documentation, complaint-handling procedures, lot traceability, replacement availability, delivery consistency, and technical support. These factors are especially important for instruments that are used in adhesive workflows or require a precise handpiece connection.
Compatibility with Existing Equipment
Before purchasing, confirm whether the bur shank fits the clinic’s handpieces, whether the polishing system uses the available mandrels, whether the matrix or isolation components suit the clinic’s techniques, and whether the sterilization process is compatible with the device. A technically well-designed instrument is of limited value if it cannot be safely integrated into the existing workflow.
Digital dentistry also affects compatibility. A clinic using intraoral scanning may need fewer conventional impression accessories but still requires retraction, isolation, scanning powder where applicable, scan-body or occlusal-control strategies, and suitable provisional instruments. Digital acquisition does not eliminate the need for careful preparation and margin management.
Inventory and Replacement Planning
Inventory planning should identify critical items that can interrupt treatment if unavailable. These may include specific preparation diamonds, finishing burs, curing-light tips, rubber dam clamps, cement mixing tips, polishing mandrels, and impression or scanning accessories. The clinic should establish minimum stock levels based on procedure volume and supplier lead time.
Consumables should be monitored separately from reusable instruments. A polishing disc or microbrush may be inexpensive individually but can cause a workflow interruption if the correct size or type is missing. A simple stock card, digital inventory system, or scheduled monthly review can prevent last-minute substitutions.
Step-by-Step Clinical Workflow
Step 1: Confirm the Treatment Plan
Before opening an 인레이 기구 tray, confirm the diagnosis, restorative indication, occlusal requirements, periodontal condition, and expected margin location. The clinician should determine whether an inlay is appropriate or whether a direct restoration, onlay, crown, or other treatment would better preserve tooth structure and manage functional demands.
Radiographs and other diagnostic methods should be used when clinically justified. Existing cracks, pulpal symptoms, recurrent caries, and inadequate tooth structure can change the treatment plan. A well-organized instrument set cannot compensate for an unsuitable indication.
The clinician should also consider parafunctional activity, the patient’s caries risk, available enamel for bonding, and the ability to maintain oral hygiene around the restoration. These factors can influence the restorative material, margin position, and cementation approach.
Step 2: Establish Isolation and Visibility
Prepare the isolation system before beginning tooth reduction. Check the rubber dam, clamp, frame, suction, retraction materials, and lighting. If the cervical margin is difficult to expose, plan how the tissue will be managed without causing unnecessary injury. Visibility should be sufficient to identify the preparation boundaries and remove unsupported enamel.
For adhesive cementation, the isolation strategy must remain effective through conditioning, bonding, seating, cleanup, and initial polymerization steps. The longer and more technically sensitive the protocol, the more important it is to organize materials in sequence.
Step 3: Remove Existing Material and Prepare the Cavity
Use the selected bur at the recommended speed, cooling level, and pressure. Establish a preparation that is compatible with the chosen restorative material and laboratory or digital design. Avoid creating sharp internal angles when the material or preparation philosophy calls for rounded geometry. Conversely, do not over-round margins if doing so would reduce seating accuracy or compromise the design.
Preparation should be conservative but not so minimal that the restoration becomes too thin or difficult to manufacture. The required reduction is material-specific. The clinician should use preparation guides, manufacturer recommendations, training, and laboratory communication rather than relying on a single universal measurement.
During preparation, maintain a clear distinction between removal of diseased or unsupported structure and removal intended only to create restorative space. This distinction supports minimally invasive treatment. The operator should periodically stop, rinse, dry, and inspect instead of cutting continuously without reassessment.
Step 4: Refine Margins and Inspect the Preparation
Fine burs and hand instruments can be used to smooth irregularities, remove unsupported enamel, and clarify the finish line. Inspection should include visual examination under magnification, gentle probing where appropriate, and assessment of the path of insertion. Debris must be removed before scanning or impression-making.
At this stage, check for undercuts that could obstruct seating, excessive taper that could reduce retention where it is needed, inadequate clearance, thin enamel margins, and proximal areas that cannot be recorded accurately. The final design should be communicated clearly to the laboratory or digital design team.
Margin inspection should include the transition between the occlusal surface and proximal box. A margin that appears continuous from one viewing angle may contain a step, ditch, unsupported enamel edge, or smear layer that becomes important during fabrication. Magnification, illumination, air drying, and careful instrument handling can improve this assessment.
Step 5: Record the Preparation
For conventional impressions, use suitable trays, impression materials, retraction accessories, and mixing equipment. For digital impressions, use the scanner, retraction system, scan strategy, and moisture-control method specified by the equipment manufacturer. In both workflows, the critical issue is the quality of the margin record.
The opposing arch, bite registration, shade information, photographs, and clinical notes may also be necessary, depending on the case. The operator should document the restorative material, preparation considerations, occlusal findings, and any specific requirements for proximal contact or emergence profile.
A digital scan is not automatically accurate simply because it is digital. Blood, saliva, reflective surfaces, inadequate retraction, incomplete stitching, and insufficient capture of the finish line may compromise the record. Similarly, a conventional impression requires appropriate tray selection, material handling, working time, tissue management, and inspection before it is sent to the laboratory.
Step 6: Manage the Temporary Restoration
If a temporary restoration is placed, instruments should permit accurate adaptation without damaging the preparation or adjacent tissues. Temporary cement selection must be compatible with the anticipated definitive bonding protocol. Excess temporary material should be removed carefully, and the preparation should be cleaned before final seating.
The temporary phase is also an opportunity to observe occlusion, proximal contact, patient comfort, and tissue response. Unexpected sensitivity or discomfort should be assessed clinically rather than dismissed as a routine inconvenience.
Temporary restoration instruments may include matrix bands, wedges, composite placement tools, occlusal adjustment burs, and finishing polishers. Their use should preserve the prepared walls and avoid creating new irregularities that could interfere with the definitive restoration.
Step 7: Inspect and Try In the Definitive Inlay
When the restoration is received, inspect it before placing it in the mouth. Check the identity, material, margins, surface integrity, contacts, and apparent design. The restoration should be handled over a controlled surface to reduce the risk of dropping or contaminating it.
During try-in, assess seating, proximal contact, marginal adaptation, shade where relevant, and occlusion. If the restoration does not seat, do not force it. Evaluate the preparation and restoration systematically. Minor adjustments may be appropriate, but extensive correction may indicate that the case requires laboratory review or remanufacture.
Try-in should follow a logical order. Confirm that the restoration is correctly oriented, evaluate the path of insertion, check the proximal contact, assess the margins, and then evaluate occlusion. This sequence helps prevent a clinician from adjusting the occlusion before discovering that the restoration is not fully seated.
Step 8: Condition and Cement According to the Protocol
Bonding and cementation are highly material-dependent. The appropriate instruments may include microbrushes, applicator tips, mixing pads, cement spatulas, dispensing syringes, placement instruments, floss, gel application accessories, and curing-light aids. The clinical team should arrange these items in the order of use to reduce interruptions.
Follow the instructions for the selected ceramic or composite, primer, adhesive, resin cement, or conventional cement. Surface treatment can differ substantially among restorative materials. Conditioning one material as though it were another may reduce bond performance or damage the surface.
During seating, maintain controlled pressure and remove excess at the stage recommended by the cement manufacturer. Interproximal floss, scaler-type instruments, brushes, and curing accessories may be used in a coordinated sequence. Particular care is needed around the gingival margin and contact areas.
The curing light should be inspected and maintained according to its manufacturer’s recommendations. Output, tip cleanliness, angulation, exposure time, and access can affect polymerization. If the cementation protocol depends on light activation, the team should ensure that the light can reach the restoration adequately and that the tip is not obstructed by isolation accessories or excess material.
Step 9: Finish and Verify
After cementation, confirm that excess material has been removed from accessible margins and contacts. Check occlusion with suitable indicators and adjust conservatively. If adjustment is necessary, use the correct instrument for the restorative material and complete the polishing sequence recommended for that material.
Finally, inspect the margins, proximal contacts, occlusion, surrounding gingiva, and patient comfort. The record should note the restoration type, cementation system, relevant adjustments, and any follow-up recommendations.
Patients should receive practical instructions appropriate to the case, such as avoiding unusually hard loading until the cement has completed its setting period when relevant, maintaining interproximal hygiene, and reporting persistent sensitivity, high occlusion, roughness, or discomfort. Follow-up allows the clinician to confirm tissue health and functional comfort.
Infection Prevention and Reprocessing
Infection prevention is a foundational requirement for any reusable 인레이 기구. Instruments that contact oral tissues should be processed according to their classification, intended use, and the instructions supplied by the manufacturer. The clinic should maintain written procedures for transport, cleaning, inspection, packaging, sterilization, storage, and documentation.
Cleaning should occur promptly because dried blood, saliva, cement, and resin can become more difficult to remove. Manual cleaning may involve appropriate detergent, brushes, protective equipment, and a controlled sink area. Ultrasonic cleaning or an automated washer may be suitable for some instruments, but not every device is compatible with every method.
After cleaning, inspect the working end, hinges, serrations, surfaces, and connections. Corrosion, pitting, discoloration, cracks, looseness, or loss of sharpness may indicate that an instrument should be repaired or removed from service. Instruments should be packaged in a manner that permits sterilant penetration and preserves sterility until use.
Reusable devices should not be processed beyond their validated limits. The clinic should follow the manufacturer’s sterilization temperature, exposure time, drying requirements, and packaging conditions. In the absence of clear instructions, the instrument should be referred to the supplier or manufacturer for clarification rather than subjected to an assumed cycle.
Single-use components should be discarded after use according to local regulations and facility policy. Reusing a product labeled for single use may create safety, performance, and compliance concerns. Dental practices should also separate clean and contaminated workflows and train every staff member who handles instruments.
Rotary instruments require special attention because debris may remain in flutes or abrasive surfaces. Cleaning should follow the product instructions and should not damage the cutting edges or abrasive coating. Burs should be stored in a way that prevents contact between working ends and avoids confusion between used and unused items.
Common Selection Mistakes
Buying by Quantity Rather Than Function
A kit with many burs or hand instruments may appear economical, but unused components can increase costs and complicate storage. The better approach is to map the clinic’s common inlay procedures and identify the minimum reliable sequence for each restorative material.
Ignoring Material Instructions
Polishing and surface-treatment systems are not universally interchangeable. A generic diamond, etchant, primer, or cement may not be appropriate for every restoration. Product documentation should be reviewed before clinical use, especially when changing suppliers or materials.
Using Worn Burs Too Long
Although extended use may seem efficient, worn abrasives can reduce cutting efficiency and increase operator pressure. A replacement schedule based on procedure count, visual inspection, performance, and manufacturer guidance is more defensible than waiting until a bur visibly fails.
Underestimating Isolation Accessories
Clinics sometimes invest in expensive finishing systems while treating isolation accessories as secondary supplies. In adhesive dentistry, clamps, dam sheets, retraction tools, suction, and matrix systems may have a direct effect on procedural control.
Forcing a Restoration That Does Not Seat
Seating pressure should not be used to overcome an unidentified obstruction. The issue may involve debris, a proximal contact, an undercut, an internal irregularity, or a manufacturing discrepancy. A structured assessment protects the tooth and the restoration.
Failing to Train the Entire Team
Even an excellent instrument system can underperform if assistants are uncertain about setup, cleaning, packaging, or replacement. Team training should address the sequence of use, instrument identification, contamination control, and documentation.
Mixing Incompatible Protocols
Another common mistake is combining components from different restorative systems without verifying compatibility. For example, a cement may require a particular primer, a polishing instrument may be unsuitable for the ceramic, or a bonding agent may have a specific solvent-management requirement. A tray should be assembled around a validated protocol rather than around whichever products happen to be available.
Procurement and Supplier Assessment
When selecting an 인레이 기구 supplier, dental practices should evaluate more than purchase price. A dependable supplier should provide clear product identification, technical specifications, instructions for use, warranty or replacement policies where applicable, and a process for reporting defects. For regulated devices, the clinic should verify that the product is legally marketed in the relevant jurisdiction and that the documentation is appropriate.
Important procurement questions include:
- Is the instrument intended for reusable or single-use application?
- Does it fit the clinic’s handpiece, sterilizer, and packaging workflow?
- Are the working ends and abrasive grades clearly labeled?
- Can replacement burs, tips, mandrels, or accessories be obtained consistently?
- Are cleaning and sterilization instructions available in a language the team understands?
- Does the supplier provide batch or lot information where appropriate?
- Are product claims supported by technical documentation rather than promotional language?
- Can the clinic maintain a record of purchase, use, inspection, and disposal?
Price should be assessed as a total ownership cost. This may include the initial set, replacement burs, polishing accessories, sterilization pouches, maintenance, staff time, storage, and the consequences of inconsistent supply. A less expensive instrument that wears quickly or cannot be replaced may be less economical over the life of the workflow.
Before adopting a new product, a clinic may conduct a limited evaluation period. During this period, clinicians can assess cutting efficiency, visibility, vibration, comfort, compatibility with existing equipment, and ease of reprocessing. Assistants can evaluate packaging, labeling, storage, cleaning, and preparation time. Feedback should be documented rather than relying only on memory.
Comparison of Instrument Strategies
| Strategy | Advantages | Limitations | Best suited to |
|---|---|---|---|
| Basic modular selection | Lower inventory complexity and easier customization. | Requires careful planning and separate purchasing of accessories. | Practices with defined procedures and experienced teams. |
| Material-specific set | Clear sequence for a selected ceramic, composite, or metal workflow. | May be less flexible when restorative materials change. | Clinics that frequently use one or two restorative systems. |
| Comprehensive multi-material set | Supports varied cases and multiple finishing protocols. | Higher storage, training, maintenance, and replacement demands. | Larger practices or clinics offering broad indirect restorative services. |
| Digital-centered workflow | May reduce conventional impression components and improve digital record integration. | Still requires isolation, preparation, finishing, and occlusal-control tools. | Practices with validated scanning and design workflows. |
Conditions and Requirements for Safe Use
The following conditions should be satisfied before an inlay instrument system is introduced into routine practice:
- Clinical suitability: The intended inlay cases should be clearly defined, including the materials and preparation principles used by the clinic.
- Equipment compatibility: Burs, polishers, handpieces, scanners, curing lights, and sterilizers should be technically compatible.
- Documentation: Instructions for use, cleaning, sterilization, storage, and replacement should be available to the clinical team.
- Staff competency: Dentists and assistants should understand the sequence, purpose, and limitations of each item.
- Moisture control: Isolation equipment should be available and tested before adhesive procedures begin.
- Inspection process: Instruments should be examined before and after use for wear, damage, contamination, and performance.
- Supply continuity: Critical consumables should have an approved alternative or an established replenishment schedule.
- Record keeping: The clinic should retain appropriate purchase, batch, maintenance, and sterilization records.
These requirements should be translated into a written operating procedure. The procedure may specify tray setup, bur order, isolation materials, cementation steps, cleanup instruments, polishing sequence, and post-treatment reprocessing. Written systems reduce variation between clinicians and make staff training easier.
Professional Reference Framework
This article is based on broadly recognized principles in operative dentistry, indirect restorative treatment, dental materials science, and infection prevention. For implementation, clinicians should consult current guidance from relevant national dental authorities, public-health agencies, medical-device regulators, professional dental organizations, and the manufacturers of the restoration, cement, instruments, and sterilization equipment.
Useful reference categories include the manufacturer’s instructions for use, national infection-prevention recommendations for dental settings, standards concerning the processing of reusable medical devices, and dental materials guidance concerning ceramic and resin-based restorations. Because regulations and product formulations change, the clinic should verify the current edition of applicable guidance rather than relying on an undated checklist.
External evidence should be interpreted carefully. Laboratory data on surface roughness, bond strength, or wear resistance may not directly predict clinical performance. Likewise, a supplier’s marketing description should not be treated as independent clinical evidence. A balanced procurement decision combines technical documentation, operator experience, relevant research, and local regulatory requirements.
How to Organize the Instrument Tray
A well-organized tray can reduce interruptions and support aseptic handling. Instruments should be arranged in the order in which they are likely to be used: diagnostic items first, isolation accessories next, preparation burs in a clearly labeled sequence, and cementation and finishing materials in separate sections. Color coding or labeled cassettes may help distinguish ceramic, composite, and metal protocols.
Sharp or rotating instruments should be protected from accidental contact. Burs may be arranged by handpiece type and abrasive grade, with used and unused items kept separate. Cementation accessories should remain sealed until required. If the clinic uses different bonding systems, separate storage compartments can reduce the risk of selecting the wrong primer or cement.
After the procedure, used instruments should be transferred safely to the designated contaminated area. Items should not be left on a counter where resin cement can harden or where staff may accidentally contact sharp burs. A consistent post-procedure sequence improves both safety and inventory accuracy.
A setup photograph or diagram can help standardize the tray. This is especially useful when several assistants rotate between operatories. The diagram should identify each component by name, indicate whether it is reusable or disposable, and show where replacement items are stored.
Maintenance and Quality Assurance
Maintenance begins with routine inspection. Examine hand instruments for corrosion, loose handles, damaged tips, and impaired articulation. Check rotary instruments for deformation, contamination, and reduced cutting performance. Inspect polishing accessories for glazing, tearing, or embedded debris. The frequency of review should reflect use volume and the manufacturer’s recommendations.
Quality assurance can be practical and concise. A clinic may maintain an instrument register showing the product name, intended use, reusable or single-use status, sterilization requirements, and replacement criteria. Staff can record recurring problems, such as a bur that separates from the handpiece, a polishing point that wears unusually quickly, or a matrix system that fails to adapt consistently.
Repeated issues should prompt a review of storage, technique, equipment compatibility, and supplier quality. Not every problem is caused by the instrument itself. Incorrect speed, excessive pressure, inadequate cooling, unsuitable cleaning, or improper packaging can reduce performance.
Training should be refreshed whenever a new material, cement, scanner, polishing system, or sterilization device is introduced. A short demonstration followed by supervised use can help prevent avoidable errors. Competency review is particularly important for procedures involving multiple steps, because a team member may know the general purpose of an item but not its correct order or limitation.
FAQs About 인레이 기구
What does 인레이 기구 refer to?
인레이 기구 is a Korean term generally used for instruments and accessories associated with dental inlay treatment. It can include diagnostic tools, preparation burs, isolation equipment, try-in accessories, cementation instruments, finishing devices, and polishing systems. The exact contents depend on the restorative material and clinical workflow.
Is there one standard inlay instrument kit?
No. A suitable kit varies according to whether the restoration is ceramic, composite, or metal; whether the clinic uses conventional impressions or digital scanning; and whether cementation is adhesive or non-adhesive. A modular system selected around the clinic’s actual procedures is often more useful than a generic kit with unnecessary components.
Which burs are used for inlay preparation?
Common options include round, pear-shaped, fissure, tapered, and fine-grit diamond burs. The correct bur depends on the preparation design, tooth anatomy, restorative material, handpiece, and manufacturer recommendations. Clinicians should not select a bur solely by shape or visual similarity to another product.
Are ceramic inlays adjusted with the same tools as metal inlays?
Usually not. Ceramic and metal require different adjustment and polishing approaches. Ceramic may require material-specific diamonds and polishing systems, while metal may require instruments intended for metal finishing. The restoration manufacturer’s instructions should determine the protocol.
Can reusable inlay instruments be sterilized in an autoclave?
Only when the instrument is designed and labeled for that process. The clinic must follow the manufacturer’s instructions for cleaning, packaging, temperature, exposure time, drying, and storage. Instruments lacking adequate reprocessing information should be referred to the supplier or removed from consideration until their status is clarified.
What is the most important instrument for adhesive inlay treatment?
No single instrument determines success. Effective isolation, appropriate preparation burs, accurate margin-inspection tools, compatible cementation accessories, and material-specific finishing instruments all contribute. In many cases, reliable moisture control is more consequential than adding another specialized finishing device.
How should a clinician handle an inlay that does not seat?
The clinician should avoid forcing it and should inspect the preparation and restoration systematically. Possible causes include debris, temporary cement, an interproximal contact, an undercut, an internal irregularity, or a manufacturing issue. Minor correction may be appropriate, but extensive adjustment should prompt laboratory consultation or reconsideration of the restoration.
Are polishing systems interchangeable?
No. Polishing systems are designed for particular material classes and may differ in abrasive composition, recommended speed, pressure, and cooling. Using an unsuitable system can leave a rough surface or damage the restoration. Follow the instructions for the specific material and polishing product.
How often should dental burs be replaced?
There is no universal replacement interval. Replacement should reflect the bur’s condition, cutting efficiency, number and type of procedures, manufacturer guidance, and inspection findings. Burs that are bent, damaged, contaminated beyond effective cleaning, or noticeably inefficient should be removed from service.
What should a clinic ask an inlay instrument supplier?
The clinic should ask about intended use, compatibility, reusable or single-use status, cleaning and sterilization instructions, product traceability, replacement availability, technical support, and regulatory documentation. It is also sensible to clarify the supplier’s process for handling defects or performance complaints.
Does a digital workflow reduce the need for 인레이 기구?
Digital scanning can reduce the need for some conventional impression materials and trays, but it does not remove the need for preparation, isolation, tissue management, margin inspection, try-in, cementation, occlusal adjustment, or polishing. Digital dentistry changes part of the recording process; it does not replace clinical control.
Should instrument price be the primary purchasing factor?
No. Price is relevant, but it should be considered with durability, replacement cost, compatibility, staff training, sterilization workload, technical support, and supply continuity. A lower initial price may not represent lower total ownership cost if the instrument wears quickly or is difficult to replace.
Can one polishing bur be used for every restoration?
It is generally inappropriate to assume that one polishing bur will perform equally well on all restorative materials. Abrasive hardness, particle type, binder composition, speed, and pressure can change the result. A clinic should maintain material-specific options or select a system explicitly validated for the materials it uses.
Final Expert Assessment
The most dependable approach to 인레이 기구 is systematic rather than product-centered. First define the clinical cases and restorative materials. Then identify the preparation, isolation, recording, seating, cementation, adjustment, and maintenance steps required for those cases. Only after that should the clinic compare individual instruments, complete sets, suppliers, and total ownership costs.
High-quality instruments can improve visibility, tactile control, efficiency, and consistency, but they do not replace diagnosis, training, moisture control, or adherence to material-specific protocols. A carefully selected set is one that fits the operator’s hands, the assistant’s workflow, the laboratory or digital system, and the clinic’s reprocessing capability.
For dental teams, the best purchasing decision is therefore not the largest kit or the lowest quoted price. It is a traceable, maintainable, material-compatible system that supports safe treatment from the first examination to the final polish and follow-up evaluation.