A Practical Guide to Dental Inlay Instruments
This guide explains how 인레이 기구, or dental inlay instruments, support the diagnosis, preparation, impression, placement, and finishing of indirect restorations. It examines instrument categories, material compatibility, workflow control, cleaning, sterilization, ergonomics, procurement, and quality assurance. Inlay instruments do not determine treatment success by themselves; outcomes also depend on diagnosis, tooth preparation, isolation, restorative material, adhesive protocol, operator training, and laboratory communication. The article provides an objective framework for selecting and managing these instruments in modern dental practice.
Understanding 인레이 기구 in Contemporary Dentistry
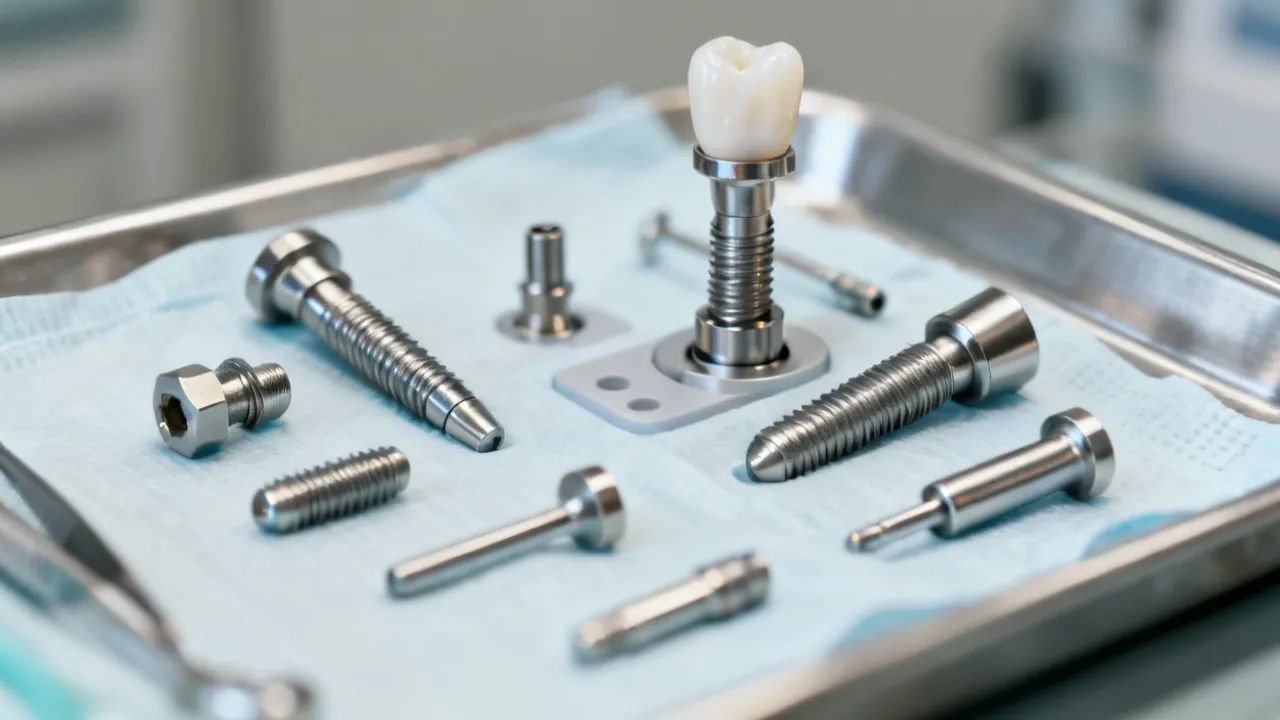
In Korean dental terminology, 인레이 기구 generally refers to the instruments and related equipment used during the planning, preparation, placement, adjustment, and maintenance of dental inlays. In English, the closest broad expression is “dental inlay instruments.” The term may describe conventional hand instruments, rotary burs, impression tools, bonding accessories, occlusal adjustment instruments, and digital equipment that supports the same clinical workflow.
A dental inlay is an indirect restoration fabricated outside the mouth and then bonded or cemented into a prepared cavity. Unlike a direct filling, which is shaped inside the tooth, an inlay is usually produced in a dental laboratory or designed and milled through a chairside digital workflow. It may be manufactured from ceramic, resin-based composite, or metal, depending on clinical requirements, laboratory capabilities, patient considerations, and the dentist’s treatment plan.
From an industry expert’s perspective, the most important point is that an instrument set should be selected according to the entire treatment pathway rather than a single procedure. A sharp bur may prepare enamel efficiently, but it cannot compensate for inadequate diagnosis. A high-quality condenser may assist with temporary material placement, but it does not replace correct isolation or an appropriate adhesive protocol. Instrument quality matters, yet workflow design, maintenance, operator skill, and infection-control compliance have equal practical importance.
The best approach is therefore systematic: define the restoration, identify the required clinical stages, map each stage to the appropriate instrument, and then verify that the instruments can be cleaned, sterilized, stored, and replaced under the clinic’s operating conditions.
What Dental Inlays Require From an Instrument System
Inlay treatment usually involves several linked phases:
- Clinical examination and diagnosis
- Tooth preparation and caries removal
- Moisture control and soft-tissue management
- Intraoral scanning or conventional impression taking
- Provisional protection when required
- Laboratory or digital restoration fabrication
- Try-in, contact evaluation, and occlusal checking
- Bonding or cementation
- Finishing, polishing, and follow-up
Each phase places different demands on instruments. Diagnostic tools must offer visibility and tactile control. Rotary instruments must maintain cutting efficiency without creating unnecessary heat or irregular preparation geometry. Isolation accessories must support a dry and accessible field. Try-in and cementation instruments must permit controlled handling of delicate restorations without excessive force. Finishing systems must be matched to the restorative material, because a polishing system intended for composite may not be suitable for every ceramic surface.
This staged perspective also helps clinics avoid unnecessary duplication. A small general dentistry practice may not need every specialized instrument used by a large restorative center. Conversely, a clinic that performs frequent ceramic inlays may need dedicated diamond systems, polishing kits, digital scanning accessories, and additional inspection tools.
Workflow planning should also account for appointment length and staff responsibilities. In a two-appointment procedure, the instruments used for preparation and impression taking may be arranged separately from those reserved for the insertion visit. In a same-day digital procedure, scanning, design, milling, crystallization, staining, glazing, and polishing equipment may all be connected to one treatment sequence. Clear organization reduces the chance of using an unsuitable instrument or overlooking a critical material-processing step.
Main Categories of 인레이 기구
1. Diagnostic and Examination Instruments
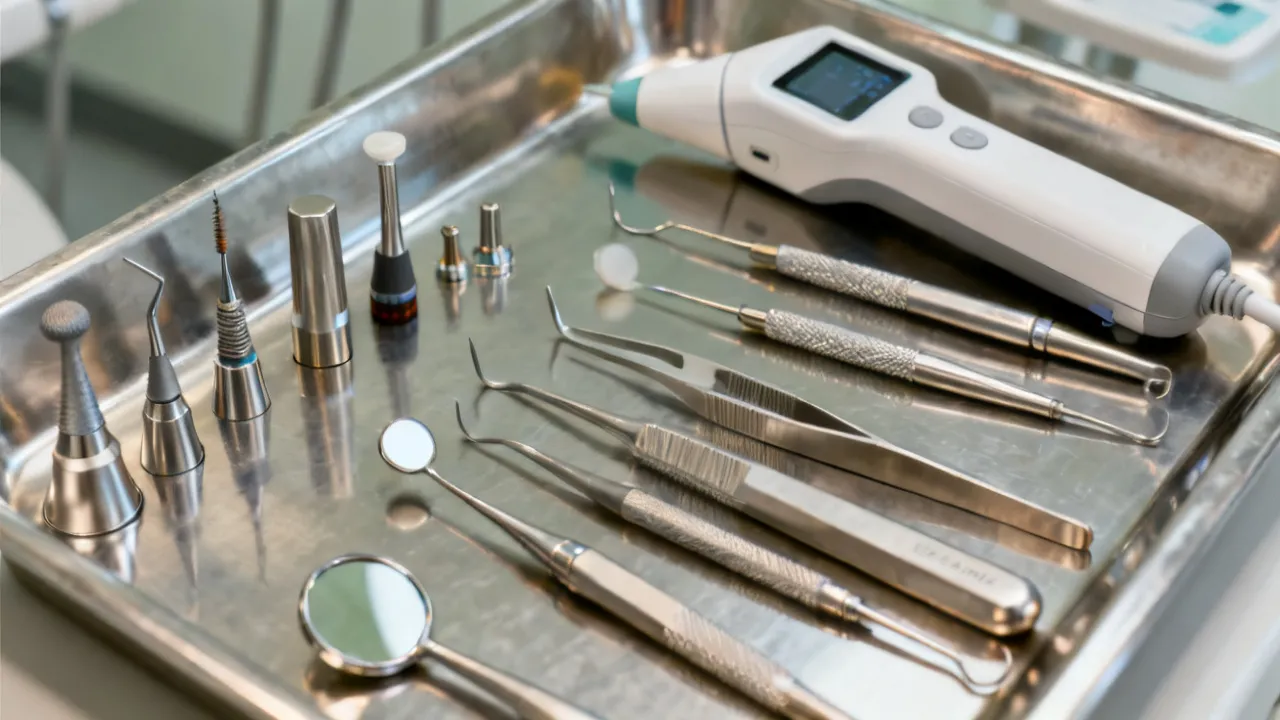
Diagnostic instruments form the starting point of inlay treatment. Common examples include mouth mirrors, explorers or probes, periodontal probes, cotton pliers, and instruments used for evaluating existing restorations. Although these tools are relatively simple, their role is fundamental. The clinician must determine whether the tooth is suitable for an inlay and whether another treatment, such as a direct restoration, onlay, crown, endodontic procedure, or extraction, is more appropriate.
A mouth mirror provides indirect vision, cheek and tongue retraction, and illumination support. A probe can assist with margin inspection, although excessive force should be avoided, particularly around weakened enamel, newly bonded restorations, or sensitive dentin. Cotton pliers are useful for handling cotton rolls, pellets, wedges, and small accessories. A periodontal probe may help assess the relationship between the proposed restoration margin and the surrounding periodontal tissues.
Some clinics also use intraoral cameras, transillumination devices, radiographic systems, and digital charting software. These are not always classified as traditional hand instruments, but they contribute directly to the diagnostic process. Inlay selection should be based on the tooth’s remaining structure, caries activity, pulp status, occlusal forces, periodontal condition, and the patient’s ability to maintain oral hygiene.
Magnification and auxiliary illumination can be particularly useful when the preparation is small, deep, or located in a posterior tooth. Loupes, operating microscopes, and focused light sources may improve visualization of margins and excess cement. However, magnification does not eliminate the need for adequate retraction, suction, and a clean field. It can even make contamination more noticeable, which is beneficial when the clinical team responds appropriately.
2. Rotary Preparation Instruments
Rotary burs are among the most technically significant items in an inlay instrument system. Preparation design depends on the material selected and on the restoration’s planned path of insertion. Common rotary categories include round burs, pear-shaped burs, fissure burs, chamfer or shoulder preparation burs, fine-grit finishing diamonds, and specialized systems supplied by manufacturers for specific restorative materials.
Carbide burs may provide efficient cutting in particular applications, while diamond burs are widely used for enamel shaping, finishing, and preparation refinement. Coarse, medium, fine, and extra-fine grits have different purposes. Coarser instruments generally remove material more rapidly, whereas finer instruments are used to refine surfaces and margins. The appropriate sequence depends on the dentist’s preparation philosophy and the restorative material.
Bur selection should be based on more than shape. Important considerations include concentricity, cutting performance, heat generation, vibration, shank compatibility, visibility, and the ability to maintain preparation geometry. A damaged or worn bur can produce uneven surfaces and force the operator to apply greater pressure. That may increase heat, reduce tactile control, and compromise patient comfort.
Water coolant and appropriate operating speed are also essential. The exact parameters should follow the handpiece and bur manufacturer’s instructions. Excessive pressure, inadequate cooling, or prolonged contact can increase thermal stress. A professional dental team should monitor coolant delivery and confirm that the spray reaches the working area rather than merely appearing at the handpiece outlet.
High-speed and low-speed handpieces serve different purposes. High-speed systems are commonly used for efficient reduction and preparation refinement, while slow-speed contra-angle handpieces may be useful for controlled excavation, finishing, or polishing. Electric handpieces can provide consistent torque and speed control, but they still require correct bur selection and cooling. Air-driven systems may offer a different tactile response. The best choice depends on the procedure and the operator’s training.
3. Caries Removal and Cavity Preparation Instruments
Excavators, spoon excavators, slow-speed round burs, and other selective caries-removal tools may be used during preparation. Their purpose is to remove infected dentin and unsupported tooth structure while preserving sound tissue where clinically appropriate. The correct approach is determined by the diagnosis, caries extent, pulp proximity, and restorative plan.
Hand excavation can provide valuable tactile feedback in deep or confined areas. Rotary excavation can improve efficiency but requires careful control. In both cases, the dentist must avoid treating instrument convenience as a substitute for clinical judgment. The shape of the final preparation should support restoration seating, material thickness, marginal integrity, and conservative preservation of tooth structure.
Margin trimmers, enamel hatchets, and other hand instruments may be used in selected preparation techniques. Their use varies among clinicians and schools of restorative dentistry. Any instrument that contacts the preparation should be sharp, stable, and appropriate for the tissue or material being modified.
The preparation should be evaluated not only for the amount of tooth removed but also for its accessibility. A margin that is technically present but difficult to visualize may complicate scanning, impression making, laboratory fabrication, and cement removal. Instruments that improve access should be used carefully, with attention to preserving the gingiva and avoiding unnecessary extension of the preparation.
4. Isolation and Moisture-Control Accessories
Moisture control is particularly important when an inlay is bonded with an adhesive resin cement or another moisture-sensitive system. Isolation instruments and accessories may include rubber dam frames, clamps, forceps, punches, dental floss, wedges, matrices, saliva ejectors, high-volume evacuation tips, cheek retractors, cotton rolls, and absorbent materials.
Rubber dam isolation can provide a controlled field and reduce contamination from saliva, blood, and sulcular fluid. Clamp selection must consider tooth anatomy, restoration status, gingival condition, and patient comfort. A clamp that is too aggressive may damage soft tissue or destabilize a compromised tooth. A clamp that is insufficiently stable may interfere with the procedure.
Retraction cord, hemostatic materials, and specialized soft-tissue management products may be considered when margins are close to the gingiva. Their use should comply with product instructions and the clinician’s assessment of periodontal risks. Excessive tissue displacement or inappropriate chemical use can cause irritation and complicate bonding.
Isolation should be planned before the procedure rather than improvised after contamination occurs. The assistant can prepare clamps, floss ligatures, wedges, suction tips, and replacement absorbent materials in advance. Patient communication is also important. Explaining the purpose of the rubber dam or retraction device can improve cooperation and reduce anxiety, especially during longer adhesive procedures.
5. Impression and Digital Workflow Equipment
Conventional inlay workflows may require impression trays, elastomeric impression materials, mixing tools, syringes, bite-registration materials, and shade-selection accessories. The tray must be rigid enough to maintain dimensional stability, and the impression material must be used within the manufacturer’s working and setting times.
The impression syringe or intraoral delivery tip should be capable of placing material around the preparation without introducing air bubbles. Mixing technique, temperature, humidity, and timing can affect the result. After removal, the impression should be rinsed and disinfected according to the material manufacturer’s instructions, then inspected promptly. If the margin is missing, distorted, or obscured, repeating the impression may be more efficient than sending an unreliable record to the laboratory.
Digital workflows use an intraoral scanner, scanning tips, software, and a compatible laboratory or milling system. Digital scanning can reduce the need for conventional impression materials, but it does not eliminate the need for clinical accuracy. The tooth must still be clean, dry, visible, and properly prepared. Blood, saliva, reflective surfaces, subgingival margins, and inadequate retraction can affect scan quality.
From an operational perspective, digital equipment introduces additional requirements. Clinics must maintain software compatibility, scanner calibration, data security, staff training, and a reliable method for transmitting files to the laboratory. A scanner should not be selected solely because of its image quality claims. The practice should also evaluate scanning speed, ergonomics, maintenance, service support, export options, and integration with existing systems.
Scanning strategy influences the quality of the digital record. The operator normally needs sufficient data from the prepared tooth, neighboring teeth, opposing arch, and occlusal relationship. The software may display holes, stitching errors, or areas of inadequate data. These should be corrected before the patient leaves, because a laboratory cannot reliably design a restoration from missing or distorted information.
6. Try-In and Cementation Instruments
During try-in, the restoration may be evaluated for seating, proximal contacts, marginal adaptation, color, and occlusion. Useful instruments and accessories can include fine probes, floss, articulating paper holders, occlusal marking film, restoration try-in pastes, microbrushes, mixing pads, cement spatulas, applicator tips, suction, and light-curing equipment.
A restoration should be handled carefully because ceramic and other indirect materials may be brittle before final bonding. Excessive force with a probe or scaler can chip a margin. The dentist should use a controlled seating motion and avoid forcing a restoration that does not seat. If a restoration fails to seat, the cause may be an interfering contact, debris, inadequate preparation, an inaccurate impression or scan, fabrication error, or material distortion.
Cementation instruments should support clean, measured, and repeatable delivery. Mixing components must be compatible with the selected cement. Light-curing devices should be checked for output according to the clinic’s quality-control policy, and curing must account for restoration thickness, material opacity, and the cement’s instructions.
Try-in pastes may assist with shade evaluation, particularly when the definitive restoration is thin or translucent. The paste should be removed completely before bonding. Cotton pellets, microbrushes, air-water syringes, and appropriate cleaning products can support this stage, but the preparation should not be contaminated after final conditioning.
7. Finishing and Polishing Instruments
Finishing begins after the restoration is secured and excess cement has been removed. Instruments may include fine diamonds, carbide finishing burs, abrasive discs, rubber points, polishing wheels, interproximal finishing strips, scalers, and specialized ceramic or composite polishing systems.
The choice should follow the restorative material. Ceramic, hybrid ceramic, and resin-based composite surfaces have different hardness, fracture behavior, and polishing requirements. Using an unsuitable abrasive may create scratches, alter anatomy, generate heat, or reduce surface luster. Finishing should preserve the margin and reproduce a smooth, hygienic contour rather than simply remove visible excess.
Interproximal finishing requires particular care. A strip that is too thick may open the contact or damage the gingiva. A strip that is too aggressive may remove restorative material unnecessarily. Dental floss can assist with contact verification, but floss resistance should be interpreted together with clinical inspection and patient anatomy.
Polishing should generally proceed from a suitable adjustment instrument to progressively finer abrasives. The operator should avoid excessive pressure and use intermittent contact when appropriate to control heat. Once the surface has been adjusted, polishing is not merely cosmetic. A smooth surface can improve comfort, reduce plaque-retentive irregularities, and help maintain the appearance of the restoration.
Comparison of Common Inlay Instrument Groups
| Instrument group | Primary purpose | Typical clinical considerations | Maintenance focus |
|---|---|---|---|
| Diagnostic hand instruments | Examination, visualization, and tactile assessment | Mirror clarity, probe control, ergonomic handles, appropriate tip design | Cleaning, inspection for corrosion, sterilization, and organized storage |
| Rotary burs | Tooth preparation, refinement, and finishing | Bur geometry, grit, shank type, handpiece compatibility, coolant delivery | Single-use or reuse policy, cleaning, cutting efficiency, and wear inspection |
| Excavation instruments | Removal of carious or unsupported tooth structure | Tactile sensitivity, access, blade sharpness, and tissue preservation | Sharpness, surface integrity, and sterilization compatibility |
| Isolation accessories | Moisture and soft-tissue control | Patient comfort, stability, visibility, and compatibility with adhesive procedures | Disposable-item control, clamp inspection, and equipment cleaning |
| Impression instruments | Capture of tooth anatomy and occlusal relationships | Tray rigidity, working time, material handling, and dimensional stability | Disinfection procedures and prevention of cross-contamination |
| Digital scanning equipment | Electronic capture of preparation and surrounding structures | Scanning strategy, field control, software, calibration, and data management | Tip processing, device disinfection, software updates, and service records |
| Cementation accessories | Bonding, seating, excess removal, and curing | Material compatibility, controlled delivery, curing access, and timing | Expiry checks, light output verification, and proper storage |
| Finishing and polishing systems | Refinement of margins, contacts, anatomy, and surface texture | Material-specific abrasives, heat control, and conservative adjustment | Wear inspection, cleaning, segregation by material, and replacement |
How Material Selection Influences 인레이 기구
The restoration material influences the instruments used at nearly every stage. Metal inlays may require different adjustment and polishing tools from ceramic or resin-based restorations. Ceramic materials can be sensitive to excessive pressure and abrupt changes in thickness. Resin-based materials may be easier to adjust but can respond differently to heat and abrasive systems.
The first question is not simply which instrument is strongest. The relevant question is whether the instrument can modify the restoration predictably while preserving marginal integrity and surface quality. Manufacturers commonly publish guidance for bur selection, speed, coolant, polishing sequence, and finishing pressure. These instructions should be treated as an important technical reference, although they do not replace the dentist’s professional judgment.
Material compatibility also applies to bonding accessories. Some primers, silanes, etchants, and resin cements are designed for particular classes of restorative materials. The clinic should maintain clear labeling and avoid transferring protocols from one material to another without verification. Confusion can arise when a product is described as suitable for several materials but requires different surface treatments for each one.
In a well-managed practice, instruments are arranged by workflow and material. For example, ceramic adjustment burs should not be mixed indiscriminately with general-purpose composite finishing tools. Separate storage can reduce selection errors and help staff identify when a kit requires replenishment.
The material also influences laboratory communication. A laboratory technician may need information about the preparation design, occlusal requirements, shade, translucency, cement space, and surface treatment. If the clinic changes material systems, the dentist and laboratory should confirm whether the existing burs, polishing tools, primers, and cementation accessories remain appropriate.
Clinical Workflow: Step-by-Step Use of Dental Inlay Instruments
Step 1: Confirm the Treatment Plan
Before selecting instruments, confirm the diagnosis and the indication for an inlay. Evaluate the extent of tooth damage, remaining cuspal structure, occlusal load, proximal contacts, periodontal condition, pulp status, and the patient’s oral hygiene. Radiographs or other diagnostic records may be indicated according to the clinical situation.
The treatment plan should identify the proposed restorative material, the anticipated margin location, the impression or scanning method, and the cementation strategy. This decision determines which burs, isolation tools, scanners, impression products, and finishing systems are needed.
Step 2: Prepare and Verify the Instrument Set
Before beginning, inspect the dental chair, handpiece, light, suction, curing unit, isolation materials, and instrument tray. Check that sterile instruments are packaged correctly and that disposable accessories are within their use period. Confirm that the rotary instruments match the handpiece and that coolant is functioning.
Organizing instruments in procedural order reduces interruptions. A practical sequence may begin with diagnostic instruments, followed by isolation tools, preparation burs, impression or scanning equipment, provisional materials, try-in accessories, cementation supplies, and finishing instruments. The exact layout depends on the clinic’s workflow and the operator’s preference.
Step 3: Establish Isolation
Use the selected isolation method before adhesive-sensitive steps. Rubber dam isolation, high-volume evacuation, retraction, cotton isolation, or a combination of methods may be appropriate. The goal is a stable field with adequate visibility and patient comfort.
Isolation should be assessed continuously. A field that was dry at the start may become contaminated during preparation, rinsing, try-in, or cement removal. If contamination occurs during a bonding step, the dentist should follow the adhesive system’s instructions rather than relying on an improvised correction.
Step 4: Prepare the Tooth Conservatively
Use the selected rotary and hand instruments to remove defective material and create a preparation suitable for the planned inlay. Maintain controlled pressure and adequate water cooling. Avoid unnecessary removal of sound structure, while ensuring that unsupported enamel and carious tissue are addressed according to the clinical plan.
Preparation margins should be visible, smooth, and accessible for scanning, impression taking, laboratory fabrication, and cement removal. Sharp internal features or irregular surfaces may complicate seating and stress distribution. Preparation design must follow the requirements of the chosen restorative material and the dentist’s training.
Step 5: Capture the Preparation
For a conventional impression, select a suitable tray and manage material working time carefully. Syringe material around the preparation where indicated, seat the tray in a controlled manner, and allow the material to set without movement. Inspect the impression for voids, pulls, tears, incomplete margins, and distortion.
For digital scanning, retract soft tissues, control moisture, and follow a consistent scanning path. Review the preparation margin, adjacent teeth, occlusal surfaces, and bite record before ending the appointment. A scan that appears complete may still contain insufficient data at the margin or contact area.
Step 6: Protect the Tooth When Necessary
If the definitive inlay will not be placed during the same appointment, a provisional restoration may be required. Instruments may include a matrix, provisional material applicator, carving tool, finishing bur, and cement-removal accessories. The provisional should protect the prepared tooth, maintain acceptable contacts, and avoid irritating the gingiva.
Temporary cement selection should be coordinated with the later bonding plan. Some provisional materials or cements may affect subsequent adhesion if residues are not thoroughly removed. The dentist should follow the relevant product instructions and establish a predictable cleaning method.
Step 7: Inspect the Restoration at Try-In
Before cementation, inspect the restoration and preparation under good lighting and magnification when available. Check seating, proximal contacts, margin continuity, shade, anatomy, and occlusion. Remove debris from the preparation without damaging the tooth or surrounding tissue.
If the inlay does not seat completely, do not use force as a routine solution. Identify the interference systematically. A small adjustment may be appropriate, but extensive modification may indicate a fabrication or preparation issue that requires further assessment.
Step 8: Apply the Bonding or Cementation Protocol
Prepare the internal surface of the inlay and the tooth surface according to the selected material and cement system. This may involve etching, rinsing, drying, priming, silane application, adhesive placement, or another manufacturer-specified sequence. Not every material uses the same protocol.
Use clean applicators and accurately timed steps. Cement should be delivered in a controlled quantity to reduce excess while maintaining complete coverage. Seat the restoration along the intended path and stabilize it during initial setting or light activation as required.
Step 9: Remove Excess and Refine the Result
Remove excess cement at the appropriate stage. Instruments may include microbrushes, dental floss, scalers, probes, finishing burs, and polishing systems. Excess material left at the margin or interproximally can irritate the gingiva and complicate oral hygiene.
Check occlusion with suitable marking paper or film. Adjust conservatively and polish the adjusted surface. The final surface should be smooth enough to support hygiene and comfortable function. The patient should receive instructions concerning sensitivity, hygiene, and when to contact the clinic.
Instrument Selection Criteria for Dental Clinics
Clinical Compatibility
The first criterion is whether the instrument supports the intended procedure. A bur designed for rough reduction is not necessarily appropriate for margin finishing. An impression accessory designed for one material may not work correctly with another. Product descriptions should be reviewed alongside technical instructions.
Ergonomics
Handle diameter, weight, balance, surface texture, and angle influence operator comfort and control. Dental procedures involve repeated fine movements, so ergonomic design can affect fatigue and precision. Instruments should fit the clinician’s grip and permit stable tactile feedback without excessive force.
Durability and Reprocessing
Reusable instruments should tolerate the clinic’s validated cleaning, packaging, and sterilization processes. The Centers for Disease Control and Prevention recommends that dental instruments be cleaned and sterilized according to their classification and intended use, with manufacturer instructions incorporated into the practice protocol. The exact process depends on whether an item is critical, semicritical, or noncritical and on the device’s design.
Not all instruments should be reprocessed in the same way. Some burs or accessories may be labeled for single use, while others may be reusable. A clinic must not assume that a product is suitable for repeated use simply because it appears intact.
Traceability
Traceability is valuable when instruments are expensive, specialized, or used in material-sensitive workflows. A practice can record purchase dates, lot information where applicable, sterilization cycles, maintenance actions, and replacement decisions. Such records support quality management and help identify recurring problems.
Supplier and Service Support
When comparing suppliers, examine product documentation, warranty terms, technical support, delivery consistency, replacement availability, and training resources. The lowest initial purchase price may not represent the lowest total cost if the instruments wear quickly, require frequent replacement, or are difficult to reprocess.
For digital equipment, service support is especially important. A scanner or milling-related device can affect scheduling if it becomes unavailable. Clinics should ask about calibration, software updates, repair response, data export, and staff onboarding before purchase.
Cleaning, Sterilization, and Storage Requirements
Infection prevention is not an accessory to inlay treatment; it is part of the instrument system. Instruments that enter the oral cavity must be handled according to the clinic’s infection-control policy and applicable regulations. The workflow should separate contaminated instruments from clean supplies and prevent exposure during transport.
Cleaning is necessary because organic debris can protect microorganisms and interfere with sterilization. Manual cleaning may involve brushing under water or using an approved ultrasonic cleaner, while automated washer-disinfectors may be available in larger facilities. Staff should use appropriate personal protective equipment and follow equipment instructions.
After cleaning, instruments should be inspected for debris, corrosion, cracks, loosened components, and functional defects. Hinged instruments may require attention at the joint. Burs should be checked for wear and damage. Instruments that cannot be adequately cleaned should be removed from service.
Packaging and sterilization must be performed using validated equipment and procedures. Steam sterilization is widely used for compatible dental instruments, but the specific cycle, loading method, packaging, and monitoring process must follow the sterilizer and instrument manufacturer’s instructions. Chemical indicators and biological monitoring should be incorporated according to applicable professional and regulatory guidance.
Storage should protect sterile packs from moisture, dust, crushing, and unnecessary handling. Sterile packages with compromised seals or visible contamination should be reprocessed. A first-in, first-out approach can help manage packaged items and reduce avoidable waste.
Digital scanner tips and accessories require separate attention. The scanner body may not be immersible or autoclavable, while removable tips may require heat sterilization or another validated process. The practice should distinguish between the reusable device, removable patient-contact components, protective barriers, and disinfectant-compatible surfaces. Using an unsuitable chemical can damage optical windows or reduce scanning accuracy.
Common Errors in Using 인레이 기구
Using a Worn Bur Beyond Its Useful Life
A worn bur may cut slowly and encourage excessive pressure. It may also create an irregular surface or produce more heat. Clinics should establish criteria for replacement based on visible damage, cutting performance, manufacturer guidance, and the type of material being prepared.
Mixing Material-Specific Instruments
Using the same polishing system for different restorative materials without verification can lead to inconsistent results. Separate kits, clear labels, and staff training reduce this risk.
Ignoring Moisture Control
Bonding procedures can be sensitive to contamination. Isolation is not merely a preliminary step; it must be maintained during the stages where the adhesive interface is created. If visibility or dryness cannot be maintained, the operator should reassess the method.
Forcing an Inlay Into Place
Force can damage a restoration, preparation, or surrounding tooth structure. Seating problems should be investigated in a controlled sequence. Debris, proximal contact interference, internal surface contamination, and manufacturing discrepancies are among the possible causes.
Overadjusting Occlusion
Occlusal adjustment should be conservative and based on a complete assessment of the patient’s bite. Removing excessive restorative material can alter anatomy, reduce thickness, and compromise the restoration’s intended function.
Failing to Inspect Instruments Before Use
A sterile instrument may still be unsuitable if it is bent, cracked, corroded, dull, or poorly assembled. Inspection should occur after reprocessing and again before clinical use.
Neglecting the Light-Curing Unit
When a resin cement is used, insufficient light output or poor positioning of the curing tip can affect polymerization. The unit should be maintained and tested according to the clinic’s quality-control procedure. The operator should consider restoration thickness, opacity, access, and the curing characteristics of the cement.
Allowing Excess Cement to Remain Interproximally
Excess cement may be difficult to see, particularly around posterior contacts or subgingival margins. A combination of floss, microbrushes, visual inspection, and appropriate hand instruments can help remove it before final polishing. The contact should be checked again after cement removal to ensure that floss passes without shredding or excessive force.
Quality Assurance and Workflow Management
A reliable inlay workflow depends on repeatable systems. The clinic can create procedure-specific checklists covering diagnosis, isolation, preparation, scan or impression quality, restoration inspection, cementation, finishing, and patient instructions. Checklists are not intended to replace clinical judgment; they help prevent avoidable omissions during busy sessions.
Staff meetings can review recurring issues such as incomplete impressions, scanner artifacts, excess cement, bur shortages, or delayed laboratory communication. These discussions should focus on process improvement rather than assigning blame. If the same problem appears repeatedly, the root cause may involve instrument layout, training, product compatibility, scheduling pressure, or unclear responsibility.
Performance indicators should be selected carefully. Useful internal measures may include remakes, restoration seating adjustments, instrument-related delays, reprocessing failures, and patient-reported discomfort. Any statistical comparison should define the observation period and avoid conclusions that exceed the available evidence. National or international performance figures should be taken from recognized sources such as government health agencies, professional organizations, or peer-reviewed research.
Quality assurance should also include periodic review of the laboratory interface. The clinic can assess whether preparation photographs, shade information, digital files, bite records, and written instructions are consistently transmitted. A technically excellent instrument system cannot overcome incomplete communication between the dental office and laboratory.
Training Requirements for Dental Teams
Clinicians should understand the intended use and limitations of each instrument. Dental assistants and hygienists who prepare trays or manage reprocessing require specific instruction in identification, cleaning, packaging, storage, and documentation. Training should include practical demonstrations and periodic competency checks.
Digital workflows require additional skills. Team members should know how to prepare the scanner, process scanning tips, recognize missing data, manage patient records, and communicate files securely. They should also understand that a digital file cannot repair a poorly exposed margin or a contaminated field.
Continuing education may be useful when a clinic introduces a new ceramic system, adhesive cement, scanner, or polishing protocol. Training should be based on manufacturer documentation, recognized dental education, and the scope of local professional requirements.
Training should include emergency and troubleshooting procedures. Staff should know what to do if the handpiece loses coolant, the scanner stops recording, the curing light fails, a restoration is dropped, or a sterile pack becomes compromised. A written backup plan can prevent rushed decisions and reduce appointment disruption.
Cost and Procurement Considerations
The price of 인레이 기구 varies widely according to instrument type, material, manufacturing method, brand, reusability, digital integration, and service support. A basic set of diagnostic hand instruments usually involves a different investment from a complete digital restorative workflow with a scanner, software subscription, specialized burs, curing equipment, and laboratory connectivity.
Procurement decisions should consider total cost of ownership rather than purchase price alone. Relevant factors include:
- Initial equipment and instrument cost
- Replacement frequency
- Reprocessing supplies and staff time
- Maintenance and calibration
- Training and implementation
- Consumable compatibility
- Warranty and technical support
- Downtime and scheduling impact
- Laboratory or software charges
Clinics should request clear product specifications and confirm regulatory status where applicable. Avoid purchasing instruments solely because of unsupported claims about superior outcomes, permanent durability, or universal compatibility. Evidence should be considered together with the clinician’s experience, the practice’s case mix, and the manufacturer’s instructions.
Inventory planning is another practical consideration. Frequently used burs, microbrushes, wedges, impression tips, cement applicators, and polishing points should have defined minimum stock levels. Rarely used products should be monitored for expiration and storage conditions. A purchasing system that records consumption can help the practice identify which products are genuinely necessary.
How to Build a Practical Inlay Instrument Set
A small clinic can build its set in stages. Begin with core diagnostic instruments, appropriate handpieces, commonly used preparation burs, reliable isolation equipment, and a validated finishing system. Add material-specific accessories as the number of inlay cases increases.
A moderate-volume restorative clinic may benefit from separate trays for preparation, scanning or impression taking, try-in, cementation, and finishing. This arrangement reduces the risk that a needed accessory is overlooked. It also makes inventory review easier.
A clinic using chairside digital dentistry should establish a dedicated digital maintenance plan. The scanner tip, computer, display, software, calibration process, and file-transfer system should be included in routine checks. Backup procedures are advisable for equipment malfunction or connectivity problems.
Each tray can contain a core group of instruments plus a clearly identified supplementary compartment. For example, a preparation tray may include examination tools, isolation aids, excavation instruments, and the standard bur sequence. A cementation tray may include try-in supplies, bonding accessories, floss, excess-cement instruments, articulating materials, and polishing tools. This reduces cognitive load during treatment.
Conditions and Requirements Before Treatment
Before using dental inlay instruments, the following conditions should be satisfied:
- The patient has received an appropriate clinical assessment and treatment explanation.
- The tooth is considered suitable for an inlay under the dentist’s professional judgment.
- The selected restorative material and cementation system are compatible.
- The preparation design is appropriate for the intended restoration.
- Required instruments have been cleaned, sterilized, inspected, and organized.
- Rotary equipment, coolant, suction, lighting, and curing equipment are functioning.
- Isolation and moisture-control materials are available.
- Impression or scanning equipment has been prepared and verified.
- Staff understand their roles in the procedure and reprocessing workflow.
- Patient records, laboratory instructions, and material details are documented.
These requirements are general operational considerations, not a substitute for local regulations, clinical training, or product-specific instructions. Dental professionals should apply the standards of their jurisdiction and the policies of their institution.
Expert Perspective on Selecting 인레이 기구
An expert approach begins with risk control. The instrument should help the operator see, access, prepare, seat, and finish the restoration without introducing unnecessary variables. Products that are difficult to identify, difficult to clean, or poorly supported may create more risk than their apparent convenience justifies.
Instrument design should also be judged in the context of patient care. A tool that reduces vibration may improve operator control, but the clinical benefit depends on correct speed, pressure, coolant, and technique. A digital scanner may improve data transfer in a suitable workflow, but a conventional impression may remain practical in some settings. There is no universal instrument package for every clinic.
Consistency is often more valuable than excessive variety. A carefully selected, well-maintained set that the team understands may produce a more dependable workflow than a large collection of unfamiliar tools. Standardization also supports training, inventory control, and quality review.
Experts also evaluate instruments according to failure prevention. A bur with clear color coding can reduce selection mistakes. A cement delivery system with predictable extrusion can reduce waste and excess. A scanner with visible data-quality indicators can prompt correction before the appointment ends. Small design features may have meaningful operational value when they are used consistently.
FAQs About Dental Inlay Instruments
What does 인레이 기구 mean?
인레이 기구 is a Korean term that can be translated broadly as dental inlay instruments or equipment. It may include diagnostic tools, preparation burs, excavation instruments, isolation accessories, impression or scanning equipment, cementation supplies, and finishing systems used during indirect inlay treatment.
Are inlay instruments different from ordinary restorative instruments?
Some instruments are common to many restorative procedures, such as mirrors, probes, handpieces, and isolation accessories. Other tools are selected specifically for indirect restorations, including material-specific preparation burs, try-in accessories, ceramic polishing systems, digital scanning equipment, and cementation instruments.
Which burs are used for inlay preparation?
The selection depends on preparation design, tooth anatomy, restorative material, and the dentist’s technique. Diamond and carbide burs may both be used in different stages. Coarse burs can support reduction, while finer burs are generally used for preparation refinement and margin finishing. Manufacturer instructions and professional training should guide the final selection.
Can the same polishing kit be used for ceramic and composite inlays?
Not automatically. Polishing systems are often designed around the hardness and surface behavior of specific materials. The product documentation should be checked before using a kit across different restorative materials. Separate, clearly labeled systems may reduce errors.
How important is cooling when using rotary instruments?
Cooling is important because friction and pressure can generate heat. The appropriate coolant volume, speed, and technique depend on the handpiece, bur, and procedure. The operator should follow manufacturer guidance and maintain adequate visibility while preventing overheating.
Are digital scanners considered 인레이 기구?
In a broad clinical sense, yes. Although a scanner is not a hand instrument, it supports the inlay workflow by capturing the preparation, adjacent teeth, and occlusal relationship. Its effectiveness depends on field control, scanning technique, software, maintenance, and accurate data review.
How should reusable inlay instruments be sterilized?
Reusable instruments should be cleaned, inspected, packaged, sterilized, and stored according to the instrument and sterilizer manufacturers’ instructions and the clinic’s infection-control policy. The process also depends on the item’s classification and intended use. Instruments that cannot be safely or effectively reprocessed should not be reused.
When should a dental bur be replaced?
Replacement may be necessary when the bur shows visible damage, reduced cutting efficiency, corrosion, deformation, or contamination that cannot be removed. The decision should consider the manufacturer’s reuse guidance, the bur’s intended purpose, and the clinical consequences of reduced performance.
What should be checked if an inlay does not seat?
The dentist should assess preparation debris, proximal contacts, internal interferences, margin design, restoration distortion, impression or scan accuracy, and laboratory fabrication. The restoration should not be forced into place. A controlled diagnostic sequence is safer than aggressive adjustment.
Does expensive equipment guarantee better inlay outcomes?
No. Equipment quality can support precision and efficiency, but outcomes also depend on diagnosis, preparation design, isolation, material selection, bonding technique, laboratory communication, maintenance, and operator training. Purchase decisions should be based on documented performance, compatibility, support, and the clinic’s actual needs.
How can a clinic reduce instrument-related delays?
Use procedure-specific trays, maintain par levels for commonly used burs and accessories, inspect instruments before appointments, document replacement schedules, and assign clear responsibility for reprocessing and inventory. Periodic workflow reviews can identify recurring shortages or equipment problems.
Is a conventional impression still appropriate for inlays?
Conventional impressions remain a recognized option when performed correctly with suitable materials, trays, moisture control, and inspection. Digital scanning is another option. The appropriate method depends on the preparation, margin visibility, clinician training, laboratory workflow, patient factors, and available equipment.
What is the most important instrument in an inlay procedure?
There is no single most important instrument. The diagnostic instruments, preparation burs, isolation accessories, impression or scanning system, bonding tools, and finishing devices work together. A weakness in one stage can affect the entire restoration, so the complete workflow deserves attention.
Sources and Professional Reference Framework
The clinical and infection-control principles discussed here should be interpreted alongside current guidance from recognized authorities. Useful reference frameworks include the Centers for Disease Control and Prevention’s dental infection-prevention recommendations, relevant United States Food and Drug Administration device information, International Organization for Standardization standards concerning dental instruments and medical-device processing, and professional guidance published by national dental associations. Peer-reviewed restorative dentistry literature and the instructions for use supplied with each instrument or material should also be consulted.
Because product specifications, regulations, and bonding protocols can change, dental practices should verify current documentation before implementing a new instrument system. Local legal requirements may differ, particularly regarding sterilization records, single-use devices, clinical waste, radiographic equipment, digital patient data, and medical-device procurement.
Training materials should be updated when a manufacturer changes a product formulation, introduces a new instrument geometry, revises a sterilization recommendation, or updates software. Keeping an archived copy of relevant instructions can assist with staff education and quality audits, although the current manufacturer documentation should always be confirmed before clinical use.
Conclusion
인레이 기구 encompasses a complete set of clinical tools and technologies that support indirect restorative dentistry. The category extends from simple examination instruments to precision burs, isolation systems, impression materials, intraoral scanners, cementation accessories, and material-specific polishing devices.
The most reliable selection strategy is workflow-based. Begin with the diagnosis and restorative material, identify the clinical stages, choose compatible instruments, and confirm that the entire set can be maintained under the clinic’s infection-control and quality-assurance procedures. Pay attention to ergonomics, durability, supplier support, documentation, and total cost of ownership.
The practical value of a well-designed instrument system is seen in small, repeatable improvements: clearer visibility, more stable isolation, smoother preparation, fewer impression or scanning errors, easier restoration seating, cleaner cement removal, and more predictable finishing. These improvements can support both clinical efficiency and patient experience.
Ultimately, dental inlay instruments are enabling tools rather than independent determinants of treatment success. When matched with sound diagnosis, conservative preparation, effective isolation, accurate data capture, appropriate bonding, careful finishing, and consistent maintenance, they help create a more controlled and predictable restorative process.