Understanding Dental Inlay Instruments
This guide explains how 인레이 기구, or dental inlay instruments, support the preparation, fitting, adjustment, and placement of indirect restorations. Inlay procedures require more than a single tool: clinicians typically combine examination instruments, cavity-preparation burs, isolation equipment, impression or scanning systems, cementation tools, and finishing devices. Selection depends on the restorative material, tooth anatomy, adhesive protocol, ergonomics, infection-control requirements, and the clinician’s training. The article outlines instrument categories, workflow, safety, maintenance, procurement considerations, and common questions from a clinical perspective.
What 인레이 기구 Means in Modern Dentistry
인레이 기구 refers to the instruments, accessories, and supporting equipment used during dental inlay treatment. In English, the term is commonly translated as dental inlay instruments or inlay procedure instruments. These tools help the dental team examine a tooth, establish isolation, prepare the cavity, record its shape, evaluate the indirect restoration, cement or bond it, remove excess material, and refine the final occlusion.
An inlay is an indirect restoration designed to fit within the cusps of a posterior tooth. It is different from a direct filling because it is fabricated outside the mouth, either in a dental laboratory or through a digital chairside workflow. The restoration may be manufactured from ceramic, composite resin, hybrid ceramic, gold alloy, or another restorative material. Since the restoration is created separately from the tooth, every stage must be coordinated carefully. A small error during preparation, scanning, impression taking, try-in, cementation, or occlusal adjustment can affect the final result.
The most important point for clinicians, dental assistants, and purchasers is that an inlay instrument set is not a single standardized kit. The required instruments vary according to the restoration material, the preparation design, the location of the tooth, the condition of the surrounding tissues, and the cementation method. A practice using conventional impressions will require a different supporting setup from one using an intraoral scanner. Similarly, an adhesive resin-cement protocol may require different applicators and surface-treatment accessories from a self-adhesive cement protocol.
From an industry expert’s perspective, the best instrument selection is not based on the largest number of items. It is based on whether each instrument supports a specific clinical decision, maintains visibility, protects the tooth and restoration, permits reliable moisture control, and allows the operator to verify the result. A compact, well-organized system may be more useful than an extensive tray containing instruments that are rarely used or are not compatible with the chosen materials.
Why Instrument Selection Influences Inlay Outcomes
Instrument choice affects nearly every stage of inlay treatment. A suitable bur may create a preparation with appropriate internal geometry, adequate clearance, and smooth, identifiable margins. An unsuitable or worn bur can create excessive taper, roughness, unsupported enamel, excessive removal of sound tooth structure, or heat that may be uncomfortable for the patient. A reliable isolation system can protect the prepared tooth from contamination, while a poorly selected clamp or retraction accessory may make the procedure uncomfortable and fail to control moisture.
Try-in and cementation instruments are equally important. Restoration tweezers must provide a secure grip without damaging a fragile ceramic margin. Microbrushes must be small and flexible enough to apply primers or adhesives evenly. Floss and finishing instruments must remove excess cement without opening the proximal contact or scratching the restoration. Occlusal marking materials help the clinician identify high points, but the final decision must be based on clinical interpretation rather than on the size of a single articulating-paper mark.
Instrument selection also influences efficiency. A dental assistant who understands the procedure can pass the appropriate item at the correct time, reducing interruptions and keeping the sequence organized. A procedure-specific tray prevents the operator from searching through unrelated instruments. Digital workflows may reduce the need for impression trays and mixing spatulas, but they increase the importance of scanner maintenance, retraction, air control, and virtual-model inspection.
Patient safety must remain central. Every reusable instrument must be processed according to the manufacturer’s instructions and the practice’s infection-prevention policy. Single-use products must not be reused. Rotary instruments require special attention because their cutting flutes, grooves, and internal surfaces can retain debris. The selection process should therefore consider cleaning, sterilization, inspection, packaging, storage, replacement, and staff training in addition to clinical performance.
Core Categories of Dental Inlay Instruments
The following categories provide a practical framework for understanding 인레이 기구. Some items directly contact the tooth or restoration, while others support visualization, isolation, recording, handling, or quality control.
| Instrument category | Typical examples | Primary purpose |
|---|---|---|
| Examination instruments | Mouth mirror, explorer, periodontal probe, cotton pliers | Diagnosis, visualization, measurement, and manipulation of small materials |
| Isolation equipment | Rubber dam, clamp, frame, floss, suction tips, retraction accessories | Moisture control, soft-tissue protection, and improved visibility |
| Rotary preparation instruments | Diamond burs, carbide burs, finishing burs, polishing points | Preparing tooth structure and refining cavity walls and margins |
| Hand instruments | Excavators, chisels, hatchets, margin trimmers, condensers | Removing unsupported material, refining surfaces, and handling restorative materials |
| Impression and scanning equipment | Impression trays, mixing accessories, intraoral scanners, scan tips | Recording the preparation and surrounding anatomy |
| Try-in instruments | Restoration tweezers, probe, seating instrument, articulating paper | Checking fit, contacts, marginal adaptation, and occlusion |
| Cementation instruments | Automix dispensers, mixing pads, microbrushes, brushes, applicators | Applying cement, primer, adhesive, and conditioning materials |
| Finishing and polishing instruments | Fine diamonds, polishing discs, points, strips, occlusal adjustment burs | Refining margins, contacts, surface texture, and occlusion |
| Maintenance and processing equipment | Bur blocks, ultrasonic cleaners, sterilization pouches, inspection lighting | Cleaning, sterilization, organization, and quality control |
Examination and Diagnostic Instruments
The procedure begins before the tooth is prepared. A mouth mirror provides indirect vision, retracts the cheek or tongue, and helps illuminate areas that are difficult to view directly. An explorer may assist with examining existing restoration margins, surface anatomy, and areas of suspected breakdown. A periodontal probe can be used to evaluate the surrounding tissues, measure sulcus depth where relevant, and determine whether the proposed restoration is appropriate for the clinical environment.
Cotton pliers, also called college tweezers, are used to carry cotton pellets, articulating paper, retraction materials, wedges, and other small accessories. Their tips should meet accurately without excessive force. Poorly aligned tweezers can make small-item handling difficult and increase the risk of dropping a component into the oral cavity. Tips should be inspected regularly for deformation and cleaned carefully after use.
Diagnostic instruments should be used with a conservative philosophy. The objective is to assess the tooth accurately without causing unnecessary mechanical disruption. Excessive probing pressure can damage a fragile surface, disturb a provisional restoration, or irritate the gingival tissues. A trained clinician interprets the findings alongside radiographs, pulp testing, periodontal assessment, occlusal analysis, and the patient’s symptoms.
Magnification systems, such as dental loupes or an operating microscope, are not usually classified as hand instruments, but they have a close relationship with 인레이 기구. Clear visualization allows the operator to inspect preparation walls, margins, internal angles, cement remnants, and surface defects. Magnification should be combined with suitable illumination because magnification by itself cannot compensate for poor lighting or an obstructed field.
Isolation and Moisture-Control Equipment
Moisture control is one of the most consequential parts of adhesive inlay treatment. Saliva, blood, sulcular fluid, and uncontrolled moisture can interfere with bonding procedures and contaminate prepared surfaces. A rubber dam system may include a dam sheet, frame, clamp, clamp forceps, punch, template, dental floss, wedging accessories, and stabilizing materials.
Rubber dam clamps must be selected according to tooth anatomy, eruption level, cervical contour, and periodontal condition. The clamp should be stable without causing avoidable trauma. Floss ligatures can provide an additional safety measure and help the team retrieve a clamp if it becomes displaced. The choice between rubber dam isolation and other retraction methods depends on the tooth, margin position, restorative material, adhesive protocol, patient tolerance, and operator judgment.
High-volume evacuation and saliva ejectors support a dry and visible field. Retraction cords, retraction paste, cheek retractors, cotton rolls, absorbent pads, or specialized isolation systems may be needed when margins approach or extend toward the gingival tissues. The instrument is only one part of the process. Correct placement, suction positioning, patient comfort, and continuous observation determine whether isolation is actually effective.
From a purchasing perspective, practices should assess the compatibility of clamps, forceps, frames, and dam systems before assembling a tray. A clamp that works well for one posterior tooth may not be appropriate for another. A standardized setup can reduce delays, but it should still allow clinicians to add tooth-specific isolation items. An adequate supply of replacement clamps, floss, dam sheets, and suction tips is useful because isolation problems often occur unexpectedly.
Rotary Burs for Tooth Preparation
Rotary burs are among the most recognizable 인레이 기구. They are available in diamond, carbide, and other designs, with variations in shape, grit, length, diameter, and shank configuration. The correct choice depends on the preparation design, tooth location, amount of tooth reduction required, and restorative material.
Coarse or medium-grit diamonds may be used for efficient reduction, while fine-grit diamonds are commonly selected for smoothing and margin refinement. Round, tapered, football, cylinder, torpedo, and flame shapes each produce different preparation contours. A clinician should follow the preparation principles recommended for the selected restorative material rather than relying on a universal bur sequence.
For ceramic inlays, preparation commonly requires attention to rounded internal line angles, adequate material thickness, and margins that can be identified and finished predictably. Sharp internal corners may create stress concentrations or complicate laboratory fabrication. The precise geometry depends on the ceramic or hybrid material, the design system, the occlusal forces expected in the area, and the manufacturer’s instructions.
Carbide burs can be useful for cutting or refining certain materials, including old restorative material, but they must be selected carefully. Excessive pressure, worn cutting edges, or poor handpiece maintenance can generate heat and reduce control. Water cooling is important when recommended for the bur and procedure. The operator should use light, controlled pressure and avoid prolonged contact in one area.
Bur blocks help organize the sequence and reduce contamination between instruments. They also make it easier for the assistant to identify the next bur. A bur should be discarded or removed from service when its cutting performance declines, its shape becomes altered, its head is damaged, or it cannot be adequately cleaned and processed according to the manufacturer’s instructions.
Hand Instruments Used During Preparation
Although rotary instruments perform much of the cutting, hand instruments remain useful in selected situations. Spoon excavators can remove softened dentin or debris from areas that are difficult to access with a bur. Chisels, hatchets, and margin trimmers may be used by trained clinicians for specific refinement tasks, although their role depends on preparation design and current minimally invasive techniques.
Enamel hatchets and chisels must be sharp and handled with controlled pressure. A dull instrument may require excess force and reduce precision. Margin trimmers can help refine certain enamel margins, but the operator must understand the direction of enamel rods and the desired restorative interface. These instruments should not be included merely because they are traditional components of a dental set; they should have a clear clinical purpose.
Condensers and placement instruments are more relevant when a clinician handles a provisional material, base, liner, or related restorative component. Their working ends should be smooth and free of scratches that could catch material. Some clinicians prefer coated or nonstick instruments for handling composite-based provisional materials. Instruments should be wiped promptly when compatible materials begin to harden on their surfaces.
In modern practice, hand instruments and rotary instruments are complementary. Rotary instruments shape the preparation efficiently, while hand instruments can provide tactile feedback and controlled refinement. The choice should be guided by tooth conservation, visibility, access, and the material-specific protocol rather than by habit alone.
Impression Trays and Digital Scanning Accessories
After preparation, the dental team must record the prepared tooth and the opposing dentition accurately. Conventional impressions may require a tray, impression material, tray adhesive, mixing equipment, syringes, retraction materials, and a bite-registration material. Tray selection must provide adequate coverage without excessive distortion or discomfort.
Rigid trays are generally preferred when dimensional stability is important. The tray should be disinfected or processed according to its classification and intended use. The operator should inspect the impression for voids, pulls, bubbles, tray show-through, incomplete occlusal anatomy, and complete capture of the preparation margin. An inadequate impression may require repetition, increasing chair time and patient inconvenience.
When using a syringe-and-tray impression technique, the working time of the material must be coordinated with tissue management and tray loading. The assistant’s mixing speed, room temperature, material proportions, and transfer time can all influence the result. A well-designed instrument setup allows the team to proceed without unnecessary delays during the material’s working phase.
Digital workflows use an intraoral scanner, scan tip, scanning software, and a computer interface. The scan tip must be cleaned, sterilized, or replaced according to the scanner manufacturer’s instructions. The scanning field should be kept visible and appropriately dry. Retraction and tissue management remain important because a scanner cannot accurately record a margin it cannot see.
Digital scanning does not eliminate the need for clinical judgment. The operator must inspect the virtual model for incomplete data, stitching errors, soft-tissue interference, occlusal artifacts, and missing distal or proximal surfaces. The dental team should maintain a practical backup plan when scanning equipment is unavailable or when the scan quality is insufficient.
Try-In Instruments and Fit Verification
Try-in is a decision-making stage rather than a simple insertion step. Restoration tweezers or a dedicated inlay placement instrument can help transfer the restoration without damaging its margins. The working end should provide a secure grip while minimizing the risk of dropping or scratching the inlay. Small restorations should be handled over a protected field whenever possible.
The clinician typically evaluates internal fit, seating, proximal contacts, marginal adaptation, contour, shade where relevant, and occlusion. A probe can help identify excess material or a margin discrepancy, but excessive pressure should be avoided. The restoration should not be forced into place. If an inlay does not seat fully, the cause may be internal interference, a tight contact, debris, inadequate preparation, or an issue with the restoration itself.
Articulating paper and shim stock can assist with occlusal analysis. These materials do not replace clinical interpretation. Mark size and intensity may be influenced by paper thickness, moisture, biting force, and the surface texture of the restoration. The operator should evaluate the patient’s habitual bite and excursive movements where clinically relevant.
Try-in paste may be used in some adhesive protocols to assess the visual effect of a restoration, particularly with translucent ceramic materials. The paste must be removed thoroughly before definitive bonding. The specific cleaning method depends on the restoration material and the manufacturer’s instructions. A restoration should be evaluated under suitable lighting because the appearance of translucent materials may change under different light sources.
Cementation and Adhesive Application Tools
Cementation instruments support one of the most technique-sensitive stages of inlay placement. Typical items include microbrushes, applicator brushes, mixing pads, automix dispensers, dispensing tips, resin-cement instruments, floss, cleanup brushes, and fine hand instruments. The exact set depends on whether the clinician uses self-adhesive cement, adhesive resin cement, or another luting system.
Microbrushes are used to apply primers, adhesives, silanes, or other surface-treatment agents. Their size and flexibility affect access to the preparation. A brush that is too large may flood the area, while one that is too small may make uniform application difficult. Applicators should be used within their intended role and should not be contaminated by contact with unrelated surfaces.
Automix systems can improve consistency by reducing manual proportioning, but the dispensing tip must be attached correctly and the initial material should be handled according to the product instructions. Working time, seating time, light-curing requirements, cleanup timing, and the amount of available film space vary among cement systems. The instrument setup should therefore be prepared before mixing or dispensing begins.
Dental floss is a simple but essential item during proximal cleanup. It helps remove excess cement from contacts before final polymerization or setting, depending on the material. Floss should be passed carefully to avoid dislodging the restoration. A scaler or fine hand instrument may be used for accessible excess, but the operator must protect the restoration margin and adjacent enamel.
Light-curing units are supporting equipment rather than hand instruments, but they are crucial in many cementation systems. Their output should be checked according to the practice’s maintenance protocol. The curing tip must be positioned close to and appropriately aligned with the restoration surface, while the exposure time should follow the cement manufacturer’s instructions. A damaged, contaminated, or weak curing tip can compromise polymerization.
Finishing, Polishing, and Occlusal Adjustment
Finishing instruments are used after the inlay is seated and the cement has been managed. Fine diamonds, finishing burs, abrasive discs, polishing points, polishing cups, and interproximal strips may all have a role. The correct sequence depends on the restorative material and the adjustment required.
When adjusting ceramic, clinicians should use instruments designed for ceramic and follow appropriate cooling and pressure guidelines. A rough adjustment can create surface defects or leave an area that requires extensive polishing. The goal is not simply to remove a mark; it is to preserve anatomy, maintain a smooth surface, and avoid creating an occlusal discrepancy.
Composite-based inlays may require a different polishing system from glass ceramic or other ceramic materials. Gold alloy restorations have their own finishing considerations. A polishing instrument selected for one material should not automatically be used on another. The manufacturer’s instructions and the laboratory’s recommendations remain important references.
Interproximal strips can help remove residual cement or refine a contact, but they should be used cautiously. Excessive stripping may open the contact or damage the adjacent tooth. Occlusal adjustment should be conservative, with repeated checks in the patient’s normal bite and during relevant movements. After adjustment, the surface should be polished rather than left rough.
Material-Specific Considerations
| Inlay material | Instrument priorities | Key clinical considerations |
|---|---|---|
| Glass ceramic | Fine diamonds, ceramic polishing systems, restoration tweezers, adhesive applicators | Protect margins, use suitable surface treatment, and polish adjusted areas according to the material protocol |
| Hybrid or resin-based ceramic | Material-compatible burs, polishing discs, points, and finishing strips | Use controlled pressure and a polishing sequence intended for the specific product |
| Composite resin | Composite finishing burs, discs, points, brushes, and cement cleanup tools | Monitor surface texture and avoid excessive heat during adjustment |
| Gold alloy | Metal finishing burs, stones, rubber polishers, articulating paper | Maintain conservative adjustment and verify contacts and occlusion carefully |
This comparison is a general framework, not a substitute for product-specific instructions. Manufacturers may specify different conditioning agents, burs, polishing systems, or cement protocols. The dental team should confirm compatibility before beginning treatment. The restoration laboratory may also provide recommendations for finishing and polishing a particular material.
Step-by-Step Workflow for Using 인레이 기구
Step 1: Confirm the restorative plan
Before setting up the tray, confirm the tooth, diagnosis, planned material, restoration type, and cementation strategy. Review the laboratory prescription or digital design when applicable. This prevents the team from preparing an instrument sequence that does not match the restoration. It is also useful to verify whether the case is intended for a temporary or definitive restoration and whether a provisional is required.
Step 2: Prepare the clinical field
Arrange the examination instruments, isolation materials, rotary burs, hand instruments, impression or scanning equipment, and restorative accessories. Confirm that the handpiece, water supply, suction, curing light, and magnification system are functioning. Check that all processed instruments are packaged appropriately and that single-use components are available.
Step 3: Examine and isolate the tooth
Inspect the tooth and adjacent structures. Establish isolation appropriate to the procedure. Place retraction and suction equipment before preparation whenever possible. Good organization at this stage improves visibility and reduces contamination. Explain the planned steps to the patient so that movement, breathing, and communication can be managed comfortably.
Step 4: Prepare the cavity conservatively
Use the selected burs with controlled pressure, adequate cooling where indicated, and a clear understanding of the intended geometry. Remove unsupported structure and defective restorative material while preserving sound tooth tissue. Refine the preparation with suitable fine instruments and inspect the margins under magnification if available.
Step 5: Record the preparation
For a conventional impression, select a stable tray and follow the material’s mixing and working-time requirements. For a digital scan, manage tissue and moisture before capturing the preparation, adjacent teeth, opposing arch, and bite relationship. Inspect the record before dismissing the patient or proceeding to fabrication.
Step 6: Evaluate the restoration during try-in
Clean the preparation and restoration according to the intended protocol. Seat the inlay gently and inspect internal fit, contacts, margins, contour, and occlusion. Do not force a restoration that does not seat. Diagnose the interference before making any adjustment. If the fit is unacceptable, communicate with the laboratory or reassess the preparation as appropriate.
Step 7: Condition surfaces and apply cement
Use the correct applicators and surface-treatment materials for the restoration and tooth. Respect the product’s timing, drying, mixing, and curing requirements. Maintain isolation throughout this stage and prevent contamination of conditioned surfaces. Prepare all materials before conditioning begins so that the restoration does not remain untreated beyond the recommended time.
Step 8: Seat and remove excess material
Seat the inlay with controlled pressure and stabilize it while the cement reaches the appropriate stage. Remove excess from accessible margins and pass floss through proximal contacts carefully. The timing of cleanup depends on the cement system. Avoid using excessive force with a scaler or explorer, especially before the restoration has achieved adequate stability.
Step 9: Cure or allow setting as directed
Use the curing light according to the cement manufacturer’s instructions when light activation is required. Check the curing tip, position, and access. For chemically or dual-cured systems, observe the specified setting time before proceeding. Do not assume that a brief exposure or a visible surface set guarantees complete polymerization throughout the cement layer.
Step 10: Finish and verify
Remove remaining cement, inspect the margins, check proximal contacts, and evaluate occlusion. Use compatible finishing and polishing instruments for any necessary adjustment. Confirm patient comfort and provide appropriate post-treatment instructions. Document the material, cement, significant adjustments, and any concerns that may require follow-up.
Conditions and Requirements for a Reliable Setup
A clinically effective 인레이 기구 setup requires more than having the instruments physically present. The instruments must be clean, functional, compatible, accessible, and arranged in a logical sequence. The following conditions should be considered before treatment.
- Clinical training: Only appropriately trained dental professionals should perform tooth preparation, adhesive procedures, cementation, and occlusal adjustment.
- Material compatibility: Burs, polishing systems, primers, adhesives, and cements must be suitable for the selected inlay material.
- Moisture control: The team should be able to isolate the treatment area and manage saliva, blood, and gingival fluid.
- Equipment maintenance: Handpieces, curing lights, suction systems, scanners, and sterilization equipment require routine inspection.
- Infection prevention: Reusable instruments must be cleaned, inspected, packaged, sterilized, and stored according to applicable regulations and manufacturer instructions.
- Visibility and access: Adequate lighting, magnification when appropriate, and patient positioning improve control.
- Emergency preparedness: Small instruments and clamps should be managed to reduce aspiration or swallowing risks, with retrieval procedures available.
- Documentation: The team should record the restorative material, cement system, lot information where required, and any relevant adjustments.
How to Evaluate Instrument Quality
Quality should be evaluated by function rather than appearance alone. A polished handle does not guarantee a precise working end, and a low-cost instrument is not automatically unsuitable. However, the purchase decision should consider manufacturing consistency, material quality, corrosion resistance, ergonomic design, warranty support, and processing instructions.
For hand instruments, inspect the connection between the handle and working end. There should be no looseness, visible cracks, rough transitions, or sharp unintended edges. The working tip should match the intended design. For burs, examine the shank, head shape, cutting surfaces, and manufacturer’s recommended speed range. A bur that appears intact may still be clinically ineffective if the cutting edges are worn.
Ergonomics deserve particular attention in procedures requiring repeated fine movements. A handle that is too thin may increase pinch force, while a heavy or poorly balanced instrument may contribute to hand fatigue. Textured handles can improve control, but deep grooves may require more attention during cleaning. The best design is one that gives the operator secure control while limiting unnecessary muscle tension.
Purchasers should also verify whether instruments are compatible with existing handpieces, bur blocks, sterilization systems, and tray layouts. Standardization can simplify inventory, but over-standardization may create gaps when a specific material or technique requires specialized items. A small trial order can help a practice assess handling, cleaning, and performance before making a larger purchase.
Cleaning, Sterilization, and Instrument Maintenance
Dental instruments must be processed according to recognized infection-prevention principles and the instructions supplied by the instrument manufacturer. The process usually includes safe transport from the operatory, cleaning, rinsing, drying, inspection, packaging, sterilization, and storage. Local regulations and professional guidance should determine the exact protocol.
Instruments should not be allowed to dry with blood, saliva, cement, or impression material on their surfaces. Dried debris can make cleaning more difficult and may conceal damage. Rotary burs require careful inspection because debris can remain between cutting surfaces. Some burs may be designated for single use, and those instructions must be followed without substitution.
Ultrasonic cleaning or automated washer-disinfectors may support the cleaning process when compatible with the instrument. They do not replace inspection. After cleaning, staff should check for corrosion, bent tips, dull cutting edges, loose components, and residual contamination. Instruments that cannot be cleaned adequately should be removed from service.
Packaging should protect instruments during sterilization and storage. Sterile packs should be kept in a clean, dry environment and opened only when needed. Damaged or wet packaging should be treated according to the practice’s policy rather than assumed to be sterile. Sterilization indicators and monitoring records should be maintained as required.
Maintenance records can identify recurring problems. If a particular bur wears prematurely, a handpiece produces vibration, or a clamp loses retention, the practice can investigate whether the cause is instrument quality, incorrect use, excessive sterilization stress, or equipment malfunction. Maintenance is not merely an administrative task; it is part of clinical risk control.
Common Errors in Inlay Instrument Use
Using a generic bur sequence for every material
Different restorative materials have different preparation and adjustment requirements. A sequence suitable for composite resin may be inappropriate for ceramic. The remedy is to organize bur selection around the material and the clinical objective.
Skipping isolation planning
Adhesive cementation can become difficult when the team begins treatment without deciding how moisture will be controlled. Isolation equipment should be prepared before the conditioning and bonding stage, not selected after contamination occurs.
Forcing an inlay into position
Resistance during seating is a diagnostic sign. Excessive pressure may damage the restoration, tooth, or surrounding tissues. The clinician should inspect the internal surface, contacts, preparation, and debris before making an adjustment.
Adjusting without polishing
Occlusal or proximal adjustment can leave a rough surface. The adjusted area should be polished with a system compatible with the restorative material. A smooth surface is easier to maintain and more comfortable for the patient.
Ignoring instrument wear
A dull bur can reduce efficiency, generate heat, and compromise preparation control. Staff should know when to replace burs and should avoid extending the use of instruments beyond their safe performance.
Organizing too many instruments
An overloaded tray can create confusion and increase the chance of selecting the wrong item. A better approach is to create procedure-specific trays with a core set and clearly labeled supplementary modules.
Failing to inspect the final result
Completing cementation does not automatically mean the procedure is finished. The operator should inspect margins, contacts, occlusion, cement removal, restoration contour, and patient comfort. A final inspection helps identify problems while they are still relatively easy to correct.
Building a Practical Inlay Instrument Tray
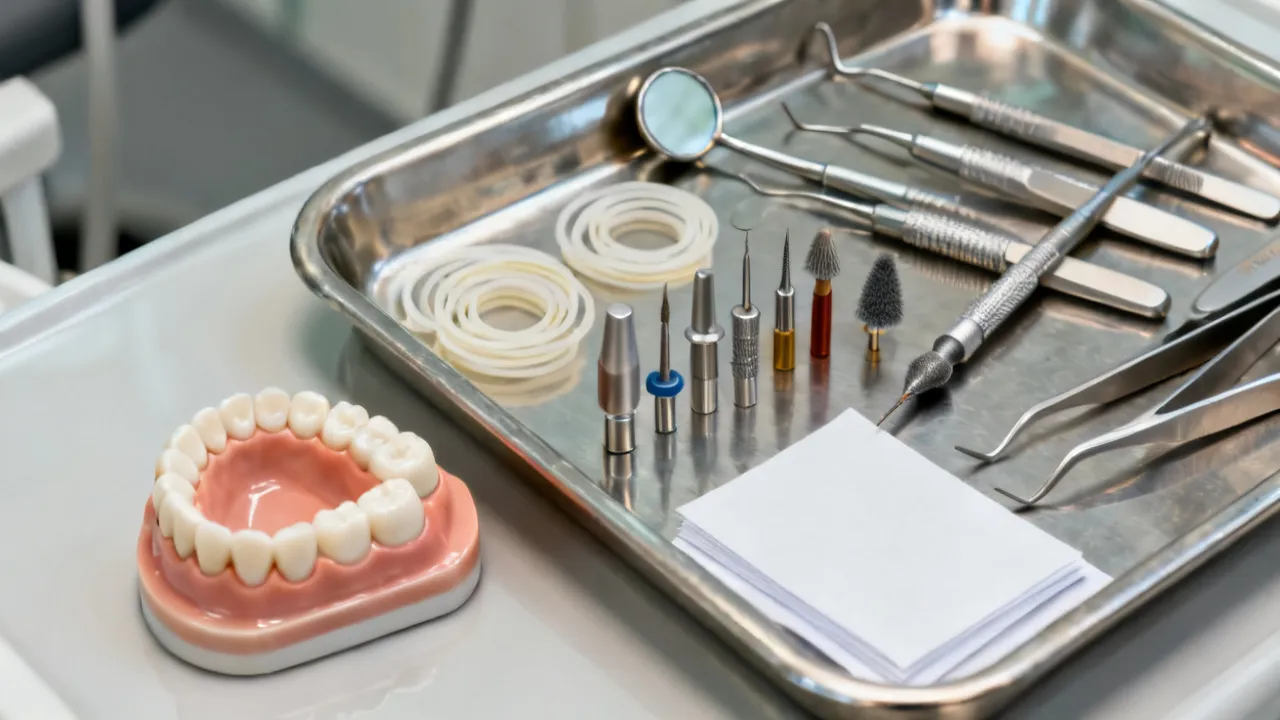
A basic tray can be divided into functional zones. Examination instruments may be placed together, followed by isolation items, preparation burs, restoration-handling tools, cementation materials, and finishing devices. The arrangement should reflect the treatment sequence from left to right or front to back, depending on the operator’s preference.
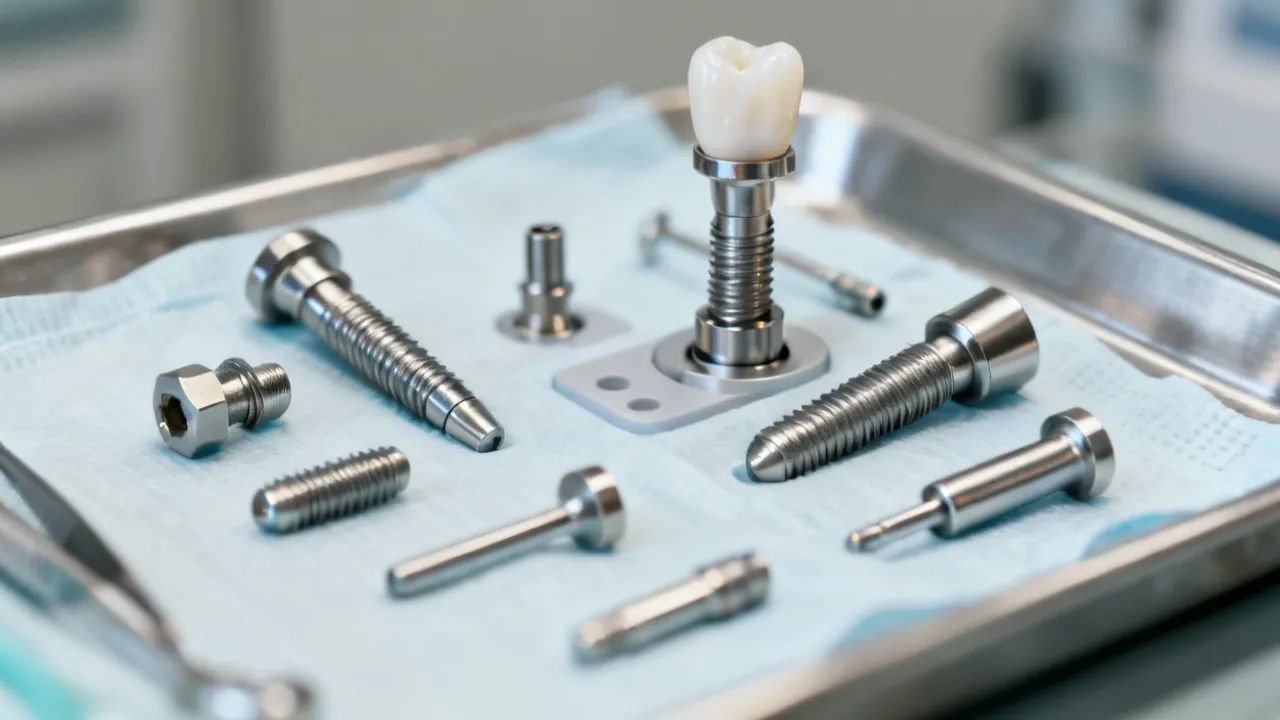
A core setup may include a mouth mirror, explorer, probe, cotton pliers, suction accessories, isolation equipment, selected burs, a bur block, restoration tweezers, articulating paper, microbrushes, cementation accessories, floss, and finishing tools. The exact contents should be adapted to the tooth and restorative material.
Supplementary modules can be prepared for ceramic, resin-based, or metal inlays. Each module may contain compatible adjustment burs, polishing instruments, surface-treatment accessories, and manufacturer-specific items. This reduces the risk of mixing incompatible components and improves inventory control.
Dental assistants can support quality by checking the tray before seating the patient. The check should include instrument integrity, bur availability, curing-light readiness, isolation materials, cement expiry dates, and the presence of suitable cleanup items. A short pre-procedure checklist can prevent avoidable interruptions. After treatment, the team can record which items were used and which supplies need replenishment.
Procurement and Supplier Evaluation
When purchasing 인레이 기구, the practice should evaluate suppliers using objective criteria. Product specifications should identify the instrument material, dimensions, shank type, intended use, processing limitations, and replacement policy. Supplier documentation should be clear enough for the clinical and sterilization teams to use safely.
Compatibility is a central concern. A bur may be designed for a particular handpiece connection, a polishing system may require a specific mandrel, and a scanner tip may have a defined reprocessing pathway. Before ordering, the purchaser should compare the new item with the equipment already installed in the practice.
Availability and consistency matter more than a single low purchase price. If replacement burs or polishing components are difficult to obtain, the practice may experience delays or substitute unsuitable products. A dependable supplier should provide stable product identification, batch information where applicable, technical support, and transparent return procedures.
Samples or demonstrations can be useful when evaluating unfamiliar hand instruments, but clinical trial use should follow the supplier’s conditions and the practice’s safety policies. Purchasers should avoid making unsupported claims about longevity, cutting speed, or clinical superiority unless these are supported by reliable technical evidence.
Cost Planning Without Sacrificing Clinical Control
The cost of an inlay instrument system includes more than the initial purchase. Practices should consider replacement frequency, sharpening or maintenance, sterilization requirements, compatible accessories, staff training, storage, and the effect of instrument failure on appointment time.
Reusable instruments may be appropriate when they can be effectively cleaned, inspected, sterilized, and maintained. Single-use items may be selected when the manufacturer specifies single use or when reprocessing cannot reliably achieve the required level of safety. The decision should be based on clinical suitability and regulatory requirements, not on price alone.
A usage review can identify instruments that are rarely used or repeatedly replaced. The practice may then reduce unnecessary stock while maintaining essential alternatives. A small inventory of critical backup items is sensible, especially for isolation, cementation, and curing procedures. Stock rotation should ensure that materials are used before their expiration dates.
Expert Perspective: Matching Tools to Clinical Decisions
An experienced restorative clinician generally begins with the treatment objective rather than the instrument catalog. If the objective is to preserve sound enamel, the preparation instruments must support controlled reduction. If the objective is reliable adhesive bonding, isolation and surface-treatment tools become priorities. If the concern is marginal accuracy, visualization and finishing instruments require careful selection.
This decision-based approach also improves staff communication. Instead of asking which instrument is traditionally used, the team can ask what task must be completed, what material is involved, and what condition must be maintained. That logic makes the setup easier to teach and adapt.
Experts also emphasize the importance of restraint. An inlay should not be adjusted repeatedly simply because an instrument is available. Each adjustment should have a reason, such as correcting a specific occlusal interference, improving a contact, or removing identified excess cement. Unnecessary intervention can reduce the quality of the restoration or weaken the remaining tooth structure.
Finally, experts treat maintenance as part of clinical quality. A sharp, clean, well-maintained instrument supports predictable performance. A damaged or contaminated instrument introduces uncertainty, regardless of the operator’s experience. Consistency in the small details often determines whether a complex restorative procedure feels controlled or improvised.
Comparison of Conventional and Digital Workflows
| Workflow element | Conventional approach | Digital approach |
|---|---|---|
| Recording the preparation | Impression tray, impression material, adhesive, and mixing accessories | Intraoral scanner, scan tip, software, and tissue-management accessories |
| Occlusal record | Bite-registration material and holder when required | Digital bite scan with appropriate software capture |
| Quality check | Inspection of impression completeness and distortion | Inspection of scan coverage, stitching, margin visibility, and bite data |
| Key support instruments | Mixing spatulas, syringes, trays, retraction tools | Scanner accessories, cheek retractors, air control, and digital workstation |
| Common limitation | Material handling and distortion risk | Moisture, visibility, scan coverage, and equipment availability |
Neither workflow is universally superior for every case. The choice depends on clinician training, equipment, laboratory communication, patient factors, preparation visibility, and the practice’s quality-control system. Digital technology can improve communication and reduce certain material-handling problems, but it does not eliminate the need for excellent tissue management or careful inspection. Conventional impressions remain useful when the operator has appropriate materials, trays, and technique control.
Patient-Centered Use of Inlay Instruments
Although patients may not recognize individual 인레이 기구, instrument use affects their experience. A well-organized tray can shorten interruptions and make the appointment feel more controlled. Proper suction, isolation, and retraction can improve comfort when applied thoughtfully. Instruments should be handled gently, especially near the gingiva and adjacent teeth.
Patients may ask why an inlay requires several appointments or multiple stages. The dental team can explain that the restoration is designed outside the mouth and must be checked for fit, contact, and bite before final placement. Clear communication helps patients understand why preparation, scanning or impression taking, try-in, bonding, and polishing are distinct steps.
After placement, the patient should receive instructions about expected sensitivity, chewing, oral hygiene, and when to contact the dental office. Persistent pain, a feeling that the tooth hits first, a loose restoration, or sharp cement should be evaluated by the treating clinician. Patients should not attempt to modify the restoration with household tools or dental instruments purchased online.
Regulatory and Professional Considerations
Dental instruments are subject to different regulatory classifications depending on the jurisdiction and intended use. Practices should purchase products through legitimate medical or dental channels and retain appropriate documentation. The instrument’s labeling, instructions for use, sterilization guidance, and intended application should be reviewed before clinical use.
Professional bodies and public-health authorities publish infection-prevention guidance, but local requirements may vary. A practice should maintain written procedures for instrument transport, cleaning, sterilization monitoring, storage, and staff training. The most authoritative source for a specific device remains its manufacturer’s instructions, interpreted alongside applicable regulations.
Claims that a particular 인레이 기구 guarantees a clinical result should be treated cautiously. Restoration success depends on diagnosis, tooth condition, preparation design, isolation, material selection, cementation, occlusion, laboratory quality, and patient maintenance. Instruments support these factors; they do not replace clinical judgment. Marketing descriptions should be distinguished from independently supported clinical evidence.
Frequently Asked Questions
What is 인레이 기구?
인레이 기구 means dental inlay instruments. It is a broad term covering the examination, isolation, preparation, impression or scanning, try-in, cementation, finishing, and maintenance tools used for inlay treatment.
Is there one standard inlay instrument kit?
No. A suitable setup varies according to the restorative material, clinical technique, digital or conventional workflow, tooth location, isolation method, and the clinician’s preferences. A core tray with material-specific modules is often more practical than one universal kit.
Which burs are used for inlays?
Clinicians may use diamond or carbide burs in different shapes and grits. The choice depends on the preparation design and restorative material. Fine diamonds and compatible polishing instruments are commonly used for refinement and adjustment, but the exact sequence should follow the material and product instructions.
Are hand instruments still needed when rotary burs are available?
Yes. Hand instruments can assist with removing softened material, refining selected surfaces, manipulating provisional materials, and examining margins. Their use depends on the preparation and the operator’s training.
Why is isolation important during inlay placement?
Isolation limits contamination from saliva, blood, and moisture. This is especially important when adhesive protocols or resin-based cements are used. The appropriate isolation method depends on the tooth, margin position, restorative material, and clinical circumstances.
Can the same polishing instrument be used for ceramic and composite inlays?
Not necessarily. Ceramic, composite, hybrid ceramic, and metal restorations may require different finishing and polishing systems. Using a material-incompatible instrument can produce poor surface quality or unnecessary damage.
How should inlay instruments be sterilized?
Reusable instruments should be cleaned, inspected, packaged, sterilized, and stored according to the manufacturer’s instructions and applicable infection-control requirements. Single-use items should be discarded after use when designated by the manufacturer.
What should be checked if an inlay does not seat completely?
The clinician should inspect for debris, internal interference, tight proximal contacts, preparation errors, tissue obstruction, or a discrepancy in the restoration. The restoration should not be forced into place.
Does digital scanning eliminate impression instruments?
Digital scanning can reduce the need for conventional trays and impression materials, but it still requires tissue-management accessories, a scanner, a scan tip, appropriate software, and careful quality control. Conventional impression equipment may remain useful as a backup.
How often should dental burs be replaced?
There is no single replacement interval for every bur. Replacement depends on the manufacturer’s guidance, material being cut, frequency of use, visible wear, cutting efficiency, cleaning condition, and the practice’s quality-control policy.
What makes a dental inlay instrument ergonomic?
An ergonomic instrument generally has a balanced design, a comfortable grip, a working end suited to the task, and a surface that allows secure control without excessive hand force. The ideal design may differ among clinicians.
Can patients purchase 인레이 기구 for home use?
These instruments are intended for trained dental professionals and clinical settings. Patients should not attempt to adjust, remove, or cement an inlay themselves. Any concern about fit, sensitivity, or occlusion should be assessed by a dental professional.
Final Guidance for Selecting 인레이 기구
The most effective approach to 인레이 기구 selection is systematic. Start with the restoration material and treatment workflow. Identify the required preparation, isolation, recording, try-in, cementation, and finishing tasks. Then confirm that each instrument is compatible with the equipment, processing method, and clinical protocol used by the practice.
Prioritize visibility, moisture control, precise preparation, safe restoration handling, material-compatible finishing, and reliable sterilization. Evaluate suppliers by documentation, consistency, technical support, availability, and compliance rather than by appearance or unsupported performance claims. Maintain instruments carefully, replace worn items, and train the entire team in the sequence.
Dental inlay instruments are tools within a larger restorative system. Their value is realized when they support sound diagnosis, conservative preparation, accurate recording, controlled cementation, and careful final verification. A thoughtfully designed setup helps clinicians work with greater consistency while keeping patient safety and restoration quality at the center of the procedure.