Selecting and Using Dental Inlay Instruments
This guide explains how to evaluate, organize, use, and maintain 인레이 기구, the dental instruments used during the preparation, fitting, adjustment, and cementation of indirect inlays. It reviews instrument categories, clinical workflow, material compatibility, ergonomics, infection prevention, quality assurance, and purchasing considerations. The discussion is based on established dental practice principles and manufacturer instructions rather than unsupported claims about performance or pricing.
Introduction: What 인레이 기구 Means in Dental Practice
In dental terminology, 인레이 기구 refers to instruments used in the clinical management of dental inlays. An inlay is an indirect restoration fabricated outside the mouth and then bonded or cemented into a prepared cavity. Unlike a direct filling, which is shaped inside the tooth, an inlay is produced from a material such as ceramic, composite resin, or dental alloy and fitted to a precisely prepared cavity.
The instruments used for this procedure are not a single specialized device. Instead, the category includes several groups of tools that support diagnosis, tooth preparation, impression or digital scanning, provisional protection, try-in, occlusal adjustment, isolation, cementation, and finishing. The correct combination depends on the restorative material, the clinical technique, the laboratory or computer-aided workflow, and the dentist’s preferred system.
From an industry perspective, the most important purchasing principle is that an instrument should be selected for a defined clinical task rather than for appearance alone. A well-designed handle, an accurate working end, dependable sterilization compatibility, and clear documentation usually matter more than a large assortment of instruments. The clinical objective is controlled preparation and predictable seating of the restoration while protecting the tooth, the soft tissues, the patient, and the dental team.
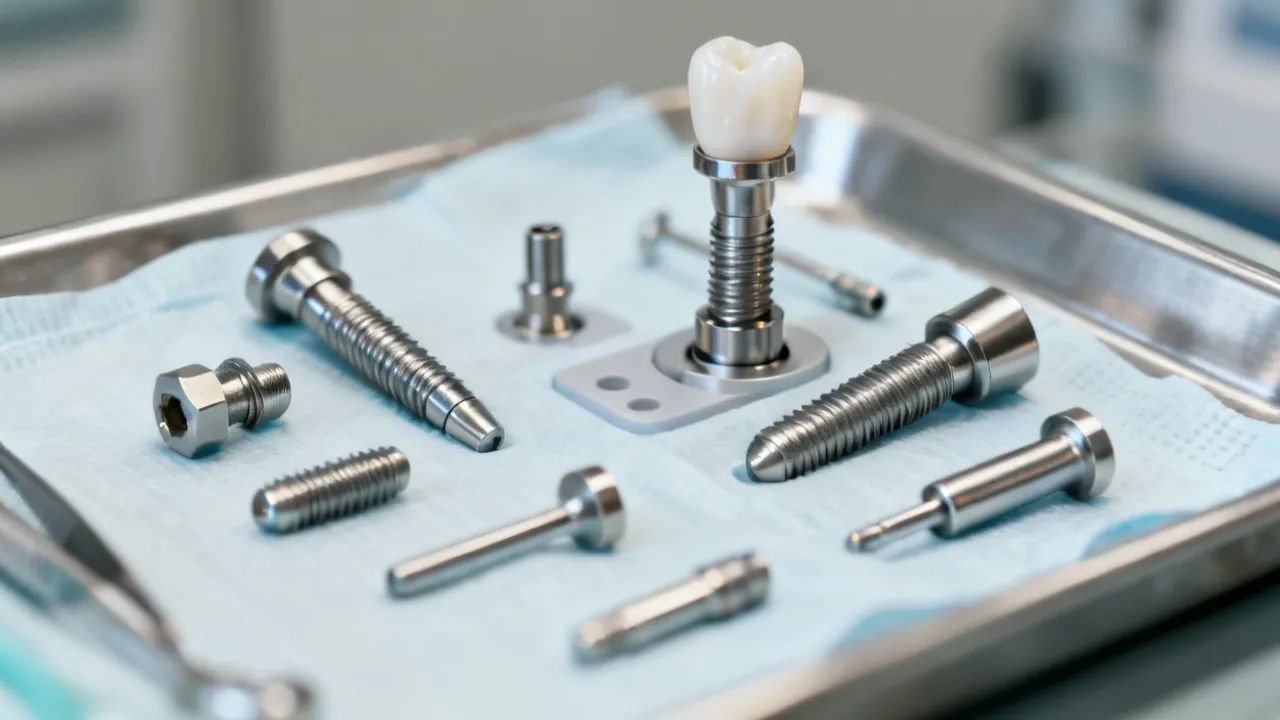
Because “인레이 기구” may be used as a broad search term, buyers should distinguish between preparation burs, hand instruments, try-in tools, cementation accessories, and laboratory instruments. These groups are related, but they are not interchangeable. A dental mirror may assist visibility throughout the appointment, while a fine diamond bur is specifically selected for tooth reduction or restoration adjustment. A cement spatula may be appropriate for mixing certain materials, whereas a manufacturer-supplied mixing tip may be required for an automix cement.
The term may also appear in online catalogs, Korean dental supply listings, educational materials, and searches for restorative dentistry equipment. In those settings, the same phrase can describe a single bur, a small hand-instrument set, a ceramic adjustment kit, or a complete procedural package. Buyers should therefore read the product description carefully and confirm whether the item is intended for chairside use, laboratory use, or both.
Why Instrument Selection Affects Inlay Treatment
Indirect restorative treatment depends on accuracy at several stages. The preparation must provide adequate space for the chosen material without unnecessarily weakening the tooth. The internal and external surfaces of the restoration must be inspected carefully. The inlay must seat fully, maintain appropriate proximal contact, and function harmoniously with the opposing dentition. Adhesive or conventional cementation must also be performed under conditions recommended for the selected material.
Each of these steps can be influenced by instrument quality and instrument handling. A bur with a damaged cutting surface may generate excess heat or remove tooth structure inefficiently. A blunt explorer may provide limited tactile feedback. A poorly balanced handpiece accessory may make margin refinement more difficult. Inadequate isolation tools may allow moisture contamination during an adhesive procedure. These examples do not mean that an expensive product guarantees a successful result; they illustrate why compatibility, maintenance, and technique should be assessed together.
Clinical decisions remain the responsibility of a qualified dental professional. Patients should not attempt to purchase or use dental inlay instruments for self-treatment. Inlays require diagnosis, tooth preparation, radiographic or clinical assessment when indicated, laboratory or digital design, material selection, and controlled placement in a clinical setting.
Instrument choice may also affect appointment efficiency. An assistant who can identify the correct bur, applicator, or polishing point without delay can help the dentist maintain the planned working time of a cement or bonding agent. In a busy practice, organized instrument selection can reduce interruptions, prevent the use of incompatible accessories, and make it easier to maintain consistent procedures among multiple clinicians.
Main Categories of 인레이 기구
1. Diagnostic and Examination Instruments
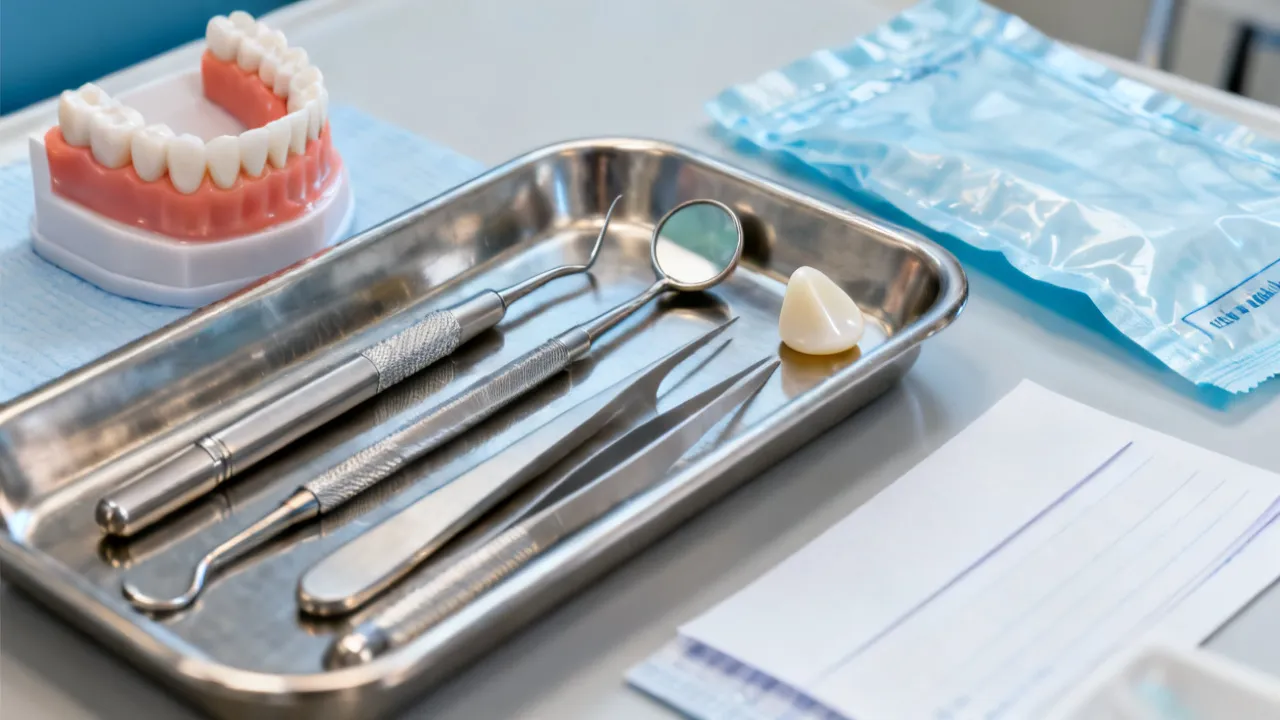
Before preparation begins, the dentist generally requires instruments for examination and isolation. A mouth mirror supports indirect vision and retraction. An explorer may assist with detecting defects, checking margins, and evaluating the surface of a provisional or final restoration. Cotton pliers or utility tweezers can transfer small items and handle cotton rolls or other accessories.
Periodontal probing instruments may be relevant when the clinician needs to assess gingival health, pocketing, or the relationship between a proposed restoration margin and the periodontal tissues. A dental probe should not be used aggressively against fragile restoration margins. Excessive force can scratch certain surfaces or produce misleading tactile impressions.
Occlusal marking materials, including articulating paper, are not cutting instruments, but they are important accessories in the inlay workflow. They help identify contacts during try-in and final adjustment. Marking results should be interpreted alongside the patient’s bite, tooth anatomy, proximal contacts, and clinical judgment. A dark mark alone does not prove that a contact is excessively high.
Magnification systems, overhead lighting, intraoral cameras, and radiographic equipment may also support diagnosis and quality control. These devices are not always listed under the narrow definition of 인레이 기구, but they contribute to the same treatment workflow. A clear image of a preparation or restoration can help with laboratory communication, patient education, and documentation.
2. Rotary Instruments for Tooth Preparation
Rotary instruments are commonly used to establish the outline, internal form, and finish of an inlay preparation. Diamond burs and carbide burs are available in many shapes and grits. The correct design depends on the location of the tooth, the material being removed, the restorative material planned, and the desired preparation geometry.
Common shapes include round, pear, football, wheel, fissure, chamfer, and flame forms. A round bur may assist in initial caries removal or internal refinement, while a fissure or tapered bur may be used for controlled wall development. Fine and extra-fine diamonds may support finishing and margin refinement. However, the names and recommended uses vary by manufacturer, so the product’s technical documentation should be consulted.
Water cooling is an important consideration during rotary preparation. Heat control is influenced by speed, pressure, bur condition, coolant delivery, and intermittent contact. The operator should use the handpiece and bur within the manufacturer’s stated parameters. A bur that is loaded with debris, worn, or damaged may cut poorly and increase the temptation to apply excessive pressure.
Instrument selection should also account for access. Posterior teeth may require a shank and head configuration that permits visibility and clearance from adjacent teeth. A bur that is technically suitable but difficult to control can create practical risks. For this reason, dental professionals often maintain several sizes and shapes rather than relying on a single universal bur.
Diamond grit is another important consideration. Coarse diamonds can remove material quickly but may leave a rougher surface or make it easier to remove more tooth structure than intended. Medium, fine, and extra-fine instruments are generally used for progressively controlled refinement. The clinician must select the sequence according to the preparation stage rather than using a coarse instrument for every task.
3. Hand Instruments for Preparation and Refinement
Hand instruments can complement rotary preparation by supporting controlled removal of unsupported enamel, refinement of margins, and removal of temporary material. Examples may include enamel hatchets, hoes, excavators, margin trimmers, and specialized finishing instruments. Their use depends on the preparation design and the dentist’s training.
Excavators may be helpful for removing softened dentin in selected situations, although caries removal strategies should follow current clinical judgment and the individual condition of the tooth. Margin trimmers are designed for particular margin orientations and should be selected carefully. An instrument intended for one side or angle of a preparation may not perform appropriately in another location.
Hand instruments require a stable fulcrum and controlled pressure. Excessive force can fracture unsupported enamel or cause accidental damage to neighboring surfaces. In practical training, clinicians learn to combine visual inspection, tactile feedback, magnification when appropriate, and conservative instrumentation.
Some clinicians use hand instruments to refine areas that are difficult to approach safely with a rotary instrument. This may be useful around thin enamel edges or in areas where the operator wants to preserve a specific margin. However, the instrument must be sharp and properly aligned. A dull hand instrument can require excessive force and may be less predictable than a properly selected rotary finisher.
4. Instruments for Impression and Digital Workflows
Traditional inlay procedures may involve an impression tray, elastomeric impression material, mixing accessories, retraction materials, and provisional restoration instruments. The specific tools depend on whether the impression is taken with a conventional tray or created through an intraoral scanner.
In digital workflows, the scanner itself is not usually classified as a hand instrument, but it becomes part of the broader inlay equipment system. The clinician must prepare the field, control moisture, scan the preparation, capture the opposing arch, and record the bite relationship. The quality of the digital record depends on preparation visibility, tissue management, surface cleanliness, scanner calibration, software workflow, and operator technique.
Conventional and digital systems each have their own procedural requirements. The choice should be based on the practice’s equipment, training, laboratory communication, case complexity, and patient considerations. The instruments used for tissue retraction and moisture control remain important in either workflow.
For conventional impressions, tray rigidity and size are relevant. A tray that flexes during removal may distort the impression, while a tray that is too small may fail to capture important anatomy. Mixing pads, spatulas, dispensing guns, and intraoral tips should be compatible with the selected impression material. Staff should also monitor setting times and avoid unnecessary movement while the material is setting.
Digital scanning requires a different form of instrument management. Scanner tips must be cleaned, disinfected, or sterilized according to the device instructions. The scanner should be calibrated when required, and software updates should be managed through the practice’s equipment policy. A digital workflow can reduce some physical impression materials, but it does not eliminate the need for careful tissue management, isolation, and accurate preparation.
5. Try-In and Seating Instruments
During the try-in stage, the restoration is evaluated before final cementation. A mirror, explorer, cotton pliers, articulating paper, floss, and suitable handling instruments are commonly used. Some dental systems provide dedicated try-in tools or holders, especially for small restorations that are difficult to grasp securely.
Handling instruments should avoid contamination of bonding surfaces. The clinical team should follow the restorative material and cement manufacturer’s instructions regarding cleaning, conditioning, silanization, priming, and handling. A restoration that appears to fit well may still require evaluation of marginal adaptation, proximal contact, internal seating, occlusion, shade, and patient comfort.
Dental floss is a particularly useful accessory for checking proximal contact. It should pass through the contact with appropriate resistance rather than being forced aggressively. If contact is too tight, the clinician may need to determine whether the issue is caused by debris, incomplete seating, restoration contour, or preparation geometry.
Restoration holders should provide enough control without damaging a delicate margin or contaminating a treated surface. Some clinicians use specialized tweezers, vacuum handling systems, or small applicators. The appropriate choice depends on restoration size, shape, surface treatment, and the cementation protocol.
6. Cementation and Bonding Accessories
Cementation instruments vary according to the cement system. Some products use a hand-mixing pad and spatula; others are supplied in automix cartridges with disposable mixing tips. Cement placement may involve a syringe tip, instrument, or restoration-specific applicator. The material’s instructions for use should determine mixing time, working time, seating time, light exposure, cleanup procedure, and storage conditions.
Isolation accessories are central to adhesive procedures. Cotton rolls, saliva ejectors, cheek retractors, dental dams, clamps, retraction cord, retraction paste, and matrix materials may be used depending on the tooth and margin location. The selected system should allow clear access while reducing moisture contamination risk.
Finishing and cleanup instruments may include scalers, explorers, brushes, polishing systems, and abrasive strips. Cleanup should be performed at the stage recommended for the cement. Removing excess too early can disturb the restoration; removing it too late can make cleanup unnecessarily difficult. The exact approach differs among resin cements, resin-modified glass ionomer materials, and other luting systems.
Bonding accessories may include etching syringes, microbrushes, mixing wells, primers, silane applicators, air abrasion devices, and curing lights. Not every system uses all of these products. The clinical team should avoid placing unrelated products on the tray simply because they are commonly used in other adhesive procedures. A focused setup helps reduce confusion and lowers the possibility of using the wrong agent.
7. Finishing and Polishing Instruments
After seating, the restoration may require minor adjustment of occlusion or proximal areas. Ceramic, composite, and metal inlays each require compatible finishing and polishing systems. A ceramic adjustment kit may include fine diamonds, rubber polishers, and a final polishing point. Composite systems may use discs, cups, points, or strips. Metal restorations may require different abrasives and polishing materials.
Adjustment should be conservative. The clinician should identify the exact area requiring correction and use the least aggressive instrument capable of producing the intended result. Excessive reduction can alter anatomy, expose an unfavorable surface, or compromise the restoration’s appearance. Cooling and intermittent contact are often relevant when adjusting ceramic materials, although the operator must follow the product instructions.
Polishing is not merely cosmetic. A properly polished surface may be more comfortable to the patient and may reduce plaque retention compared with a rough, unfinished surface. The final sequence should be selected for the restoration material and used without creating excessive heat or changing the intended anatomy.
Step-by-Step Inlay Instrument Workflow
Step 1: Confirm the Diagnosis and Treatment Plan
The instrument setup begins with a clear treatment plan. The dentist evaluates the tooth, existing restoration, caries risk, cracks, pulpal and periodontal status, occlusion, and the amount of remaining tooth structure. An inlay may not be suitable for every cavity. The final choice can involve a direct restoration, onlay, crown, or another approach depending on clinical findings.
The material should be selected before finalizing the preparation strategy. Ceramic and resin-based materials may require adhesive protocols, while some metal restorations follow different procedures. The preparation, reduction, margin design, and finishing sequence should be consistent with the selected restoration.
Patient-specific factors may influence the plan as well. These can include oral hygiene, caries activity, bruxism, moisture control, esthetic expectations, appointment availability, and the condition of adjacent teeth. The instruments selected should support the chosen plan rather than determine it after treatment has already begun.
Step 2: Prepare and Verify the Operatory
Before treatment, the team should confirm that instruments are clean, sterilized as required, intact, and organized in the sequence of use. Rotary instruments should be inspected for wear, corrosion, damage, and secure attachment. Handpieces should be maintained according to the manufacturer’s recommendations.
Single-use items should be checked for package integrity and expiration information. Reusable instruments should be processed through the dental facility’s validated cleaning, packaging, sterilization, and storage procedures. The Centers for Disease Control and Prevention identifies appropriate instrument reprocessing as a central component of dental infection prevention, and local regulations may impose additional requirements.
The assistant should also verify that the selected cement, bonding agent, impression material, provisional material, and polishing system are present and compatible. A pre-procedure checklist can prevent delays caused by missing mixing tips, expired materials, unsuitable bur shapes, or a curing light that requires maintenance.
Step 3: Establish Isolation and Visibility
Moisture control affects preparation visibility, impression accuracy, and cementation. The clinician may use a dental dam, cotton rolls, suction, retractors, gingival displacement materials, or a combination of methods. The selected approach should provide access without traumatizing soft tissues.
Magnification and adequate illumination can support inspection of preparation walls and margins. These aids do not replace sound technique, but they may help the operator identify defects that are difficult to see under poor lighting.
Isolation should be reassessed during the procedure. Saliva, blood, crevicular fluid, retraction material, and temporary cement remnants may compromise a clean field. If contamination occurs during an adhesive step, the clinician should follow the applicable decontamination or repeat-conditioning protocol rather than simply continuing without evaluation.
Step 4: Prepare the Tooth Conservatively
Preparation begins with instruments appropriate for the existing anatomy and planned restoration. The operator controls depth and direction while preserving sound tooth structure wherever clinically appropriate. Rotary instruments should be used with suitable coolant and pressure. Unsupported enamel, carious tissue, and irregularities are managed according to the treatment plan.
The finished preparation should be checked for adequate clearance, smooth transitions, clean margins, and the absence of undercuts that conflict with the selected restoration design. The precise requirements vary with the material and laboratory or milling system. A preparation intended for a ceramic inlay should not automatically follow the same geometry as one intended for cast metal.
The clinician should also consider the direction of insertion and the ability of the restoration to seat without binding. Sharp internal angles may be undesirable for certain materials, while excessive taper can reduce resistance or alter the intended design. Preparation principles must be adapted to the tooth and restoration rather than applied mechanically.
Step 5: Record the Preparation
For a conventional impression, the clinician chooses a suitable tray and impression material, manages the gingival tissues, and follows the material’s working and setting times. For a digital scan, the field is prepared and scanned according to the device’s workflow. In either case, the preparation must be clearly captured, including the margins and adjacent structures relevant to the restoration.
If the record is incomplete or distorted, repeating the impression or scan may be more efficient than proceeding with uncertain information. The dental laboratory should receive clear instructions about the material, shade, contacts, occlusion, and any relevant clinical observations.
Photographs can supplement, but not replace, an accurate impression or scan. They may be useful for documenting shade, anatomy, soft-tissue conditions, and special instructions. Communication is particularly important when the inlay has unusual contours, limited clearance, deep margins, or a complex occlusal relationship.
Step 6: Protect the Tooth Temporarily
A provisional restoration may be used when the final inlay is produced outside the mouth. Instruments for provisional fabrication and removal can include a matrix, mixing accessories, temporary material instruments, occlusal adjustment burs, and temporary cementation tools.
The provisional should protect the prepared tooth, preserve function where possible, maintain periodontal comfort, and allow removal without unnecessary damage. The dentist should check the provisional’s margins and occlusion before dismissing the patient.
Temporary cement should be selected with awareness of the future bonding procedure. Some residues may be difficult to remove or may interfere with subsequent adhesive steps. The practice should follow the cement manufacturer’s recommendations for cleanup and use an appropriate removal technique at the next appointment.
Step 7: Inspect and Try In the Final Restoration
Once the final inlay is available, it should be inspected for damage, contamination, fit, contact, anatomy, and shade when relevant. The restoration is tried in under suitable conditions. The dentist may use an explorer, floss, articulating paper, mirror, and appropriate handling device.
Try-in paste or other evaluation materials may be used for certain adhesive restorations. The clinical team should follow the product’s instructions for cleaning and removal. A restoration should not be permanently cemented until the clinician is satisfied that the fit and clinical conditions are acceptable.
Try-in should be conducted gently. Repeated forceful insertion and removal can damage a thin restoration, alter a margin, or create misleading resistance. If the inlay does not seat as expected, the dentist should investigate the cause systematically, including debris, proximal interference, internal binding, impression or design error, and preparation limitations.
Step 8: Condition the Restoration and Tooth
Surface treatment depends on the restorative material. Glass ceramics, zirconia, composite resin, and metal do not share an identical conditioning protocol. Etching, priming, silanization, air abrasion, or other procedures may be indicated in some cases and inappropriate in others.
The manufacturer’s instructions for both the restoration and the cement should be treated as essential technical documents. Mixing products from unrelated systems without confirmation of compatibility can create uncertainty. The dental team should also monitor working time, ambient conditions, curing requirements, and contamination control.
Conditioning instruments should be used in a way that prevents cross-contamination between products. Separate microbrushes, wells, applicator tips, and mixing accessories may be needed for different agents. Labels should be checked before application, especially when several syringes or bottles have similar packaging.
Step 9: Seat the Inlay and Remove Excess Cement
The restoration is seated with controlled pressure and verified for complete placement. Excess cement is managed according to the cement system. Floss, scalers, brushes, micro-applicators, and curing equipment may be used as indicated. Particular attention is required in proximal and gingival areas, where residual cement can be difficult to detect.
When light-curing is required, the curing light should be maintained and used according to its technical specifications. Output may be affected by the device condition, distance, angulation, exposure time, and restoration thickness. A dental practice should have a defined process for checking and maintaining curing equipment.
Seating pressure should be controlled and directed appropriately. Excessive force can fracture a restoration or cause discomfort, while insufficient stabilization may allow movement during cement polymerization. The clinical sequence should account for the cement’s working time so that the restoration is not left partially seated or exposed to contamination.
Step 10: Check Occlusion, Contacts, and Margins
After cementation, the clinician evaluates occlusion in maximum intercuspation and during relevant excursive movements. Proximal contacts are checked with floss, and margins are examined visually and tactically. Any adjustment should be followed by polishing appropriate to the material.
The patient should receive instructions about sensitivity, chewing, hygiene, and when to contact the clinic. A follow-up examination may be appropriate when symptoms persist or when the case presents specific restorative risks.
Documentation should record the restoration material, cement or bonding system, relevant adjustments, and any patient comments. This information can help the practice manage future repairs, replacements, or diagnostic questions.
Material Compatibility and Instrument Choice
| Restoration Material | Instrument Considerations | Important Clinical Caution |
|---|---|---|
| Glass ceramic | Fine diamond adjustment instruments, ceramic polishing systems, suitable try-in accessories, and material-specific bonding tools | Use the conditioning and polishing sequence specified for the particular ceramic; avoid unnecessary reduction. |
| Composite resin or hybrid ceramic | Fine diamonds, discs, rubber polishers, abrasive strips, and compatible adhesive accessories | Heat control and final polishing can influence surface quality and should follow the product instructions. |
| Cast metal | Metal-compatible finishing burs, occlusal marking materials, cementation instruments, and appropriate polishing tools | Adjustment and cement selection should reflect the alloy and the planned retention or bonding method. |
| Zirconia-based material | Manufacturer-approved adjustment and polishing instruments, surface-treatment accessories, and suitable cementation tools | Do not assume that protocols for glass ceramics apply to zirconia. |
This comparison is a general orientation rather than a substitute for the instructions supplied with a specific product. Dental materials differ substantially even within the same broad category. The clinician should confirm the exact substrate and consult the current technical documentation before treatment.
Material compatibility also involves the surface of the instrument itself. Certain chemicals, abrasive particles, or cleaning solutions may damage instrument coatings or alter the performance of an applicator. A product that is safe for one cement or primer may not be suitable for another. Practices should keep material safety information and instructions for use accessible to the clinical team.
Ergonomics and Design Features
Ergonomics is often overlooked when practices compare 인레이 기구. A handle that feels comfortable during a short demonstration may become tiring during repeated procedures. Important features include grip diameter, surface texture, balance, weight, finger positioning, and the relationship between the handle and the working end.
Textured handles may improve control when gloves are wet, but aggressive textures can complicate cleaning. Hollow handles may reduce weight, although their internal construction must be compatible with cleaning and sterilization. Color coding can assist organization, but color should not replace clear identification of instrument function.
For rotary instruments, shank compatibility is essential. The bur must match the handpiece type and be secured correctly. The practice should maintain a system for separating new, used, damaged, and processed rotary instruments. Reusing a disposable item contrary to the manufacturer’s instructions can create performance and infection-control concerns.
Dental professionals who use magnification should consider the working length and instrument profile. An instrument that appears suitable without magnification may obstruct the field when used with loupes or a microscope. The optimal choice is therefore influenced by the clinician’s posture, visual system, and normal working distance.
Ergonomic decisions also affect repetitive strain. A clinician who frequently performs indirect restorations may benefit from instruments that allow a light, controlled grasp instead of a tightly clenched grip. Assistants should have access to clearly arranged trays so that they do not need to twist, reach, or search repeatedly during a time-sensitive cementation procedure.
Cleaning, Sterilization, and Instrument Processing
Instrument processing should follow the facility’s infection-prevention policy, applicable regulations, and the instructions for use provided by the instrument manufacturer. The general process commonly includes point-of-use handling, transport in a safe container, cleaning, inspection, packaging, sterilization, and storage.
Cleaning is not the same as sterilization. Organic debris can interfere with later processing and may protect microorganisms from the sterilization cycle. Instruments should be cleaned using a validated method that is compatible with their materials. Ultrasonic cleaners and automated washers may be suitable for some instruments, while others require manual handling or specific restrictions.
Before packaging, instruments should be inspected for residual debris, corrosion, pitting, looseness, dull cutting edges, and damage. Hinged instruments should be processed in the position recommended by the manufacturer. Rotary instruments may require special attention because debris can remain within flutes or around the shank.
Heat sterilization is widely used for compatible dental instruments, but the cycle parameters must be appropriate for the device and packaging system. The practice should not rely on assumptions based only on the instrument’s appearance. Documentation, monitoring, and staff training are important parts of a reliable processing program.
The CDC’s Guidelines for Infection Control in Dental Health-Care Settings and subsequent infection-prevention recommendations provide a recognized reference framework for dental settings in the United States. Practices in other jurisdictions should also follow their national and regional requirements. Manufacturer instructions remain important because some instruments have specific limitations regarding chemicals, temperature, lubrication, or drying.
After sterilization, instruments should be stored in a manner that preserves package integrity and allows the team to identify the contents. Packages that are wet, torn, punctured, or otherwise compromised should be handled according to the practice’s reprocessing policy. Instruments should not be returned to a clean storage area when their sterile status is uncertain.
Quality Control Before Clinical Use
A simple inspection routine can reduce avoidable problems. Before using an inlay instrument, the dental team can confirm the following:
- The instrument is the correct type and size for the planned procedure.
- The working end is intact, clean, and free from visible damage.
- The handle or shank is secure and compatible with the intended device.
- The packaging is intact when a sterile instrument is required.
- The instrument has been processed according to policy.
- Any disposable component is within its stated use conditions.
- The instrument does not show corrosion, distortion, or excessive wear.
Rotary cutting efficiency should not be judged solely by whether a bur still rotates. A worn bur may continue to function while producing inferior cutting performance or increased heat. Practices should establish criteria for removal from service based on wear, damage, manufacturer guidance, and clinical experience.
Quality control can include periodic review of restoration adjustments. If a particular bur shape repeatedly produces excessive reduction, rough margins, or difficult access, the clinician may need to reconsider the instrument choice or technique. Likewise, repeated problems with cement cleanup may indicate an issue with timing, isolation, applicator selection, or staff coordination rather than with the cement alone.
How to Build a Practical Inlay Instrument Set
A practical set can be organized by procedure stage rather than by brand. One tray may contain diagnostic and isolation items, another may contain preparation instruments, and a separate setup may be used for try-in and cementation. This arrangement can reduce searching and help the assistant anticipate the next step.
A basic preparation group may include a mouth mirror, explorer, periodontal probe when indicated, cotton pliers, isolation accessories, selected rotary burs, hand instruments for refinement, and a finishing instrument. The exact selection should reflect the dentist’s routine procedures and the types of inlays commonly treated.
A try-in and cementation group may include a restoration holder, floss, articulating paper, cement accessories, micro-applicators, mixing tools where applicable, curing equipment, cleanup instruments, and polishing items. The set should not contain products that are incompatible with the intended cement or restoration material.
Practices should avoid purchasing large quantities of rarely used instruments without a defined maintenance and storage plan. Inventory should reflect actual case volume, replacement intervals, emergency needs, and the availability of local technical support. A smaller, well-maintained set can be more useful than a broad collection with unclear indications.
Inventory labels can include instrument name, size, grit, material compatibility, and whether the item is reusable or single-use. For rotary burs, separate containers for preparation, finishing, and polishing can reduce selection errors. A digital inventory system may help larger practices monitor stock levels, expiration dates, and replacement patterns.
Purchasing Criteria for 인레이 기구
When comparing suppliers, dentists and procurement teams should examine more than the listed price. The total cost may include shipping, import charges, maintenance, replacement parts, sterilization accessories, training, and downtime caused by poor durability. A low initial price is not necessarily the lowest cost over the instrument’s useful service period.
Product documentation should state the intended use, material composition where relevant, compatibility, cleaning limitations, sterilization parameters, and warranty conditions. For powered equipment, the documentation should also cover electrical requirements, maintenance intervals, accessories, and service arrangements.
Reliable suppliers should provide traceable product information and a process for handling complaints, returns, and quality concerns. Dental practices may request evidence of regulatory compliance appropriate to the market in which the product is sold. Compliance statements should be reviewed carefully because regulatory classifications differ among instruments, accessories, and powered devices.
Price comparisons should be made between equivalent products. A single reusable hand instrument, a multi-instrument kit, a disposable applicator, and a complete powered system cannot be compared only by headline price. The practice should record the unit of sale, included accessories, replacement requirements, sterilization compatibility, and expected use.
Supplier support may be important when purchasing specialized finishing kits, scanners, curing devices, or systems with proprietary accessories. Training, demonstrations, troubleshooting, and availability of replacement components can affect long-term usability. A supplier that provides detailed technical support may offer greater practical value than one that only provides a lower purchase price.
Common Selection Mistakes
Choosing by Appearance Rather Than Function
A polished finish or attractive color does not demonstrate cutting efficiency, dimensional accuracy, or sterilization durability. Functional specifications and user experience should guide selection.
Using One Bur for Every Material
Different restorative materials respond differently to cutting and polishing. A system intended for one substrate may produce poor results or unnecessary surface damage on another. Material-specific kits are often designed to address these differences.
Ignoring the Provisional Stage
Inadequate provisional instruments can complicate the time between preparation and final placement. The provisional must be shaped, adjusted, removed, and replaced without compromising the prepared tooth or surrounding tissues.
Overlooking Moisture Control
Even a highly accurate inlay can be affected by contamination during adhesive cementation. Isolation tools should be selected before the procedure, not improvised after bonding has begun.
Failing to Inspect Instruments After Processing
Sterilization does not restore a damaged cutting edge or repair corrosion. Instruments should be inspected after processing and removed from service when they no longer meet clinical requirements.
Mixing Protocols From Different Systems
Adhesive systems, primers, cements, and restorative materials may have specific compatibility requirements. Combining steps from different product instructions without confirmation can create an avoidable source of uncertainty.
Buying a Kit Without Checking Its Contents
Some kits are marketed as complete systems but may omit essential items such as a particular bur size, a polishing point, a mixing tip, or a restoration holder. The practice should compare the included components with the actual clinical workflow before ordering.
Training and Team Coordination
Instrument effectiveness depends on the operator and the dental assistant as well as on the product itself. Team members should know the sequence of the appointment, the names and locations of the instruments, the material being used, and the timing requirements for cementation.
Short internal training sessions can cover tray setup, bur identification, isolation methods, cement handling, cleanup timing, and instrument inspection. A written setup guide can be especially useful when several clinicians use the same operatory. It may include photographs or standardized labels, provided that the information remains current.
New instruments should be introduced with a clear explanation of their indication and limitations. If an instrument requires a different cleaning process or special storage condition, that information should be integrated into the practice’s processing documentation.
Team communication is particularly important during adhesive cementation. The dentist may need the assistant to prepare a restoration, activate a timer, manage suction, pass a particular applicator, or maintain light access. A brief pre-cementation confirmation can prevent confusion about the material, restoration identity, shade, and sequence of surface treatment.
Evidence-Based Standards and Professional References
Instrument selection should be consistent with recognized infection-control and medical-device principles. The following sources provide useful reference points for dental practices:
- The Centers for Disease Control and Prevention’s dental infection-prevention guidance addresses instrument processing, environmental controls, hand hygiene, and safe clinical practice.
- The United States Food and Drug Administration provides regulatory information for medical devices and dental products marketed in the United States.
- International standards developed through ISO committees address dental hand instruments, rotary instruments, sterilization, and quality-management topics in relevant product categories.
- Manufacturer instructions for use provide the most specific information about a particular instrument, material, cement, bur, or powered device.
- National dental associations and public-health authorities may publish additional requirements for reprocessing, occupational safety, and clinical documentation.
These sources should be consulted directly by the dental practice when developing policies. General educational information cannot replace the current instructions supplied with the product or the requirements of the relevant jurisdiction.
Clinical research and continuing education can also help dentists evaluate new materials and instruments. Product claims should be interpreted carefully and compared with independent evidence when available. A marketing statement such as “universal,” “one-step,” or “multi-material” should not be treated as proof that a product is appropriate for every case.
Frequently Asked Questions
What is 인레이 기구?
인레이 기구 is a Korean term commonly used to describe dental instruments associated with inlay treatment. It may refer to preparation burs, hand instruments, try-in tools, cementation accessories, finishing systems, or a broader inlay procedure kit. The exact meaning depends on the supplier’s product description and the clinical context.
Is there one standard inlay instrument kit?
No. The contents vary according to the restoration material, clinical technique, digital or conventional workflow, and the dentist’s preferences. A practice treating ceramic inlays may need a different finishing and bonding setup from a practice primarily placing cast-metal inlays.
Which instruments are used to prepare a tooth for an inlay?
Preparation may involve diagnostic instruments, isolation accessories, rotary diamonds or carbide burs, and selected hand instruments. The specific shape and grit depend on the preparation design and restorative material. The dentist should use instruments according to training and manufacturer guidance.
Can the same polishing instrument be used on ceramic and composite inlays?
Some polishing products may be labeled for more than one material, but this should never be assumed. The practice should confirm the product’s stated compatibility. Ceramic, composite, hybrid ceramic, zirconia, and metal may require different abrasives or sequences.
How should inlay instruments be sterilized?
They should be cleaned, inspected, packaged, and sterilized according to the instrument manufacturer’s instructions and the dental facility’s infection-control policy. The correct cycle depends on the instrument’s materials and design. Disposable items should not be reprocessed unless the manufacturer specifically authorizes that use.
When should a dental bur be replaced?
A bur should be replaced when it is damaged, visibly worn, corroded, contaminated after processing, or no longer provides the required cutting performance. Practices may also use manufacturer recommendations and documented internal replacement criteria. Rotation alone is not evidence that a bur remains clinically suitable.
Are reusable hand instruments better than disposable instruments?
Neither category is universally better. Reusable instruments may support repeated clinical use when they are durable and processed correctly. Disposable components may simplify certain procedures or reduce reprocessing demands. The decision should consider clinical indication, infection prevention, environmental policy, cost, and manufacturer instructions.
What should a dentist check before cementing an inlay?
The dentist typically evaluates seating, margins, proximal contacts, occlusion, restoration integrity, shade when relevant, isolation, and the compatibility of the cementation protocol. The final checklist depends on the case and the restoration material.
Can a patient buy 인레이 기구 for home use?
Dental inlay instruments are intended for trained clinical personnel and are not suitable for home treatment. Attempting to prepare a tooth, adjust a restoration, or remove cement without professional care can cause injury, infection, tooth damage, or an incorrect bite.
Do expensive instruments always produce better restorations?
No. Instrument quality matters, but outcomes also depend on diagnosis, preparation design, material selection, isolation, operator skill, laboratory or digital accuracy, cementation, and follow-up. A moderately priced instrument that is appropriate, maintained, and used correctly may be more effective than an expensive instrument used outside its intended purpose.
What should be included in a supplier comparison?
A comparison should include the exact product specification, intended use, compatibility, included accessories, reprocessing requirements, warranty, service support, delivery conditions, replacement costs, and regulatory documentation. Price should be evaluated alongside these factors rather than considered in isolation.
Does a digital workflow eliminate the need for conventional instruments?
No. Digital scanning may reduce the need for impression trays and some mixing accessories, but examination instruments, burs, isolation devices, provisional tools, try-in accessories, cementation instruments, and polishing systems remain necessary. Digital equipment changes how information is recorded; it does not replace clinical preparation and restoration management.
What should be done if an inlay does not seat completely?
The restoration should not be forced into place. The clinician should investigate possible causes such as debris, proximal interference, internal binding, incorrect preparation geometry, distortion, or an error in the digital or conventional record. The appropriate correction depends on the clinical findings and the restoration material.
Practical Checklist for Dental Practices
Before ordering or revising an 인레이 기구 inventory, a practice can work through the following checklist:
- Identify the types of inlay materials used in the practice.
- Map the clinical workflow from diagnosis through follow-up.
- Separate instruments into preparation, impression or scanning, provisional, try-in, cementation, and polishing categories.
- Confirm compatibility with handpieces, curing lights, scanners, sterilizers, and cement systems.
- Review manufacturer instructions for use and reprocessing limitations.
- Define inspection and replacement criteria for reusable and rotary instruments.
- Train the clinical team on setup, handling, contamination control, and cleanup timing.
- Compare suppliers using total ownership considerations, not only the initial price.
- Document lot information and product records where traceability is required.
- Review the inventory periodically and remove items that are obsolete, damaged, or rarely used.
A practice may also benefit from conducting a periodic procedure review. The team can record which instruments were used, whether any item was missing, whether a bur was difficult to control, and whether additional cleanup or adjustment was required. This information can guide future purchasing more effectively than assumptions based on catalog descriptions alone.
Conclusion
인레이 기구 is best understood as a coordinated group of dental instruments rather than a single product category. The most reliable approach is to match each instrument to a specific clinical purpose, restorative material, and procedural stage. Preparation burs must support controlled tooth reduction; hand instruments should provide careful refinement; isolation accessories should support a clean working field; try-in tools should permit accurate evaluation; and finishing systems should be compatible with the restoration surface.
Successful selection also depends on factors beyond the working end of the instrument. Ergonomic design, handpiece compatibility, reprocessing requirements, supplier documentation, staff training, and replacement planning all influence clinical consistency. Dental practices should use current manufacturer instructions, recognized infection-prevention guidance, and applicable regulations when establishing their protocols.
For patients, the central message is straightforward: inlay treatment requires professional diagnosis and placement. For dental teams, the purchasing objective is equally clear—build a controlled, material-compatible, well-maintained instrument system that supports accuracy at every stage of care.
A thoughtful instrument system does not need to be unnecessarily large. It should be complete enough to support the practice’s routine cases, flexible enough to accommodate different restorative materials, and organized enough to promote consistent performance. When selection, training, maintenance, and clinical judgment are treated as one connected process, 인레이 기구 can contribute to safer appointments, more efficient workflows, and predictable indirect restorative care.