A Professional Guide to 인레이 기구
This guide explains how 인레이 기구, or dental inlay instruments, support the clinical workflow from tooth preparation and impression-taking to try-in, cementation, finishing, and maintenance. It distinguishes examination tools, rotary instruments, isolation devices, restorative accessories, and laboratory-related equipment, while discussing material compatibility, infection-control requirements, ergonomics, quality assurance, and purchasing considerations. The information is intended for dental professionals and procurement teams evaluating safe, efficient, and clinically appropriate instrument systems.
What 인레이 기구 Means in Clinical Dentistry
인레이 기구 refers to the instruments, accessories, and supporting devices used during the diagnosis, preparation, fabrication, try-in, placement, adjustment, finishing, and maintenance of dental inlays. In English-language dentistry, the term is commonly translated as dental inlay instruments, inlay preparation instruments, or inlay placement instruments. The exact meaning may vary between dental suppliers, educational resources, and clinical settings.
An inlay is an indirect restoration made outside the mouth and subsequently bonded or cemented into a prepared cavity within a tooth. It generally restores the internal portion of the tooth without covering one or more cusps. This distinguishes it from an onlay, which extends over at least one cusp, and from a full crown, which covers most or all of the clinical crown.
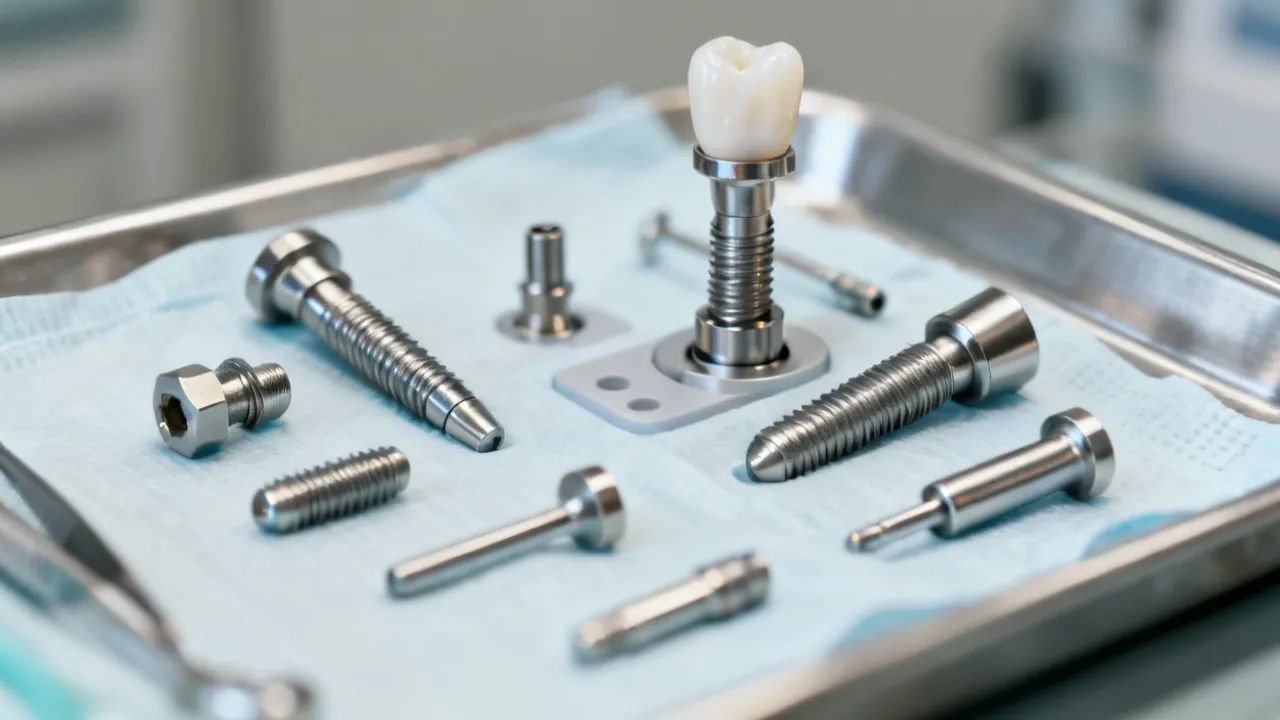
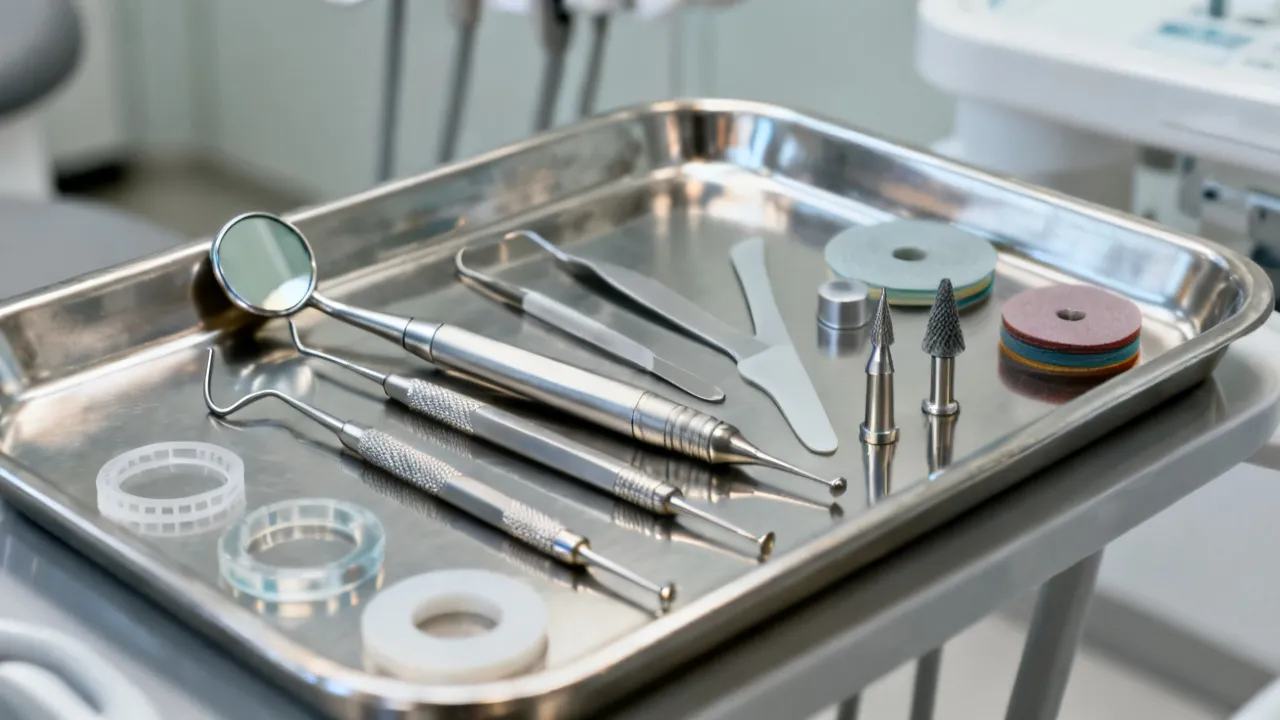
The term 인레이 기구 does not describe one universal instrument. Instead, it refers to a coordinated collection of products that may include diagnostic instruments, isolation devices, high-speed and low-speed burs, matrix accessories, impression or digital scanning equipment, try-in tools, cementation instruments, excess-removal devices, finishing burs, polishing systems, and sterilization containers.
For clinicians and purchasers, this distinction is important. A kit may look comprehensive in a catalog but still fail to support the actual clinical workflow. Conversely, a carefully selected set of standard dental instruments may perform extremely well when the components are compatible with the tooth, restoration material, adhesive system, and operator technique. The objective is not to purchase the largest or most expensive set. The objective is to create a predictable system that supports accurate preparation, controlled moisture management, reliable restoration seating, efficient cement cleanup, and durable finishing.
Why Instrument Selection Influences Inlay Outcomes
Indirect restorative treatment consists of a series of connected stages. The clinician must evaluate the tooth, determine whether an inlay is appropriate, remove defective tissue, create a preparation compatible with the selected restorative material, record the preparation accurately, inspect the fabricated restoration, manage the cementation procedure, and establish a satisfactory occlusion. A problem in one stage can create complications in the next.
For example, a worn bur may produce an irregular preparation or generate excess heat. An inadequate preparation can result in a restoration with insufficient thickness, an unsuitable path of insertion, or an unmanageable margin. A poorly fitting matrix may interfere with proximal anatomy during an associated buildup or temporary procedure. An unsuitable placement instrument may make it difficult to control a small ceramic restoration during try-in. A blunt or poorly shaped cement instrument may make excess removal unnecessarily difficult.
Instrument selection also affects operator comfort and procedural consistency. An instrument with a poorly balanced handle may increase wrist fatigue during a long posterior procedure. A bur with an inappropriate angle may limit visibility. A retraction instrument that is too bulky may obstruct the preparation margin. Even small issues become important when repeated across many procedures.
Clinical performance should therefore be considered together with durability, ergonomics, compatibility, cleaning requirements, replacement availability, and technical support. A product should be evaluated according to its intended use rather than its appearance or marketing description.
Principal Categories of 인레이 기구
Organizing 인레이 기구 by function helps clinicians prepare a procedure efficiently and helps practice managers build a rational inventory. The principal categories are shown below.
| Category | Typical Examples | Primary Purpose |
|---|---|---|
| Diagnostic instruments | Mouth mirror, explorer, periodontal probe, cotton pliers | Assessment, visualization, margin inspection, and transfer of small items |
| Isolation equipment | Rubber dam frame, clamp, punch, clamp forceps, suction, cheek retractor | Moisture control, soft-tissue management, access, and visibility |
| Preparation instruments | Diamond burs, carbide burs, depth-cutting burs, excavators | Removal of defective tissue and formation of the cavity preparation |
| Proximal accessories | Matrix bands, wedges, separators, sectional rings | Protection and management of proximal surfaces and contact areas |
| Recording accessories | Impression trays, retraction cord instruments, scan tips, bite-registration devices | Capturing the preparation and related anatomy |
| Try-in instruments | Restoration tweezers, placement instruments, articulating paper holders | Positioning and evaluating the restoration before final cementation |
| Cementation instruments | Cement spatulas, mixing pads, automix tips, microbrushes, applicators | Mixing, delivery, seating, curing, and excess removal |
| Finishing and polishing tools | Fine diamonds, carbide finishers, abrasive strips, discs, cups, points | Adjustment of margins, contacts, occlusion, and surface texture |
| Reprocessing equipment | Cassettes, ultrasonic cleaners, washer-disinfectors, sterilization pouches | Cleaning, inspection, sterilization, storage, and traceability |
Diagnostic Instruments Before Preparation
Inlay treatment begins with diagnosis rather than preparation. A mouth mirror provides indirect vision, illumination assistance, and soft-tissue retraction. An explorer can help the clinician assess surface irregularities, restoration margins, fissures, and areas of suspected defect. A periodontal probe helps evaluate probing depths, gingival conditions, and the relationship between the proposed restoration margin and the surrounding tissues.
Cotton pliers, also called college tweezers, are used to transfer cotton pellets, retraction materials, wedges, matrix components, and other small items. Their tips should align properly and close securely. A tweezer that fails to grasp small components can increase the risk of dropping, contaminating, or misplacing an accessory.
Diagnostic instruments should be examined regularly. A bent explorer, a loose mirror head, a corroded handle, or a probe with unreadable markings can reduce reliability. Instruments should be checked for pitting, sharp unintended edges, staining, and joint damage. These defects may affect both clinical use and cleaning.
Magnification, operating lights, and dental microscopes are not always categorized as 인레이 기구, but they are important supporting equipment. Improved visualization can assist with margin inspection, detection of unsupported enamel, removal of residual cement, and evaluation of surface defects. Magnification is most useful when combined with appropriate training and stable patient positioning.
Isolation and Moisture-Control Instruments
Moisture control is a central requirement for many inlay procedures, especially when adhesive cementation is used. Saliva, blood, crevicular fluid, and uncontrolled water can interfere with bonding, visibility, and material handling. The required degree of isolation varies according to the cement, adhesive system, restoration material, margin position, and patient-specific conditions.
A rubber dam setup may include the dam sheet, frame, punch, clamps, clamp forceps, dental floss, stabilizing cord, and lubricant. Clamps should be selected according to tooth anatomy and placed in a way that provides stability without unnecessary trauma to the gingiva. The dam should permit access to the preparation and allow the operator to see the cervical and proximal margins.
Other moisture-control devices include high-volume evacuation tips, saliva ejectors, cotton rolls, dry angles, cheek retractors, absorbent pads, retraction cords, and gingival displacement pastes. These products serve different purposes. A saliva ejector may remove pooled fluid, but it does not necessarily provide the level of field control required for adhesive procedures. A cheek retractor improves access but may not adequately control sulcular fluid.
Retraction cord instruments are useful when a margin approaches or slightly enters the gingival sulcus. The working end should allow the clinician to place the cord gently and accurately. Cord packers may be straight, angled, or curved for different regions of the mouth. Excessive force should be avoided because tissue trauma can lead to bleeding and make moisture control more difficult.
The isolation setup should be prepared before tooth preparation begins. If the clinician waits until the restoration is ready for cementation, there may be insufficient time to correct tissue management problems. A well-planned setup also reduces unnecessary interruptions and allows the assistant to anticipate the next stage.
Preparation Burs and Rotary Instruments
Rotary preparation instruments are among the most important components of an inlay system. They may be manufactured from tungsten carbide, diamond-coated materials, or other specialized abrasive surfaces. Bur behavior is influenced by shape, grit, diameter, cutting design, coating quality, handpiece compatibility, speed, pressure, and water cooling.
Common shapes include round, pear, fissure, tapered, chamfer, football, wheel, and finishing forms. A tapered bur can assist in establishing the intended path of insertion. A fissure bur may provide controlled wall development. A fine-grit diamond may refine the margin. A round bur may be used for caries removal or localized excavation. The specific sequence depends on the preparation design, tooth anatomy, lesion extent, and restorative material.
It is useful to distinguish four stages of rotary work: removal of defective or unsupported tissue, development of the preparation form, refinement of internal surfaces and margins, and adjustment or finishing of the restoration. Each stage may require a different instrument. Using one bur for all stages can be convenient, but it may reduce precision and accelerate wear.
High-speed burs should be used with water cooling when indicated by the handpiece, bur, or clinical technique. Heat is affected by cutting pressure, speed, water flow, bur sharpness, and the duration of continuous contact. If a bur is worn, the operator may unconsciously apply more pressure, increasing heat and reducing tactile control.
Before use, the bur should be checked for damage, contamination, deformation, and secure placement in the handpiece. The shank must match the handpiece connection. A bur that is not fully seated or that has an incompatible shank may produce vibration, runout, or detachment.
Low-speed instruments are often used for temporary material removal, finishing, polishing, or controlled adjustment. They should be used with light pressure and appropriate speed. Excessive pressure can remove more tooth structure or restorative material than intended and may create heat.
Preparation Design and Instrument Geometry
The instrument sequence must support the principles of the intended preparation. An inlay preparation typically requires a defined path of insertion, adequate space for the restorative material, accessible margins, preservation of sound tooth structure where possible, and removal of unsupported enamel or compromised tissue.
Preparation geometry varies according to whether the restoration is made from glass-ceramic, zirconia, indirect composite, hybrid ceramic, or metal. Some materials require particular minimum thicknesses, internal forms, margin designs, and occlusal clearances. The clinician should consult the specific restorative material instructions instead of applying one generic preparation pattern to every case.
Instrument geometry can guide the formation of walls and line angles, but it cannot replace clinical judgment. A tapered bur may create a suitable wall angle, yet the clinician must still determine whether the path of insertion is clear and whether the remaining tooth structure is adequately supported.
Sharp internal angles may create stress concentration in some brittle materials. Excessive rounding, however, may make the preparation difficult to scan or reproduce. The appropriate balance depends on the restorative system and laboratory or chairside CAD/CAM workflow.
Preparation instruments should be used conservatively around margins. A margin that is too thin, irregular, chipped, or hidden by tissue can create challenges during scanning, impression-making, and cement cleanup. Finishing instruments should be selected to refine rather than unnecessarily enlarge the preparation.
Proximal Management and Matrix Accessories
Proximal accessories can be important when the inlay procedure includes a core buildup, temporary restoration, proximal repair, or management of an adjacent surface. Matrix bands, wedges, separators, and sectional rings help control contour and protect neighboring teeth.
A matrix band should be sufficiently stable to resist collapse during placement of restorative material, while still being adaptable to the cervical and proximal anatomy. Wedges can improve adaptation at the gingival margin, provide slight separation, and reduce the risk of a proximal overhang. Sectional systems may improve contact formation in appropriate situations but require correct placement and sufficient access.
Placement instruments for wedges and rings should give the operator control without distorting the accessory. Excessive force can injure the papilla, deform the matrix, or create a contour that is difficult to correct. The selected accessory should match the tooth size, contact tightness, cervical anatomy, and restorative step being performed.
When the final inlay is being tried in, the clinician should also inspect the adjacent contact. A contact that is too tight may prevent complete seating. A contact that is too open may affect food impaction and patient comfort. Contact adjustment should be conservative and performed with a suitable abrasive strip or finishing instrument.
Conventional Impressions and Digital Scanning
After preparation, the restoration must be fabricated from an accurate record. A conventional workflow may use impression trays, tray adhesive, elastomeric materials, mixing devices, retraction instruments, and bite-registration materials. A digital workflow uses an intraoral scanner, approved scanning tips, software, retraction aids, and a controlled scanning sequence.
For conventional impressions, tray rigidity is important. The tray must capture the prepared tooth, adjacent teeth, relevant soft tissues, and opposing relationship as required. The impression material should be mixed and seated within the manufacturer’s working time. Movement during setting can produce distortion that may not be obvious until the restoration is tried in.
Retraction cord or paste may be needed to expose the margin. The cord instrument should place the material without shredding it or causing unnecessary tissue trauma. Bleeding must be controlled before recording the margin because blood and fluid can obscure detail and interfere with some impression materials.
Digital scanning requires a visible, dry, and accessible preparation. The scanner should be moved according to the manufacturer’s recommended technique, and the operator should verify that the software has captured the margin rather than assuming that a complete arch scan is automatically accurate. Saliva, blood, tongue movement, and reflective surfaces can reduce scan reliability.
Scanner tips must be cleaned, disinfected, or sterilized according to the scanner manufacturer’s instructions. Reusable and single-use tips should not be treated as interchangeable. The practice should verify the approved processing method, maximum number of uses if stated, and any limitations related to heat or chemical exposure.
Try-In Instruments and Restoration Handling
Try-in is a critical stage for evaluating the restoration before final cementation. The clinician should inspect seating, marginal adaptation, proximal contacts, contour, occlusal relationship, shade when relevant, and the appearance of the restoration under different lighting conditions.
Restoration tweezers and placement instruments should hold the inlay securely without damaging delicate surfaces. Smooth working ends may be preferred for fragile ceramic, while a slightly textured design may improve grip. The instrument should permit controlled positioning in posterior regions where direct vision is limited.
Try-in pastes or other water-soluble media may be used in selected workflows to evaluate shade or seating. They must be removed thoroughly before final bonding. Microbrushes and applicators should be compatible with the material and should not shed fibers into the preparation.
If the restoration does not seat completely, the operator should avoid immediately grinding the occlusal surface. Possible causes include debris, a tight proximal contact, internal interference, an inaccurate preparation, a distorted impression, or an inaccurate digital design. The cause should be identified before irreversible adjustment is performed.
Cementation Instruments and Excess Removal
Cementation instruments support mixing, delivery, seating, stabilization, curing, and cleanup. Depending on the cement, the setup may include a cement spatula, mixing pad, automix syringe, dispensing tip, intraoral tip, microbrushes, primer applicators, seating instruments, dental floss, and excess-removal tools.
Manual cement spatulas should have a smooth, nonreactive working surface and a handle that allows controlled manipulation. The mixing technique should follow the cement instructions, including the recommended mixing time and method. Excessive incorporation of air can alter handling and may create voids.
Automix systems can simplify proportioning, but the operator must confirm that the mixing tip is fully engaged and that the material has reached a uniform consistency before intraoral delivery. The first portion of material may need to be discarded according to the product instructions because it may not be adequately mixed.
Seating pressure should be controlled and maintained during the relevant working or curing period. The restoration must not be displaced while excess is being removed. The timing of cleanup varies with cement chemistry, light access, restoration opacity, temperature, and manufacturer recommendations.
Interproximal excess is commonly managed with dental floss. The floss should be guided through the contact carefully and moved in a way that removes material without pulling the restoration out of position. Floss should not be snapped aggressively into the gingiva.
Microbrushes, foam pellets, brushes, and specialized instruments may help remove marginal excess. Scalers can be useful after the cement has reached an appropriate consistency, but they must be used cautiously around ceramic margins, enamel, and gingival tissues.
For light-activated or dual-cure systems, the curing unit is an important supporting device. The operator should verify wavelength compatibility, output, tip condition, distance, angulation, and exposure time. The presence of a ceramic restoration may reduce light transmission, making adherence to the cement manufacturer’s protocol especially important.
Finishing, Occlusal Adjustment, and Polishing
Finishing after cementation focuses on the margins, proximal contacts, occlusion, and surface texture. Common tools include fine diamond burs, carbide finishers, abrasive strips, polishing discs, rubber cups, points, wheels, and material-specific polishing systems.
Before making an occlusal adjustment, complete seating should be confirmed. An inlay that is not fully seated may appear high even when the occlusal anatomy is correct. The clinician should evaluate proximal contacts, internal fit, residual cement, and preparation geometry before removing restorative material.
Articulating paper can help identify contact points, but marks should be interpreted within the overall occlusal relationship. Static closure and excursive movements may reveal different interferences. The thickness and marking characteristics of the paper can influence the apparent size of a mark.
Adjustment instruments should be selected according to the restoration material. Glass-ceramic, zirconia, indirect composite, hybrid ceramic, and metal require different abrasive strategies. After grinding, many ceramic materials require polishing with a compatible sequence. Leaving a rough adjusted surface may be undesirable for patient comfort and plaque control.
Interproximal strips should be used conservatively. Excessive reduction can create an open contact, alter the emergence profile, or damage adjacent enamel. The operator should stabilize the restoration and use controlled strokes, especially when the contact is already close to the intended dimension.
Polishing is both functional and aesthetic. A smooth surface may improve comfort and reduce irregularities that retain plaque. The final result should be inspected under adequate light and, when available, magnification. Margins should feel continuous to the explorer without relying solely on visual inspection.
Material Compatibility
Material compatibility is a major purchasing and clinical consideration. Instruments that work well on one restoration type may be inefficient or damaging when used on another.
| Restoration Material | Instrument Considerations | Potential Concern |
|---|---|---|
| Glass-ceramic | Use compatible diamond adjustment and ceramic polishing systems | Rough or inadequately polished adjusted areas may affect surface quality |
| Zirconia | Use suitable diamonds and zirconia polishing instruments when adjustment is needed | Heavy grinding may create surface irregularities or unnecessary material removal |
| Indirect composite | Use composite-compatible finishing burs, discs, and polishers | Excessive pressure and heat may affect the surface |
| Hybrid ceramic | Follow the product-specific finishing and polishing sequence | A generic ceramic or composite sequence may not produce the intended result |
| Metal alloy | Use alloy-compatible carbide or abrasive instruments | Cross-contamination and over-adjustment should be avoided |
These categories are general. The specific instructions for the restoration, cement, primer, bonding agent, and polishing system should take priority. Suppliers should clearly identify the intended material range and any restrictions.
Ergonomics and Instrument Design
Instrument design influences precision, fatigue, and infection-control efficiency. Handles may be round, octagonal, textured, silicone-coated, hollow, or solid. The most suitable style depends on the operator’s grip, glove use, procedure duration, access requirements, and personal preference.
A handle that is too narrow may cause excessive finger pressure. A handle that is too large may reduce tactile feedback. Balance is particularly relevant for instruments used in posterior areas, where the operator may need to maintain a stable position for an extended period.
Angled shanks can improve access to posterior preparations but may obscure the working end if the operator is unfamiliar with the design. Mirror positioning, patient head position, chair height, and operator posture should be considered together with instrument geometry.
Surface finish should be smooth enough to permit effective cleaning while still providing a secure grip. Deep grooves, unnecessary joints, and poorly finished welds may make inspection and cleaning more difficult. A simple design is not automatically better, but unnecessary complexity should be justified by a clear clinical benefit.
Infection Prevention and Reprocessing
Reusable 인레이 기구 must be processed according to applicable infection-prevention standards and the manufacturer’s validated instructions. The practice should follow the requirements of relevant health authorities, professional organizations, and local regulations.
Reprocessing generally includes point-of-use containment, safe transport, cleaning, inspection, packaging when required, sterilization, drying, and storage. Cleaning is essential because organic debris can shield microorganisms from the sterilization process. Passing an instrument through a sterilizer does not compensate for inadequate cleaning.
Ultrasonic cleaners and washer-disinfectors can improve consistency, but they must be loaded correctly. Hinged instruments may need to be opened. Small burs and accessories should be secured so they do not damage one another or become hidden from the cleaning action. Detergent concentration, water quality, cycle duration, and equipment maintenance should follow the relevant instructions.
Instrument cassettes can simplify organization and reduce handling injuries. However, cassettes should not be overloaded, and their design must permit effective cleaning and sterilization. Sharp burs should be protected from contact with other instruments.
Inspection should include the working tip, cutting surface, hinge, joint, coating, handle, and shank. Instruments with corrosion, cracks, deformation, excessive wear, or uncertain cleanliness should be removed from service. Records of sterilizer monitoring, maintenance, and instrument-related incidents should be maintained according to practice policy.
Quality Indicators When Buying 인레이 기구
Purchasing should begin with a clinical workflow analysis. The practice can list each stage of an inlay procedure and identify the instruments required for that stage. This prevents buying duplicate items while overlooking essential accessories.
- Intended use: Confirm whether the item is for diagnosis, preparation, cementation, adjustment, polishing, or laboratory support.
- Material compatibility: Verify whether it is suitable for enamel, dentin, ceramic, composite, zirconia, metal, or another material.
- Handpiece compatibility: Check shank type, chuck requirements, speed range, water-cooling needs, and device limitations.
- Reprocessing requirements: Determine whether the item is reusable, single-use, heat tolerant, or restricted to a specific cleaning process.
- Ergonomics: Assess balance, handle size, working angle, visibility, and glove grip.
- Traceability: Look for catalog numbers, lot information, technical sheets, and clear instructions.
- Replacement availability: Confirm that frequently used burs, tips, strips, and accessories can be reordered consistently.
- Regulatory documentation: Review the classification and required documentation for the market where the product will be used.
- Training support: Determine whether the supplier provides usage, maintenance, and reprocessing guidance.
Price should be evaluated as part of total cost rather than as an isolated figure. A low-cost bur that wears rapidly may increase procedure time and replacement frequency. A premium product may be worthwhile when it provides demonstrable durability, improved access, or reliable support, but a higher price alone does not prove superior performance.
Building a Practical Inlay Instrument Set
A practical set should follow the clinical sequence. The following framework can be adapted to the practice’s treatment style and restorative materials.
Assessment and Planning
Prepare the mouth mirror, explorer, periodontal probe, cotton pliers, imaging access, illumination, and any magnification system. Include diagnostic accessories needed to evaluate existing restorations, caries, cracks, periodontal conditions, and occlusal relationships.
Isolation
Prepare the rubber dam or alternative isolation system, clamps, frame, punch, clamp forceps, floss, suction, cheek retraction, cotton products, and gingival displacement materials where indicated. Confirm that the clamp or retractor is suitable for the tooth before treatment begins.
Preparation
Organize burs by purpose. Separate gross reduction burs, caries-removal instruments, preparation-form burs, margin-finishing burs, and restoration-adjustment instruments. A clearly arranged tray makes it easier for the assistant to identify the next item and reduces selection errors.
Recording
For conventional impressions, prepare the tray, adhesive, material, mixing accessories, syringe, retraction instruments, and bite-registration materials. For digital scanning, prepare the scanner, approved tip, retraction aids, suction, and the equipment required for post-use processing.
Try-In and Cementation
Prepare restoration tweezers, try-in materials, seating instruments, cement delivery accessories, microbrushes, primer applicators, floss, curing equipment if required, and excess-removal tools. Keep materials organized to minimize contamination and interruptions.
Finishing and Follow-Up
Prepare articulating paper, holders, interproximal strips, material-specific adjustment burs, polishing systems, and inspection instruments. After the procedure, document the restoration material, cement system, adjustments performed, and any products requiring replacement.
Common Errors in Instrument Use
One common error is using a bur after it has lost effective cutting ability. The bur may look intact, but reduced efficiency can lead to increased pressure, heat, vibration, and operator fatigue. Practices should establish replacement criteria based on visible wear, performance, manufacturer guidance, and procedure type.
Another error is using the same finishing instrument across unrelated restorative materials. A product intended for metal may not provide an appropriate surface on ceramic. Abrasive debris can also be transferred between workflows. Separate storage containers or color-coded organization can reduce cross-use.
Inadequate moisture control is another avoidable problem. Isolation should be assessed before adhesive or cementation procedures begin. If the field cannot be maintained, the clinician should address the cause rather than depending on repeated surface cleaning to compensate for contamination.
Improper reprocessing can damage instruments and create infection-prevention risks. Instruments may be loaded while still contaminated, placed too closely together, processed with unsuitable chemicals, or stored while damp. These issues should be addressed through written protocols, staff training, and routine audits.
Premature occlusal adjustment is also important. A restoration that is not completely seated may appear high. The correct sequence is to check seating, proximal contacts, residual cement, internal fit, and preparation geometry before grinding the occlusal anatomy.
Supplier Documentation and Technical Questions
When evaluating a supplier, request information that answers practical clinical and maintenance questions. Documentation should identify the product name, catalog number, intended use, materials, dimensions, compatibility, reprocessing instructions, warnings, and storage requirements.
Useful questions include:
- Is the item reusable, single-use, or limited to a defined number of procedures?
- What cleaning, disinfection, and sterilization methods have been validated?
- Is the working end replaceable, sharpenable, or repairable?
- Which handpiece connections and dimensions are supported?
- Is the instrument appropriate for the intended restorative materials?
- What inspection findings require the product to be discarded?
- Are replacement items regularly stocked?
- Are there restrictions regarding ultrasonic cleaning, chemical exposure, or automated washing?
- Does the supplier provide technical training or procedural instructions?
Product photographs are not sufficient for procurement. They may not reveal the actual tip size, shank configuration, working angle, surface coating, or handle dimensions. Technical data and controlled clinical evaluation are more reliable.
Safe-Use Conditions and Clinical Requirements
Safe and effective use of 인레이 기구 requires appropriate training and a compatible clinical environment. The clinician should understand indirect restorative principles, the selected restoration material, the cementation system, and the reprocessing requirements for reusable items.
- Clinical suitability: The tooth and treatment plan must be appropriate for an inlay restoration.
- Instrument compatibility: Burs, hand instruments, accessories, and powered devices must match the intended task.
- Moisture control: The field must be maintained at the level required by the bonding and cementation protocol.
- Visibility and access: Lighting, retraction, magnification, and patient positioning should support accurate work.
- Equipment maintenance: Handpieces, suction, curing units, scanners, and sterilizers should be maintained according to their instructions.
- Material control: Cement, primers, abrasives, and polishing products should be stored correctly and used within their stated period.
- Reprocessing compliance: Reusable instruments must be cleaned, inspected, sterilized, and stored properly.
- Documentation: The practice should retain product instructions, maintenance records, and relevant quality-control documentation.
These requirements are especially relevant to adhesive dentistry. Small differences in contamination control, surface treatment, curing, and cement handling may affect the procedure. Instruments support the protocol, but they do not replace correct diagnosis, preparation, or clinical judgment.
Step-by-Step Workflow for Using 인레이 기구
Step 1: Review the Case
Confirm the diagnosis, tooth anatomy, existing restorations, periodontal condition, occlusal demands, and planned restorative material. Review diagnostic images and records as indicated. Select the instrument sequence according to the preparation design rather than using the same set automatically for every tooth.
Step 2: Inspect and Organize the Instruments
Check the working ends, handles, joints, bur shanks, accessories, and equipment. Remove damaged or visibly contaminated items. Arrange instruments in order of use and verify that the handpiece, suction, illumination, scanner, impression materials, and curing unit are ready.
Step 3: Establish Isolation
Place the selected isolation system and confirm that the preparation area is visible and accessible. Manage the gingiva and proximal tissues as required. Do not begin adhesive steps until the field is adequately controlled.
Step 4: Prepare the Tooth
Use appropriate burs with controlled pressure and cooling. Remove compromised tissue while preserving sound structure when clinically appropriate. Establish the intended path of insertion and material-specific geometry. Refine the margins with suitable finishing instruments.
Step 5: Inspect the Preparation
Use a mirror, explorer, air, and magnification where available. Check for unsupported enamel, residual debris, irregular margins, undesirable undercuts, and inadequate clearance. Make corrections conservatively and reassess the preparation after each significant change.
Step 6: Record the Preparation
Use a conventional impression or digital scan according to the planned workflow. Capture the prepared tooth, adjacent teeth, opposing arch, and occlusal relationship as needed. Maintain retraction and moisture control until the record is complete.
Step 7: Evaluate the Inlay at Try-In
Handle the restoration with a suitable placement instrument. Check complete seating, proximal contacts, marginal adaptation, contour, occlusion, and appearance where relevant. If seating is incomplete, investigate the cause before making irreversible adjustments.
Step 8: Perform Cementation
Prepare the tooth, restoration, and cement according to the selected system’s instructions. Use compatible primers, applicators, mixing devices, and delivery tips. Seat the restoration with controlled pressure and maintain its position during setting or curing.
Step 9: Remove Excess Cement
Use floss, microbrushes, brushes, and suitable instruments at the correct stage of cement setting. Protect the gingiva and restoration margins. Check proximal and subgingival areas carefully, because retained cement may be difficult for the patient to clean.
Step 10: Finish and Verify
Evaluate occlusion in closure and movement. Use material-specific adjustment and polishing systems only where needed. Inspect margins, contacts, and surface texture. Provide appropriate aftercare instructions and document the procedure, materials, and adjustments.
Storage, Maintenance, and Inventory Management
Storage affects instrument longevity and chairside efficiency. Sharp burs should be protected from contact with other metal objects. Small accessories should be placed in labeled compartments. Instruments with special orientation requirements should be loaded into cassettes accordingly.
Corrosion, discoloration, and pitting may result from unsuitable water, chemical exposure, inadequate drying, or incompatible processing conditions. The cause should be investigated rather than simply replacing affected items. Manufacturers may specify limits for detergents, lubricants, water quality, and sterilization cycles.
Rotary instruments should be examined after processing for flattened cutting surfaces, missing abrasive particles, cracks, distortion, or debris. Hand instruments should be checked for loose joints, damaged tips, and handle defects. A written inspection checklist helps make decisions consistent among clinicians and assistants.
Inventory management is equally important. Track frequently used burs, cementation tips, matrices, wedges, polishing points, scan tips, and disposable applicators. Maintain enough stock for routine and urgent procedures, while avoiding excessive inventory that may expire before use. Product shelf life, storage temperature, and light exposure should be monitored where relevant.
How an Expert Evaluates an Inlay Kit
An experienced evaluator usually asks whether the kit covers the actual clinical sequence, whether each item can be cleaned and maintained reliably, and whether the set improves control without introducing unnecessary complexity.
A kit containing numerous duplicate items may be less useful than a smaller, logically organized collection. A practice that performs different types of indirect restorations may benefit from modular organization: a diagnostic and isolation module, a preparation module, a cementation module, and separate finishing modules for ceramic, composite, zirconia, or metal.
Instruments should be tested in realistic conditions. Posterior access, glove grip, handpiece balance, visibility, and cement cleanup are difficult to judge from a product image. A practice can conduct a short evaluation period in which clinicians record ease of use, cutting performance, cleaning difficulty, durability, and replacement needs.
Training is another important consideration. Suppliers that provide clear technical documents and reprocessing guidance can reduce misuse. Nevertheless, the dental practice and qualified clinical professionals remain responsible for selecting and using instruments appropriately.
Standards, Evidence, and Responsible Interpretation
Information about 인레이 기구 should be interpreted through established dental, regulatory, and infection-control principles. Health authorities and professional organizations publish guidance on instrument classification, cleaning, sterilization, and storage. International and national standards may address dental instrument dimensions, materials, manufacturing quality, and performance.
A standard may establish a safety or performance requirement without prescribing one clinical technique. Regulatory clearance also does not mean that a product is superior to every alternative. Practices should combine manufacturer instructions, professional education, clinical experience, technical documentation, and local requirements.
When reviewing claims about cutting speed, service life, treatment time, or polishing quality, the purchaser should ask how the claim was tested. Relevant factors include the test material, operator pressure, handpiece, speed, cooling, number of procedures, comparator product, and evaluation method. Unsupported claims should not determine procurement decisions.
Frequently Asked Questions
What does 인레이 기구 mean?
인레이 기구 generally means dental inlay instruments. It is a broad term covering tools used for diagnosis, isolation, preparation, scanning or impression-taking, try-in, cementation, finishing, polishing, and reprocessing. It does not necessarily refer to one standardized kit.
Is a special inlay kit required for every case?
No. Many procedures can be completed with standard dental instruments that are appropriate for the intended task. Specialized items may improve access, efficiency, or material compatibility, but selection should reflect the tooth, restoration, cementation method, and operator’s clinical protocol.
Which instruments are essential for preparation?
A typical preparation setup includes diagnostic instruments, a compatible handpiece, appropriate burs, cooling where indicated, suction, isolation equipment, and instruments for inspecting and refining margins. The precise bur sequence depends on the preparation and restorative material.
Can one finishing bur be used on all inlay materials?
Not automatically. Ceramic, zirconia, indirect composite, hybrid ceramic, and metal may require different cutting and polishing instruments. The manufacturer’s instructions for the restoration material should be followed.
Why is isolation included in an inlay setup?
Isolation improves visibility and helps control saliva, blood, and other fluids. It is especially important when adhesive cementation is used. The appropriate isolation method depends on the margin position, tooth anatomy, patient factors, and cementation system.
How should reusable 인레이 기구 be sterilized?
Reusable instruments should be cleaned, inspected, packaged when required, sterilized, dried, and stored according to validated manufacturer instructions and applicable local regulations. The correct method varies according to the instrument’s materials and construction.
When should a bur be replaced?
A bur should be replaced when it is damaged, worn, corroded, distorted, contaminated beyond effective cleaning, or no longer cuts as intended. Manufacturer guidance and the practice’s inspection criteria should also be considered.
Are manual cement spatulas useful with automix cement?
They may be useful for products requiring manual mixing or for compatible laboratory and clinical steps. With automix systems, the dispensing syringe and mixing tip should be used according to the product instructions.
What should be assessed during try-in?
Assess complete seating, marginal adaptation, proximal contacts, contour, occlusion, and appearance where relevant. If seating is incomplete, investigate internal fit, contacts, preparation geometry, debris, and the accuracy of the impression or digital scan before grinding.
Does a higher price guarantee better performance?
No. Price does not by itself establish clinical superiority. Design, material quality, compatibility, durability, ergonomics, reprocessing instructions, replacement support, and appropriate technique are more meaningful indicators.
How can a practice reduce instrument-related delays?
Organize instruments by procedure stage, separate material-specific accessories, use setup checklists, monitor inventory, inspect instruments before sterilization, and test scanning, suction, handpiece, and curing equipment before the appointment.
Why is supplier documentation important?
Documentation helps confirm intended use, device classification, compatibility, safety information, and reprocessing requirements. It does not replace clinical evaluation, but it provides a foundation for responsible procurement and quality assurance.
Final Assessment
Choosing 인레이 기구 is best understood as a clinical workflow and quality-management decision rather than a simple product purchase. The essential requirements are accurate diagnosis, controlled preparation, dependable isolation, precise recording, safe restoration handling, predictable cementation, effective excess removal, conservative adjustment, appropriate polishing, and validated reprocessing.
A well-designed system should be practical, inspectable, ergonomic, replaceable, and compatible with the materials used in the practice. Clinicians and procurement teams should compare technical documentation, confirm infection-control requirements, evaluate the instruments under realistic conditions, and train staff in their correct use.
By connecting every instrument to a defined procedural purpose, dental teams can improve consistency and efficiency while reducing unnecessary equipment, avoidable damage, cross-contamination, and unsupported purchasing decisions. The most valuable 인레이 기구 set is not the one with the greatest number of components, but the one that allows the clinical team to perform each stage of inlay treatment with control, clarity, and repeatable quality.