Understanding Dental Inlay Instruments
This guide explains 인레이 기구, the specialized dental instruments used to prepare, shape, place, adjust, and finish indirect inlay restorations. It reviews instrument categories, clinical functions, material considerations, infection-control requirements, workflow, maintenance, and selection criteria. Dental inlay treatment generally combines tooth preparation, impression or digital scanning, laboratory or chairside fabrication, adhesive placement, occlusal verification, and polishing. Instrument choice should reflect the restorative material, clinical technique, operator training, and applicable dental standards.
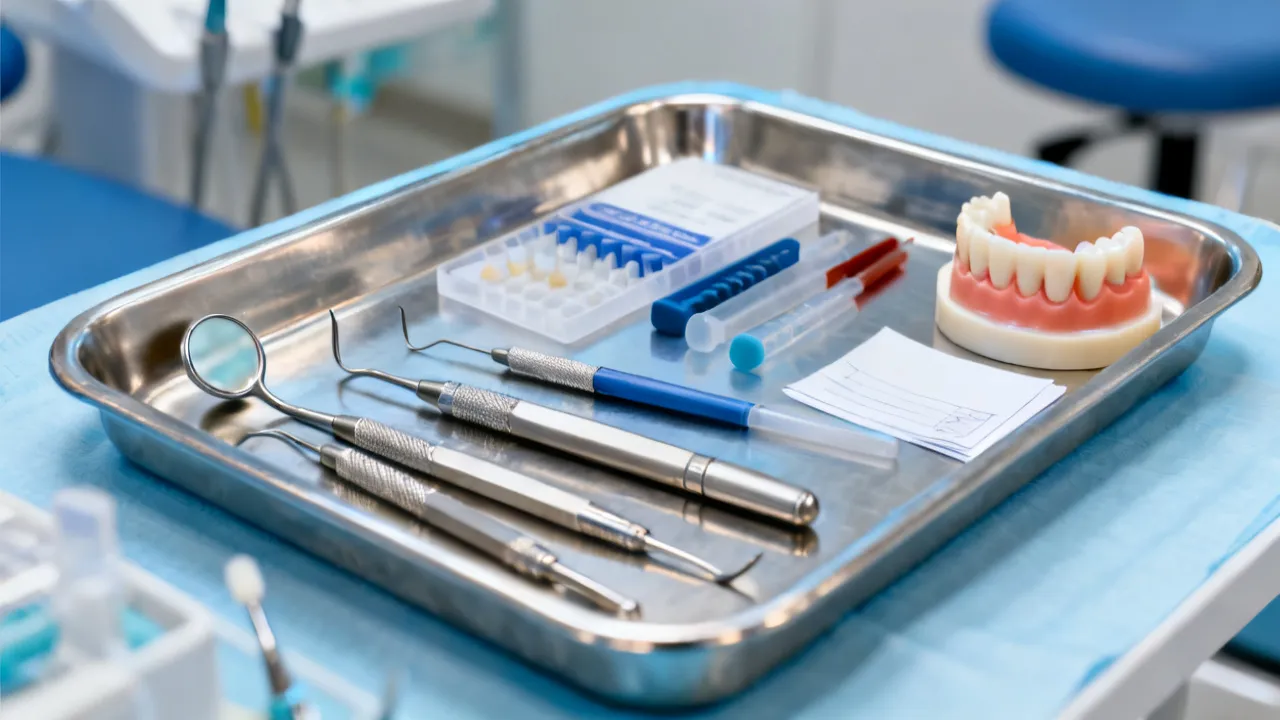
What 인레이 기구 Means in Modern Dentistry
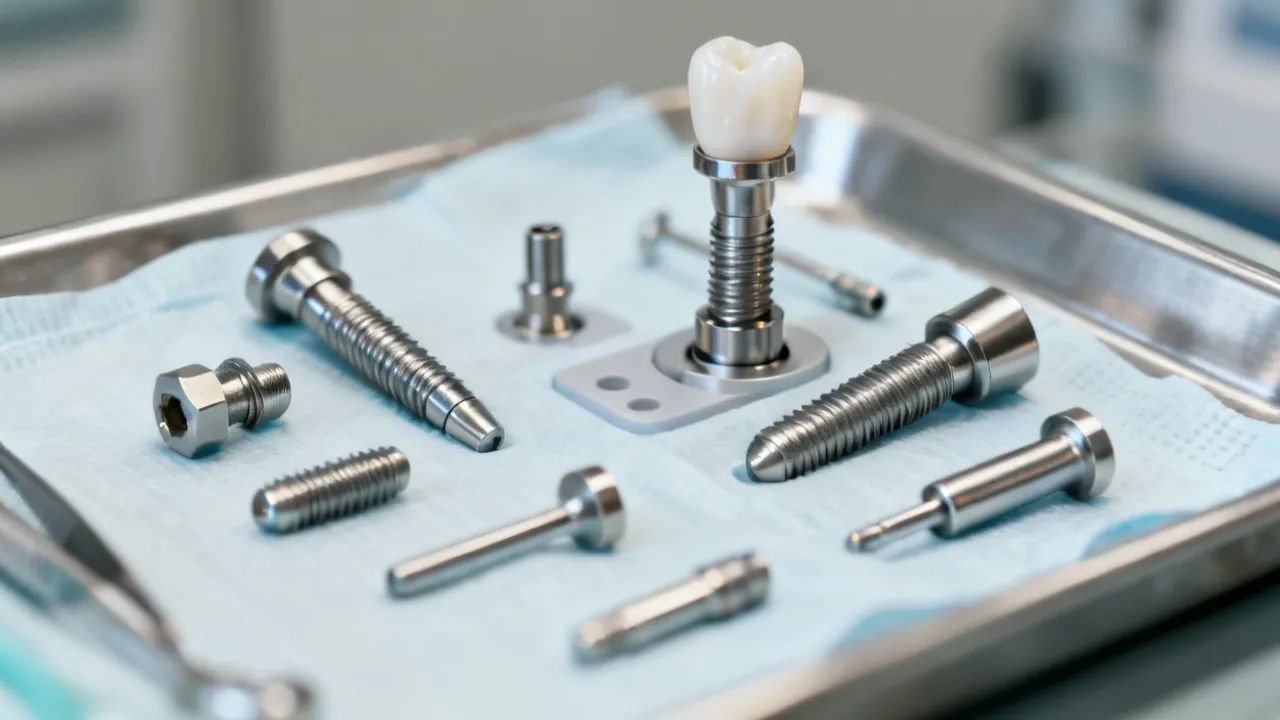
인레이 기구 refers to the instruments, devices, accessories, and supporting systems used during the diagnosis, preparation, fabrication, try-in, cementation, adjustment, finishing, and maintenance of dental inlays. In English-language clinical settings, the term may be translated as dental inlay instruments, indirect restorative instruments, operative dentistry tools, or instruments for indirect restorations.
A dental inlay is an indirect restoration designed to fit within the cusps of a prepared tooth. It is generally used when a direct filling is insufficient but a full-coverage crown is not necessary. Unlike a direct filling, which is placed and shaped inside the tooth during the appointment, an inlay is fabricated outside the mouth. The restoration may be produced in a dental laboratory or created through a chairside digital workflow using an intraoral scanner, computer-aided design software, and a milling or pressing system.
Inlays may be made from ceramic, composite resin, gold alloy, or another dental material approved for indirect restorative use. Each material has its own requirements for preparation geometry, minimum thickness, surface treatment, adjustment, polishing, and cementation. As a result, the instruments used for a ceramic inlay may not be the same as those selected for a metal or composite inlay.
From an industry and clinical perspective, no single instrument defines a successful inlay procedure. Results depend on the relationship between the handpiece, burs, isolation system, impression or scanning equipment, restorative material, adhesive system, cement, curing light, and finishing instruments. A well-designed instrument set should support visibility, tissue protection, conservative preparation, contamination control, accurate records, predictable seating, and repeatable finishing.
Clinicians should distinguish between instruments intended for tooth preparation and those used for restoration placement. A preparation bur removes enamel or dentin and establishes the geometry required by the selected restorative material. A condenser, placement instrument, or seating device performs a different function. Confusing these roles can lead to excessive removal of tooth structure, marginal damage, poor seating, fractured restoration edges, or unnecessary occlusal adjustment.
The Clinical Purpose of an Inlay
Inlays are often selected when the central portion of a posterior tooth requires substantial restoration but the cusps and external tooth structure remain sufficiently strong to avoid full coverage. They can be useful for replacing large defective restorations, treating moderate amounts of caries, restoring fractured areas, or improving the form and function of a tooth that cannot be predictably restored with a small direct filling.
The decision to use an inlay depends on many factors. The dentist must evaluate the amount of remaining enamel and dentin, the condition of the cusps, the presence of cracks, the depth and width of the cavity, occlusal loading, periodontal health, pulpal status, moisture control, and the patient’s ability to maintain oral hygiene. A restoration that appears suitable from an anatomical perspective may not be appropriate if the margin cannot be isolated or if the tooth has an unfavorable crack pattern.
Because an inlay is fabricated separately, the clinical procedure is divided into several stages. These stages must be coordinated carefully. A minor error made during preparation may be transferred to the impression, digital scan, laboratory design, or final seating procedure. For example, an unclear margin can result in an inaccurate restoration, while insufficient occlusal clearance may produce a restoration that requires excessive adjustment.
Why Instrument Selection Matters
Inlay treatment requires greater procedural coordination than many routine direct restorations. The operator must preserve sound tooth structure while creating a preparation that allows the restoration to seat along a defined path of insertion. The preparation must provide sufficient thickness for the restorative material, adequate clearance from opposing teeth, smooth internal geometry, and margins that can be accurately recorded and finished.
Instrument selection affects several clinical variables:
- Visibility: Mirrors, cheek retractors, isolation devices, magnification, and illumination help the operator see deep proximal or occlusal areas.
- Preparation accuracy: Burs and hand instruments determine taper, internal line angles, marginal design, and the amount of tooth reduction.
- Surface quality: Finishing instruments influence the smoothness of enamel margins and prepared surfaces.
- Restoration protection: Try-in tools, non-abrasive instruments, and controlled adjustment systems reduce the risk of chipping or scratching ceramic and composite restorations.
- Adhesive reliability: Isolation, air abrasion, etching, curing, and cement placement instruments help control the bonding environment.
- Patient comfort: Efficient, well-maintained instruments shorten procedure time and reduce unnecessary vibration, pressure, and tissue contact.
- Infection prevention: Reusable instruments must be cleaned, inspected, packaged, sterilized, and stored according to the manufacturer’s instructions and applicable infection-control requirements.
- Workflow efficiency: Clearly organized instrument cassettes reduce interruptions and help the dental assistant anticipate each clinical stage.
An expert approach therefore evaluates an instrument set as a complete workflow rather than as a collection of individual products. A high-quality bur cannot compensate for poor isolation, and a sophisticated digital scanner cannot correct an inaccurate preparation. Each component must support the next stage of treatment.
Core Categories of 인레이 기구
Dental inlay instruments can be organized into functional groups. This classification helps clinicians, dental assistants, students, and procurement teams identify what is required for a specific technique.
| Instrument category | Primary function | Typical considerations |
|---|---|---|
| Diagnostic instruments | Examine caries, margins, contacts, cracks, and occlusion | Visibility, tactile sensitivity, ergonomic handle, and compatibility with examination protocols |
| Isolation instruments | Control saliva, moisture, soft tissue, and working access | Rubber dam equipment, clamps, frames, suction, retractors, and patient comfort |
| Rotary preparation instruments | Remove tooth structure and establish the preparation design | Bur shape, grit, diameter, cooling, handpiece compatibility, and material suitability |
| Hand cutting instruments | Refine margins, remove unsupported enamel, and smooth selected surfaces | Sharpness, blade design, access, and controlled pressure |
| Matrix and separation systems | Protect adjacent teeth and manage proximal contours | Matrix geometry, wedge fit, contact reconstruction, and visibility |
| Impression and scanning equipment | Record the preparation and surrounding anatomy | Retraction, scan path, moisture control, software compatibility, and accuracy verification |
| Try-in and seating instruments | Evaluate fit, contacts, margins, and seating path | Non-damaging tips, visibility, restoration stability, and controlled pressure |
| Adhesive and cementation instruments | Apply conditioner, bonding agent, resin cement, or other luting material | Mixing method, delivery tip, working time, light access, and cleanup |
| Finishing and polishing instruments | Adjust occlusion, refine margins, and polish restorative surfaces | Abrasive type, pressure, speed, water cooling, and compatibility with ceramic or composite |
| Maintenance and sterilization accessories | Clean, inspect, package, and process reusable instruments | Cleaning chemistry, sterilizer compatibility, tracking, and manufacturer instructions |
Diagnostic Instruments Used Before Inlay Preparation
Diagnosis determines whether an inlay is appropriate. A basic diagnostic setup generally includes a mouth mirror, explorer, periodontal probe, cotton pliers, articulating paper, and suitable radiographic or digital imaging equipment. These tools help assess the extent of decay, the condition of existing restorations, proximal contacts, cusp integrity, periodontal status, and occlusal relationships.
The explorer should be used carefully. Excessive force may damage weakened enamel or create misleading tactile findings. Visual examination, radiographic interpretation, transillumination where appropriate, and the patient’s symptoms should be considered together. An instrument cannot independently establish a diagnosis.
Periodontal probing is especially important when the preparation is close to the gingival margin. The clinician should determine whether the tissue is healthy enough to permit predictable isolation and whether a subgingival margin may complicate impression making or digital scanning. Bleeding from inflamed tissue can interfere with both the record and the bonding procedure.
Articulating paper and occlusal marking film are useful for identifying heavy contacts before preparation and verifying the final restoration. However, marks should be interpreted in the context of the patient’s occlusion. A large mark does not always indicate excessive force, and a light mark does not necessarily prove that a contact is clinically insignificant. Thin films, shim stock, digital occlusal systems, and patient feedback may be used as complementary methods.
Magnification and coaxial illumination can improve visual control, especially when working on posterior teeth. Loupes do not replace clinical judgment, but they may help the operator identify marginal irregularities, unsupported enamel, contamination, or residual cement. Their value depends on correct working distance, declination angle, lighting, and training.
Radiographs can assist in evaluating proximal caries, the depth of an existing restoration, the relationship of the lesion to the pulp, and the condition of the supporting tissues. Radiographic findings should be combined with clinical examination rather than interpreted in isolation. If pulpal or periapical disease is suspected, the treatment plan may need to change before an indirect restoration is considered.
Isolation and Access Instruments
Moisture control is a central requirement in indirect adhesive dentistry. Saliva, blood, crevicular fluid, and uncontrolled condensation can interfere with bonding and compromise visibility. The isolation system may include a rubber dam, clamp, frame, floss ligatures, cotton rolls, dry-angle pads, high-volume evacuation, saliva ejectors, cheek retractors, and gingival retraction materials.
Rubber dam instruments typically include a punch, clamp forceps, clamp selection tools, a frame, and dental floss. The clamp should stabilize the dam without traumatizing the gingiva or interfering with the preparation. Floss ligatures can help secure the clamp and provide a retrieval safeguard. A clinician should inspect the dam for tears and confirm that the field remains dry throughout the bonding procedure.
Retraction instruments and materials are important when the margin approaches the gingival tissue. Retraction cord placement instruments, cord packers, and hemostatic materials must be used with appropriate pressure. Excessive packing may injure the sulcular epithelium or cause postoperative discomfort. The goal is to expose the margin sufficiently for scanning, impression making, cementation, and cleanup while respecting periodontal tissues.
Isolation is not merely an assistant’s task. The operator should plan access before starting preparation. A difficult posterior tooth, limited mouth opening, deep proximal box, or poorly positioned clamp may require an alternative technique. Instrument selection should reflect the patient’s anatomy and tolerance, not only the preferred routine of the dental team.
High-volume evacuation is useful during rotary preparation because it removes water, debris, and aerosols. The suction tip should be positioned so that it does not obstruct the handpiece or pull against the rubber dam. A stable assistant position and coordinated four-handed technique can improve both visibility and safety.
Rotary Instruments for Tooth Preparation
Rotary instruments are among the most important components of 인레이 기구. They are used with high-speed or low-speed handpieces to remove caries, old restorative material, unsupported enamel, and selected areas of sound tooth structure. Diamond burs are frequently selected for enamel and ceramic-related procedures, while carbide burs may be used for cutting certain restorative materials or refining dentin, depending on the clinical situation.
Bur geometry should be matched to the planned preparation. Tapered burs can help create controlled wall divergence. Round-ended or torpedo-shaped burs may form rounded internal transitions. Fine-grit diamonds can refine surfaces after initial reduction, while coarse instruments may be used for efficient bulk reduction under adequate water cooling. The exact sequence depends on the restorative material, manufacturer’s preparation guidance, and the operator’s training.
Common bur shapes used in indirect restorative procedures include round burs, pear-shaped burs, fissure burs, tapered fissure burs, football burs, torpedo burs, needle-shaped diamonds, and small finishing burs. These shapes are not interchangeable. A football bur may be useful for occlusal reduction or smoothing a concavity, while a tapered fissure bur may help define walls. A needle-shaped bur may provide access to a narrow area but can create a sharp transition if used without care.
Water cooling is essential when using rotary instruments at high speed. Heat generation can harm the pulp and may reduce cutting efficiency. The clinician should confirm that the spray reaches the active bur surface and that the evacuation system removes water and debris effectively. A worn bur may generate more heat, cut less efficiently, and require greater pressure.
Bur inspection should be routine. The team should check for:
- Loss of abrasive particles or damaged cutting blades
- Distortion of the working part or shank
- Accumulated debris that reduces cutting efficiency
- Compatibility with the handpiece chuck
- Appropriate speed range and cooling requirements
- Correct size and shape for the planned preparation
- Secure retention in the handpiece
- Visible corrosion, cracks, or signs of excessive wear
Using a bur beyond its intended service condition can make preparation less predictable. A practical replacement policy should consider the bur’s design, material, frequency of use, cleaning method, and manufacturer recommendations. The visual appearance of a bur alone may not reveal reduced cutting performance.
Hand Instruments for Refinement
Hand instruments can refine areas that are difficult to control with rotary equipment. Enamel hatchets, chisels, margin trimmers, excavators, and small hoes may be used selectively to remove unsupported enamel, refine proximal margins, or clean soft dentin. Their use requires a stable fulcrum and controlled force.
Margin trimmers are designed for specific orientations and should be selected according to the location of the proximal margin. A sharp instrument can produce a cleaner result with less pressure than a dull one. Dull blades may skid, fracture enamel, or enlarge the preparation unnecessarily. Instrument sharpening, when permitted by the manufacturer, should be performed with an appropriate sharpening system and checked for correct edge geometry.
Excavators may assist in removing softened dentin, particularly where tactile control is advantageous. Nevertheless, caries removal should follow current evidence-based principles and the clinical objectives of the restoration. The clinician should avoid removing sound tooth structure simply to create a visually uniform cavity.
Hand instruments also support conservative dentistry by allowing the operator to refine rather than enlarge. Their role is particularly relevant when the preparation margin is near an adjacent tooth or when access limits the use of a larger rotary instrument.
Instrument handles also influence performance. A balanced handle can reduce wrist strain and improve tactile control, especially during extended procedures. Textured or larger-diameter handles may be easier to control when gloves are wet or when the operator is working in a restricted posterior area. Ergonomics should be considered alongside cutting performance.
Preparation Design and Instrument Geometry
The preparation design should be determined by the tooth, the remaining structure, the restorative material, the occlusal load, and the selected manufacturing process. Ceramic inlays, composite inlays, and metal inlays may require different minimum thicknesses, margin configurations, internal geometries, and adjustment approaches. The exact parameters should come from the restorative manufacturer’s instructions and the clinician’s established protocol.
Rounded internal line angles are commonly emphasized in many indirect restorative techniques because they reduce stress concentration and improve the ability of the restoration to seat. Unsupported enamel should be removed or appropriately managed. The path of insertion should be clear, and undercuts that prevent seating should be identified before the impression, scan, or fabrication stage.
Instruments should support, not dictate, the design. For example, a tapered bur may encourage excessive wall divergence if used with uncontrolled pressure. A narrow bur may create a preparation that lacks adequate restorative thickness. A finishing instrument may smooth a margin but cannot correct an incorrect path of insertion.
In an expert workflow, the clinician repeatedly evaluates the preparation rather than waiting until the end. The operator checks:
- Removal of diseased or defective material
- Preservation of sound cusps and marginal ridges where clinically appropriate
- Clear access to all margins
- Absence of unsupported enamel
- Suitable clearance in static and functional occlusion
- Defined path of insertion without obstructive undercuts
- Clean, smooth, and recordable margins
- A preparation width and depth appropriate for the selected material
- Protection of the pulp and avoidance of unnecessary heat
Occlusal clearance should be evaluated in both maximum intercuspation and functional movements. A restoration may have adequate space when the patient closes but insufficient space during a lateral or protrusive movement. Articulating paper, clearance gauges, silicone matrices, or digital analysis can assist, but these tools must be interpreted clinically.
Matrix Systems, Wedges, and Proximal Control
When an inlay involves a proximal surface, the adjacent tooth and gingival tissues require protection. Matrix bands, sectional matrices, circumferential matrices, wedges, separation rings, and wooden or polymer wedges may be used during preparation or temporary management. The appropriate system depends on the contact area, gingival margin location, tooth anatomy, and restorative plan.
A matrix should not distort the intended proximal contour or prevent accurate access to the margin. Wedges may help adapt the matrix cervically, protect the papilla, and create slight separation where needed. However, excessive wedging can damage soft tissues or create an inaccurate contact relationship.
Protective strips may be placed between the prepared tooth and the adjacent tooth during rotary reduction. This is particularly useful when the proximal wall is close to the neighboring enamel. The strip should remain stable and should not prevent the clinician from seeing the intended margin.
During inlay try-in, contact evaluation is essential. Dental floss can help determine whether the restoration passes through the contact with appropriate resistance. If the contact is too tight, adjustment should be conservative and performed with an instrument suitable for the restoration material. The operator should avoid repeatedly forcing a restoration into place, as this may fracture a ceramic edge or damage the preparation.
Impression and Digital Scanning Instruments
After preparation, the restoration must be designed and fabricated from an accurate record. Conventional workflows use impression trays, elastomeric impression materials, mixing tips, syringes, retraction cord, hemostatic agents, and bite-registration materials. Digital workflows use an intraoral scanner, scanning tips, software, a computer, and a validated communication process with the dental laboratory or milling system.
For conventional impressions, tray selection matters. The tray should provide sufficient material thickness without impinging on the tissues. The impression syringe can deliver material around the preparation, while the tray material captures the broader arch and opposing structures. The clinician should inspect the impression for voids, pulls, tears, incomplete margins, and distortion before sending it for fabrication.
Retraction cord and tissue-management materials should expose the finish line without causing unnecessary bleeding. The operator should allow the tissue to stabilize when appropriate and should avoid contaminating the preparation after retraction. If the margin is not visible, taking an impression or scan prematurely may create a restoration with an uncertain cervical boundary.
For digital scanning, the operator should follow a consistent scanning path and maintain a dry, visible field. Blood, saliva, reflective surfaces, and soft-tissue movement may interfere with image acquisition. The preparation should be scanned from multiple angles when necessary, and the margin should be clearly visible in the software. A digital file that appears complete on the screen may still contain a clinically important defect at the margin or proximal contact.
Scanning tips and intraoral components require cleaning and processing according to the device manufacturer’s instructions. Some components are single-use, while others are designed for reprocessing. The dental team should not assume that a component is compatible with heat sterilization simply because it is made of metal or glass.
Digital systems also require technical maintenance. Software updates, calibration, battery charging, optical surface cleaning, and data backup should be included in the clinic’s routine. A scanner that is physically clean but poorly calibrated may still produce unreliable records. Team members should receive training in scanning technique, file naming, data transfer, and laboratory communication.
Temporary Protection Between Appointments
When an inlay is fabricated in a laboratory or during a later appointment, the prepared tooth may require a provisional restoration. Instruments used for this stage can include temporary placement instruments, mixing pads, spatulas, temporary cement delivery systems, occlusal marking materials, finishing burs, and floss.
The provisional should protect the dentin, maintain tooth position, preserve proximal contacts where possible, and allow the patient to function comfortably. It should not create a high occlusion or interfere with the planned path of insertion of the final restoration. Excess temporary cement must be removed carefully, especially from interproximal and gingival areas.
Patients should be informed that temporary materials may be less durable than the final inlay. They should avoid unusually hard or sticky foods if instructed by the clinician and should report a loose provisional, persistent sensitivity, or discomfort during biting.
Try-In Instruments and Fit Verification
Try-in is a decision-making stage, not a brief formality. The clinician evaluates the restoration before bonding by checking the path of insertion, internal adaptation, marginal fit, proximal contacts, occlusal relationships, shade where relevant, and patient comfort.
Non-abrasive instruments, cotton pliers, mirror handles used appropriately, resin placement tools, and specialized try-in holders may assist with handling. A restoration should be grasped securely without contaminating the bonding surfaces. Latex contamination, saliva, powder, or oily residue can interfere with adhesive procedures, depending on the system used.
Fit should be evaluated under magnification and adequate illumination. If the restoration does not seat fully, the clinician should determine whether the cause is an internal interference, excessive contact, debris, preparation undercut, insufficient clearance, or an inaccurate restoration. Removing material from the restoration should be deliberate and minimal. Repeated trial seating without cleaning may create confusion because debris can mimic a poor fit.
Try-in pastes may assist with optical evaluation for certain ceramic restorations. Their use should follow the restorative and cement system instructions. The final appearance can be influenced by the thickness and translucency of the restoration, the shade of the underlying tooth, the cement shade, and the surrounding enamel. Aesthetic decisions should be made before definitive cementation whenever possible.
The clinician should also assess whether the restoration can be removed safely if it becomes difficult to handle. A small piece of floss may serve as a handling aid during trial procedures, provided that it does not interfere with seating. Careful orientation and communication between the dentist and assistant reduce the risk of dropping or contaminating the restoration.
Adhesive and Cementation Instruments
Cementation instruments vary according to the selected luting material. A typical setup may include microbrushes, applicator tips, mixing wells, automix syringes, cement delivery tips, resin placement instruments, air syringes, light-curing units, floss, scalers, and finishing strips.
Preparation of the restoration and tooth surface must follow the material-specific protocol. Ceramic types differ in their response to etching, silane, universal primers, or other surface treatments. Glass-containing ceramics are not treated in the same manner as every oxide ceramic, metal restoration, or composite-based material. The clinician should consult the manufacturer’s current instructions rather than applying a universal sequence to all inlays.
Moisture control remains critical during bonding. The dental assistant should anticipate the need for suction, retraction, curing access, and cleanup. The operator should verify the working time of the cement and organize instruments before dispensing material. Delays can increase viscosity or reduce the available seating time.
Mixing instruments and delivery systems should be selected according to whether the cement is manually mixed, capsule-delivered, or supplied in an automix syringe. Mixing errors can alter the consistency, working time, and mechanical properties of the cement. Automix tips should be used according to the product instructions, and the initial material expressed from a new tip may need to be discarded if specified by the manufacturer.
After seating, excess cement should be removed at the appropriate stage for the selected system. Dental floss is useful for cleaning interproximal areas, but it must be used carefully so that cement is not pulled into the sulcus or dislodged from the margin. Scalers, curettes, finishing strips, brushes, and specialized cement-removal instruments may be used according to the material and curing stage.
Light-curing units should be inspected and maintained. Output can decline because of battery condition, damaged light guides, contamination, or aging components. The unit should be positioned close and perpendicular to the restoration where clinically possible, while respecting the manufacturer’s curing instructions. A curing light should not be assumed to perform adequately merely because it turns on.
Finishing, Adjustment, and Polishing Instruments
Occlusal adjustment is often necessary after an inlay is cemented. The clinician first evaluates static contacts, then asks the patient to perform functional movements. Adjustment should preserve the intended anatomy and avoid creating a flat, over-reduced surface.
Diamond finishing burs, carbide finishing burs, abrasive discs, diamond-impregnated polishers, rubber points, polishing wheels, and interproximal strips may be selected according to the restoration material. Ceramic restorations require instruments designed for ceramic adjustment and polishing. Composite and metal restorations require different abrasive strategies.
Adjustment should be performed with light pressure and adequate cooling when recommended. Excessive pressure may generate heat, create microfractures, or produce an uneven surface. After adjustment, polishing is more than an aesthetic step. A rough restorative surface may contribute to plaque retention, patient discomfort, or wear of the opposing dentition, depending on the material and location.
When adjusting ceramic, the clinician should avoid creating sharp notches or deep grooves. A coarse diamond may efficiently remove material, but a finer sequence is generally needed to reduce surface damage before polishing. The final polishing step should be performed with the pressure and speed recommended for the material. The restoration should be inspected after polishing for a continuous margin and acceptable anatomical form.
The clinician should inspect the margin after finishing. Cement remnants can remain hidden interproximally or subgingivally. Floss, visual inspection, explorer assessment, and radiographic review when indicated may help confirm removal. Patients should receive instructions about sensitivity, chewing, flossing, and symptoms that warrant follow-up.
Instrument Comparison by Clinical Use
The following comparison provides a practical way to distinguish commonly used 인레이 기구. It is not a substitute for the manufacturer’s instructions or the clinician’s professional judgment.
| Instrument type | Best suited function | Key advantage | Important limitation |
|---|---|---|---|
| Fine diamond bur | Margin refinement and surface finishing | Controlled preparation refinement | May cut slowly if used for bulk reduction |
| Coarse diamond bur | Initial reduction and efficient material removal | Fast cutting under appropriate cooling | Can remove excessive structure if pressure is not controlled |
| Carbide bur | Selected dentin or restorative material procedures | Sharp cutting action in suitable applications | Not appropriate for every ceramic or enamel-finishing task |
| Enamel hatchet or chisel | Removal of unsupported enamel and hand refinement | Tactile control and conservative finishing | Requires correct blade orientation and sharpness |
| Margin trimmer | Refinement of selected proximal margins | Designed for controlled margin shaping | Orientation-specific and technique-sensitive |
| Sectional matrix | Proximal contour and contact management | Can support accurate proximal anatomy | May be difficult with unusual tooth shape or deep margins |
| Rubber dam clamp system | Moisture and soft-tissue control | Improves isolation during adhesive procedures | Requires correct selection and patient tolerance |
| Intraoral scanner | Digital capture of preparation and occlusion | Immediate visual review of captured data | Accuracy depends on scanning conditions and operator technique |
| Interproximal finishing strip | Contact and cement cleanup | Accesses narrow proximal areas | Can alter contact if used too aggressively |
| Ceramic polishing system | Polishing adjusted ceramic surfaces | Restores a smoother surface after adjustment | Must match the ceramic type and recommended sequence |
Step-by-Step Workflow for Using 인레이 기구
A structured workflow reduces omissions and supports consistent outcomes. The following sequence is a general educational framework; the exact technique varies by restoration material, clinical findings, and product instructions.
- Confirm the diagnosis and treatment plan. Review clinical findings, radiographs when indicated, occlusion, periodontal conditions, tooth vitality, and the amount of remaining structure. Determine whether an inlay is appropriate or whether another restoration is indicated.
- Explain the procedure and obtain consent. Discuss the indirect workflow, possible sensitivity, need for a laboratory or digital fabrication stage, expected appointments, restoration limitations, and alternatives.
- Prepare the operatory and instrument cassette. Organize diagnostic, isolation, preparation, impression or scanning, provisional, cementation, adjustment, and polishing instruments before beginning treatment.
- Evaluate occlusion before preparation. Mark relevant contacts and note functional movements. This information helps guide preparation design and final adjustment.
- Establish isolation and access. Use a rubber dam or another suitable isolation system. Protect adjacent teeth and soft tissues with matrices, wedges, retractors, or suction as required.
- Remove caries, defective material, and unsupported structure. Use rotary and hand instruments conservatively. Maintain water cooling when using high-speed equipment and avoid unnecessary enlargement.
- Develop the preparation geometry. Establish a clear path of insertion, appropriate clearance, accessible margins, and smooth internal transitions. Inspect the preparation under magnification if available.
- Refine the margins. Use fine rotary instruments or appropriately sharpened hand instruments. Remove unsupported enamel and ensure that the margin is visible and recordable.
- Capture the preparation. Use a conventional impression or digital scanner according to the selected workflow. Record the opposing arch and bite relationship when required. Review the result before dismissing the patient.
- Protect the tooth between appointments when necessary. Place a suitable provisional restoration or temporary seal, check occlusion, and provide instructions on chewing and oral hygiene.
- Inspect the fabricated inlay. Check the restoration for damage, contamination, incomplete anatomy, and obvious manufacturing defects before try-in.
- Perform try-in. Assess seating, margins, contacts, occlusion, shade where relevant, and patient comfort. Clean the preparation and restoration according to the selected bonding system.
- Condition the tooth and restoration. Apply etchants, primers, silane, universal adhesive, or other materials only as indicated for the specific substrate and product protocol.
- Seat the inlay with the selected luting material. Maintain a stable path of insertion and controlled pressure. Follow the working time, light-curing, or chemical-curing requirements of the cement.
- Remove excess cement. Use floss, brushes, scalers, finishing strips, or other suitable instruments. Pay particular attention to proximal and subgingival areas.
- Verify occlusion and margins. Use articulating paper or other appropriate methods. Make conservative adjustments, then polish the adjusted surface with a compatible system.
- Document the procedure and schedule review. Record the material, cement, shade where relevant, tooth preparation details, and any adjustments. Provide postoperative instructions and arrange follow-up according to clinical need.
Conditions and Requirements for Safe Use
Safe and effective use of 인레이 기구 depends on more than product quality. Dental professionals should establish conditions that support patient safety, operator control, and regulatory compliance.
- Training: Users should understand the purpose, handling, limitations, and maintenance requirements of each instrument.
- Handpiece compatibility: Burs must fit the intended handpiece and operate within the recommended speed range.
- Cooling and evacuation: Rotary procedures require suitable water spray and effective removal of heat, aerosols, and debris.
- Visibility: Adequate lighting, mirror positioning, retraction, and magnification should be available where needed.
- Isolation: Adhesive cementation requires a moisture-control strategy suited to the tooth, margin, and material.
- Material compatibility: Finishing and polishing instruments must be compatible with ceramic, composite, metal, or other restorative materials.
- Instrument integrity: Damaged, bent, corroded, blunt, or contaminated instruments should be removed from service.
- Processing: Reusable instruments must be cleaned and sterilized according to validated procedures and manufacturer instructions.
- Traceability: Clinics should maintain appropriate records for instrument processing, equipment maintenance, and product batches when required.
- Patient-specific assessment: Allergies, limited opening, gag reflex, periodontal conditions, and medical history may influence the technique.
Cleaning, Sterilization, and Maintenance
Reusable dental instruments can carry organic material after treatment. Cleaning should occur as soon as practical because dried debris is more difficult to remove and may interfere with sterilization. The cleaning method may include manual cleaning with appropriate personal protective equipment, ultrasonic cleaning, or an automated washer-disinfector, depending on the instrument and the facility’s validated process.
Sharp instruments should be handled carefully during cleaning. Burs may require specialized holders or procedures to prevent injury and preserve their working surfaces. Instruments should be inspected after cleaning and before packaging. Hinges, serrations, cutting edges, and shanks require particular attention.
Packaging should permit sterilant penetration and preserve sterility until use. Sterilization parameters must follow the sterilizer manufacturer’s instructions, the instrument manufacturer’s instructions, and applicable national or regional guidance. The Centers for Disease Control and Prevention and professional dental organizations publish infection-prevention guidance that can support clinic protocols. Local regulations may impose additional requirements.
Maintenance also includes handpiece care, waterline management, light-curing unit inspection, scanner component processing, and replacement of worn accessories. A maintenance log can help identify recurring problems, such as bur breakage, inadequate cooling, inconsistent curing, or repeated restoration adjustment.
Instruments should be stored in a way that prevents damage and preserves identification. Overcrowded drawers can bend delicate components, dull cutting edges, or make it difficult to locate the correct bur during a time-sensitive step. Cassettes, labeled trays, and separated finishing systems can improve organization.
Common Errors and How Experts Prevent Them
Using one bur sequence for every material: Ceramic, composite, and metal restorations do not respond identically to preparation, adjustment, or polishing. Experts select instruments according to the material and manufacturer’s instructions.
Preparing without a clear path of insertion: An undercut or obstructed path can prevent seating. The operator should inspect the preparation from the planned direction of insertion before taking the impression or scan.
Ignoring proximal contacts until final cementation: Tight or open contacts can create avoidable complications. Contact evaluation should occur during try-in, before bonding.
Over-adjusting the restoration: Repeated aggressive grinding can reduce material thickness, damage anatomy, or create a rough surface. Adjust only the area responsible for the problem and polish afterward.
Underestimating isolation: Adhesive failure may be related to contamination rather than to the cement itself. The clinical team should plan isolation before dispensing bonding materials.
Failing to inspect the curing light: Inadequate light output can affect polymerization. The light guide should be clean, intact, and positioned appropriately.
Leaving cement interproximally: Residual cement may irritate gingival tissues. Floss and visual inspection should be part of the final cleanup routine.
Using damaged or worn instruments: Blunt instruments increase pressure and reduce control. Regular inspection and replacement are basic elements of quality assurance.
Skipping a final occlusal check: A restoration can appear clinically acceptable but still create an uncomfortable functional contact. Occlusion should be checked after cementation and again after any adjustment.
Failing to communicate with the laboratory: Unclear instructions regarding material, shade, margin design, occlusion, or contact preferences may produce a restoration that is technically well made but clinically difficult to place. Written prescriptions and digital photographs can improve communication.
How Clinics Can Select a Practical Instrument Set
A clinic purchasing 인레이 기구 should begin with the intended clinical workflow. A practice that sends impressions to a laboratory may need a different setup from a practice using chairside milling. A clinic focused on ceramic inlays may require more ceramic-specific adjustment and polishing systems, while a practice that frequently places metal inlays may prioritize different finishing instruments.
Selection criteria should include:
- Clinical indication and restorative materials used
- Compatibility with existing handpieces and sterilization equipment
- Ergonomics, handle design, balance, and tactile feedback
- Bur availability in the required shapes, diameters, and grits
- Manufacturer documentation and instructions for use
- Instrument durability under the clinic’s processing conditions
- Ease of identification and organization in the operatory
- Availability of replacement parts and maintenance support
- Training requirements for dentists, hygienists, and dental assistants
- Total ownership cost, including replacement and processing needs
Price should be assessed carefully. A low initial purchase price may not represent lower overall cost if the product has a short service life, limited documentation, poor compatibility, or difficult maintenance requirements. Conversely, a higher-priced instrument is not automatically superior. The best procurement decision compares clinical performance, safety, durability, usability, and support.
Supplier evaluation should include product traceability, clear technical specifications, warranty terms, delivery reliability, sterilization guidance, and access to replacement components. Clinics should avoid selecting instruments solely from promotional claims that cannot be independently verified.
Trial use can be helpful before a large purchase. A dental team may compare several bur shapes, mirror systems, matrices, or polishing kits under controlled clinical conditions. Feedback should include cutting efficiency, visibility, handling, cleanup, durability, and the ease with which the assistant can identify and prepare the instruments.
Quality Assurance and Documentation
Quality assurance helps a dental team identify whether problems arise from preparation design, instrument condition, material handling, or laboratory communication. Useful records may include the restoration material, preparation bur sequence, impression or scan method, cement system, curing unit, adjustment performed, and postoperative findings.
When a restoration repeatedly requires extensive adjustment, the team should review the full process. Possible contributors include insufficient occlusal clearance, inaccurate bite registration, scanner stitching errors, impression distortion, milling or laboratory design, seating interference, or incomplete cement removal. A process review is more productive than assuming that one instrument caused the problem.
Photographs or digital scans of the preparation may support communication with a laboratory and create a reference for future care. Any documentation must be handled according to patient privacy rules and the clinic’s information-governance policy.
Clinics may also track remakes, debonding events, fractured restorations, postoperative sensitivity, and repeated contact adjustments. These data can reveal patterns that are not apparent from individual cases. For example, repeated open contacts may suggest a scanning or laboratory-design issue, while repeated high occlusion may suggest insufficient clearance during preparation or an inaccurate bite record.
Expert Perspective on Digital and Conventional Workflows
Digital scanning has changed how many clinics capture inlay preparations, but it has not eliminated the need for conventional instruments. Retraction, isolation, margin refinement, contact management, and occlusal verification remain essential. A scanner can display missing data, yet the operator must determine why the data are missing and correct the clinical field.
Conventional impressions remain useful in many settings because they can capture the preparation without specialized scanning equipment and may fit established laboratory workflows. Their accuracy depends on tray selection, material handling, tissue management, working time, and impression inspection.
The appropriate choice is therefore based on clinical conditions, operator training, equipment availability, laboratory communication, and validated performance. Neither digital nor conventional capture should be treated as universally superior in every case.
Hybrid workflows are also common. A clinic may use a digital scan for design and communication while maintaining conventional tools for retraction, temporary restoration, occlusal recording, and final verification. The important objective is not to use the newest technology in every case, but to select the method that provides a reliable record under the actual clinical conditions.
Patient Communication and Aftercare
Patients often understand an inlay more easily when the dentist explains that it is fabricated outside the mouth and then bonded or cemented into the prepared tooth. Clear communication should cover the reason for the restoration, the expected number of visits, the role of temporary protection, and the possibility of short-term sensitivity.
Patients should also understand that an inlay is not indestructible. It can be affected by heavy bruxism, trauma, recurrent decay, poor hygiene, or changes in the supporting tooth. A night guard may be considered for selected patients who clench or grind, but the need should be assessed individually.
After placement, patients should be advised to follow the clinic’s instructions regarding eating, oral hygiene, and sensitivity. They should contact the dental office if they experience persistent pain, a bite that feels high, loosening, sharp edges, swelling, or difficulty flossing. Regular preventive care remains important because an inlay does not prevent decay in surrounding tooth structure or at other sites.
Patients may notice a different texture or temperature response immediately after treatment. Mild, temporary sensitivity can occur, but symptoms that worsen, persist, or are associated with spontaneous pain require professional evaluation. The patient should not attempt to adjust the restoration independently.
FAQs About 인레이 기구
What does 인레이 기구 mean?
인레이 기구 means dental inlay instruments or the instruments used for inlay-related procedures. The term may include diagnostic tools, isolation equipment, preparation burs, hand instruments, impression or scanning devices, cementation tools, and finishing systems.
Are 인레이 기구 used only for ceramic inlays?
No. The instrument category may support ceramic, composite, gold alloy, and other indirect restorations. However, the appropriate bur, adjustment instrument, polishing system, and bonding protocol vary according to the restorative material.
Which instruments are essential for preparing an inlay?
A basic preparation setup commonly includes diagnostic instruments, isolation equipment, compatible rotary burs, hand cutting instruments for refinement, matrix and wedge systems when proximal surfaces are involved, and instruments for recording or scanning the preparation. The exact selection depends on the tooth and planned restoration.
Why is isolation important during inlay cementation?
Isolation limits contamination from saliva, blood, and moisture. This is particularly important when the restoration relies on adhesive bonding. The selected isolation method should provide visibility, tissue protection, and sufficient working time for the cementation protocol.
How should ceramic inlays be adjusted?
Ceramic inlays should be adjusted with instruments designed for the specific ceramic and used with controlled pressure. Cooling may be required. After adjustment, the surface should be polished according to the ceramic manufacturer’s recommended sequence to reduce roughness.
Can a worn bur affect the result?
Yes. A worn or damaged bur may cut inefficiently, generate more heat, require excessive pressure, and reduce preparation control. Burs should be inspected regularly and replaced according to their condition and the manufacturer’s guidance.
How can a clinician check whether an inlay fits correctly?
Fit is evaluated by checking the path of insertion, complete seating, margins, proximal contacts, internal adaptation, occlusion, and patient comfort. Visual inspection under suitable lighting and magnification can be helpful. If the restoration does not seat, the cause should be identified before adjustment.
Are digital scanners a replacement for impression instruments?
Digital scanners provide an alternative method of recording the preparation, but they do not replace the need for tissue retraction, moisture control, margin refinement, and clinical verification. Conventional impression instruments remain relevant in many dental practices.
What should be considered when purchasing dental inlay instruments?
Clinics should consider restorative materials, clinical workflow, handpiece compatibility, sterilization requirements, ergonomics, durability, manufacturer documentation, replacement availability, supplier support, and total ownership cost. Purchasing decisions should be based on verified specifications rather than advertising language alone.
How are reusable inlay instruments processed?
Reusable instruments should be cleaned, inspected, packaged, sterilized, and stored according to validated clinic procedures and the instructions provided by the instrument and sterilizer manufacturers. Local infection-control regulations should also be followed.
What causes repeated adjustment of an inlay?
Possible causes include inadequate preparation clearance, inaccurate occlusal records, restoration design, laboratory or milling variation, incomplete seating, tight contacts, contamination, or an incorrect path of insertion. Reviewing the entire workflow can help identify the source.
Can one polishing system be used for every inlay material?
No. Polishing systems are designed for particular material categories and surface conditions. A system suitable for ceramic may not be appropriate for metal or composite. The product instructions should specify compatible materials and the recommended sequence.
Is magnification necessary for every inlay procedure?
Magnification is not the only way to achieve a successful result, but it can improve visualization of margins, internal surfaces, cement remnants, and small defects. Its usefulness depends on proper setup, lighting, posture, and operator training.
What should be done if an inlay does not seat completely?
The restoration should not be forced into place. The clinician should clean both surfaces and investigate contacts, internal interference, preparation undercuts, debris, and fabrication accuracy. Adjustments should be conservative and performed with instruments compatible with the restoration material.
Conclusion
인레이 기구 encompasses a complete set of clinical tools that support accurate and safe indirect restorative treatment. The most important instruments are not necessarily the most complex; they are the ones that provide reliable isolation, controlled preparation, clear records, predictable seating, effective cement cleanup, and a smooth final surface.
For clinicians and dental teams, the strongest approach is to organize instruments around the treatment workflow. Diagnosis should guide preparation. Preparation should guide impression or scanning. The restorative material should guide cementation, adjustment, and polishing. Throughout the process, equipment condition, infection control, manufacturer instructions, and patient-specific factors must remain central.
By treating dental inlay instruments as part of an integrated quality system rather than as isolated accessories, practices can improve consistency, reduce avoidable adjustments, and support a more controlled experience for both the dental team and the patient. The goal is not simply to own a large number of instruments, but to maintain a carefully selected, well-organized, properly processed, and clinically appropriate system that supports every stage of indirect restorative care.