A Practical Guide to 스티치 아웃 Techniques
스티치 아웃(“stitch-out”) is a practical, quality-focused way to finish seams and test stitch behavior before final production. This guide explains what stitch-out typically means in textile and apparel workflows, how factories evaluate tension, thread choice, and durability, and what to confirm with suppliers when planning a sampling or trial run. Background sections remain objective, with process considerations and requirements summarized later.
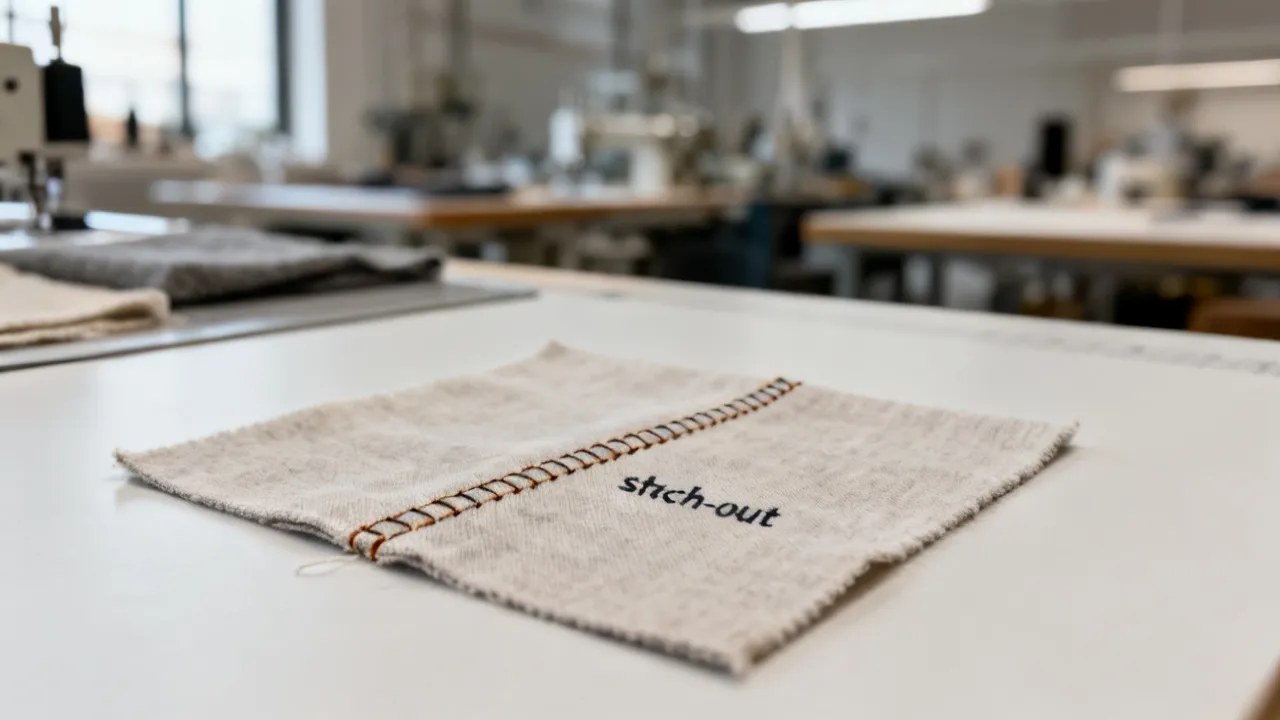
Key Takeaways on 스티치 아웃 for Reliable Stitch Quality
스티치 아웃 (“stitch-out”) refers to a structured trial or evaluation step where a sample seam is stitched out under controlled settings to confirm performance before committing to full production. In practice, it helps teams verify stitch formation, tension balance, seam strength, and finishing behavior—especially when materials, thread systems, or needle gauges differ from prior runs. For procurement and production planning, it functions as a risk-reduction checkpoint rather than a vague “test of luck.”
From an industry perspective, the most important decisions around stitch-out are not only how you stitch, but what you compare: target seam appearance, mechanical expectations, and tolerances for puckering, thread show-through, or fraying. When these are aligned early, downstream issues—rework, rejected trims, inconsistent finishing—are significantly less likely to surface late in the timeline. In many production environments, the cost of late-stage changes is multiplied: not only do you pay for re-stitching and re-finishing, but you also lose schedule credibility with internal planning, downstream buyers, and sometimes even logistics partners.
To make stitch-out truly reliable, teams should treat it as a controlled experiment in apparel manufacturing: you define a baseline, you specify inputs precisely, you run disciplined variations, and you evaluate outcomes using criteria that are explicit enough to avoid subjective drift. “Reliable” here means that if the trial is repeated by the supplier using the recorded settings and materials, the result should land in the same acceptance window—or the team should understand exactly why it does not.
When done correctly, 스티치 아웃 becomes a practical bridge between design intent and manufacturing reality. It also reduces communication friction between design/PD teams, sourcing teams, manufacturing engineers, and quality engineers. Instead of arguing about opinions like “it looks about right,” you can point to documented evidence: stitch regularity, seam lay-flat performance, edge stability, and finishing behavior after pressing or washing simulations.
Background: What “스티치 아웃” Commonly Covers
Although “스티치 아웃” is widely used in Korean apparel and textile contexts, the underlying idea is consistent: a deliberate stitching trial that demonstrates how a planned construction will behave on the intended fabric and under the intended process parameters. The term is often paired with garment sampling stages, manufacturing engineering trials, or quality-prep steps in cut-and-sew operations.
Objectively, stitch-out activities can include one or more of the following evaluations:
- Visual checks (stitch regularity, seam lay-flat, edge coverage, and thread visibility).
- Mechanical checks (basic seam strength and behavior during handling).
- Dimensional checks (shrinkage or distortion created by stitching and finishing).
- Finishing behavior (how seam allowances, topstitching, bartacks, or binding respond after washing or pressing).
Because textile outcomes depend on multiple interacting variables—thread composition, yarn twist, needle type, stitch length, machine timing, presser foot pressure (when applicable), and even operator setup—stitch-out serves as a practical mechanism for resolving uncertainty before large-scale spend.
It is also common for stitch-out to include “process capability” confirmation: whether the supplier’s line can reproduce the trial result consistently across more than one operator shift or across repeated setups. Even if the first iteration looks excellent, you still need to know whether the quality is stable. This matters in facilities where machine operators rotate, lines are reconfigured quickly, or multiple sewing stations contribute to final garment assembly.
Why 스티치 아웃 Matters in Production Planning
In garment manufacturing, even “small” deviations can become visible when the fabric is worn, washed, or pressed. Stitch-out is valuable because it makes those deviations observable early. For example, seam puckering may not be obvious on a tiny scrap, but it often becomes clearer once you see how the fabric relaxes after stitching and pressing. Likewise, a thread that looks appropriate in a studio condition may behave differently under repeated flexing, abrasion, or dryer heat.
Quality leaders typically treat stitch-out as a bridge between:
- Design intent (what the product should look and feel like),
- Process reality (what the machine and operators can produce consistently), and
- Quality requirements (what the end user experience should be).
In short, 스티치 아웃 reduces the gap between spec and outcome. However, it is useful to clarify what “gap reduction” really means. It means you lower the probability that the production line will deliver a seam that fails acceptance criteria. It also means you compress the learning cycle: rather than discovering quality defects when garments are near completion, you discover them while the line is still in the trial stage.
From a planning lens, stitch-out can influence multiple downstream decisions:
- Whether you need different needle types or thread combinations before bulk cutting begins.
- Whether you require a different pressing/finishing approach (e.g., pressing direction, temperature, steam settings, trimming allowances).
- Whether reinforcement points need adjustment (bartack placement, lockstitch requirements, stitch density around stress areas).
- Whether you should revise tolerances for seam appearance or edge fray control based on fabric realities.
When these decisions are delayed, production planning becomes guesswork. Stitch-out shifts planning from guesswork to evidence.
What to Confirm Before You Begin a Stitch-Out Trial
Before a trial is started, procurement and technical teams should confirm the following baseline inputs. This is where many projects either gain clarity—or lose time.
- Fabric identification: exact fabric type, construction, and finish (including GSM and coating treatments if any). If possible, identify the fabric lot and confirm whether the supplier can reproduce the trial using the same lot during production.
- Thread system: fiber type (e.g., polyester, cotton, blended), twist, and recommended tension range from thread supplier guidance. Confirm also whether thread is intended for top/bottom pairing and whether any “special” thread effects (sheen, mercerization, core-spun structure) matter for appearance.
- Needle and machine settings: needle size/type, presser foot choice (if relevant), stitch length, and top/bottom tension behavior. For some machines, thread path routing and bobbin case calibration can matter as much as needle size.
- Seam construction specification: stitch type (e.g., lockstitch, chainstitch where applicable), seam allowance target, and reinforcement points. Provide a construction diagram and confirm whether the seam is intended to be flat-felled, overlock overcast, topstitched, etc., depending on your product category.
- Finishing process: pressing direction, seam flattening, trimming method, and any wash simulation plan. Clarify whether finishing includes pressing only, washing, tumble drying, or steam conditioning, since each can change seam behavior.
- Acceptance criteria: what “good” means—appearance tolerances and functional considerations. Acceptance should include both “pass/fail” items and “review items” (things that are acceptable but might be improved).
These confirmations matter because a stitch-out is only as reliable as the inputs and evaluation criteria behind it. If you do not confirm baseline inputs, you may end up measuring the wrong cause. For example, if the supplier uses a different thread shade or a different needle system than the one intended, the trial result might look correct but will not transfer to production. Conversely, if the acceptance criteria are vague, you could approve a seam that appears fine yet fails after finishing or under realistic handling.
Expert Insights: The Variables That Most Often Distort Results
Industry teams that run repeated trials know that outcomes often swing due to a limited set of variables. Below are common drivers, presented objectively as process considerations rather than claims of certainty.
- Thread tension imbalance: can cause “loopy” stitch formation, puckering, thread show-through, or inconsistent seam appearance on both sides. In some fabrics, tension imbalance can also alter seam lay because the fabric is pulled differently on top vs. bottom.
- Needle selection mismatch: affects hole size, fabric damage, and stitch integrity. Needle point shape (ball point vs. sharp) and needle coating (if any) can matter significantly for knit stretch and delicate weaves.
- Stitch length vs. fabric feed behavior: influences seam strength and visual regularity. Too short can increase stiffness or perforation density; too long can reduce seam security and may lead to edge distortion.
- After-press relaxation: some fabrics relax differently under heat and moisture, changing how seams lay. This is especially relevant for blended fibers, coated fabrics, and textured yarns where heat sensitivity varies.
- Edge fray and allowance stability: particularly in knits, satins, or loosely constructed wovens. Even if the seam stitch looks fine, edge stability can fail due to inadequate trimming strategy or insufficient edge finishing.
From an engineering standpoint, the goal is to turn these variables into controlled comparisons: “A/B” trials with only one changing factor at a time (where practical) so teams can identify root causes quickly.
To make A/B comparisons reliable, it helps to structure the trial plan. For instance, you might define:
- Baseline set: known-good settings from previous similar fabrics.
- Variable set A: adjust needle size and re-test while keeping thread and stitch length constant.
- Variable set B: adjust stitch length while keeping needle and thread constant.
- Variable set C: adjust tension approach (within safe ranges) while keeping stitch length and needle constant.
Then you evaluate each set against the same acceptance criteria, ideally under similar lighting and handling. This structure prevents “trial chaos,” where multiple variables change across iterations and the team cannot determine which change caused improvement or deterioration.
It is also wise to consider operator effects. Even with correct settings, operator differences (how fabric is fed, how edges are aligned, how much pulling is applied during sewing) can create variation. Stitch-out planning should define whether the trial is performed by a single experienced operator or by the same operator cohort used for production. If you already know the line operator lineup, aligning the trial operator can improve transferability.
Supplier Collaboration: How to Align on Stitch-Out Requirements
Successful stitch-out efforts depend on clear collaboration between product teams and suppliers. The most effective approach is to provide a short technical brief that covers required inputs, trial format, and evaluation checkpoints. In many factory environments, supplier teams will also request confirmation of packaging expectations and traceability practices—because trial outcomes should remain consistent with the final production line.
Even when pricing is discussed, stitch-out should be evaluated as a process investment. While vendors may quote a cost for sampling or trial runs, the real value comes from reducing uncertainty around construction and quality acceptance. Since you did not provide specific price figures or supplier names in your request, it’s important to handle pricing transparently: treat supplier quotes as context-dependent and confirm what is included (materials, labor, number of iterations, and any finishing or evaluation steps).
In addition to cost transparency, alignment should cover the “trial governance” details:
- Document control: Who stores the approved settings and acceptance evidence? How are revisions managed?
- Change control: If anyone proposes a deviation during trial (e.g., different bobbin), how is it communicated and approved?
- Material traceability: Are fabric lots and thread lots recorded? Are sample materials labeled so results can be tracked back to inputs?
- Delivery format: How do you want to receive photos, sample reports, and measured outcomes? Do you need printed sheets, digital files, or physical samples returned?
When collaboration is structured, stitch-out results transfer better into the real production timeline. When collaboration is not structured, trials can become expensive while still failing to create actionable manufacturing instructions.
Localization Considerations for Nearby Market Contexts
In nearby apparel markets, including workwear and fashion production ecosystems influenced by Korean manufacturing practices, stitch-out evaluations are often tied to a broader sampling rhythm—where teams move from concept samples to technical samples to pre-production checks. Cultural “tempo” matters: if your timeline compresses, technical teams may prioritize the most visible failure modes first (e.g., puckering and seam appearance), then expand to mechanical checks. This sequencing should be agreed upfront to keep expectations realistic.
In some facilities, trial steps may be integrated into existing line setup processes. For example, an operator might run stitch-outs while also assembling other components. This can increase efficiency, but it can also introduce variability if machine adjustments are not logged. Localization also means that the level of documentation can vary by facility maturity. Therefore, buyers should clarify the documentation expectations early: minimum photo evidence, recorded settings, acceptance checklists, and sample naming conventions.
Another localization consideration is the typical interaction between design/merchandising and manufacturing. In some workflows, design teams focus on appearance targets, while manufacturing teams focus on throughput and feasibility. Stitch-out helps align both perspectives because it translates design intent into machine parameters and quality outcomes. For instance, if the design demands a clean topstitch effect, stitch-out becomes the tool to confirm whether the fabric/thread/needle combination can produce that visual standard at production speed.
Finally, regional differences can affect expectations for finishing. Pressing style, trimming standards, and acceptable edge fray limits can vary depending on consumer expectations and product category norms. Stitch-out should reflect the market “taste” as well as technical requirements. If your brand expects very crisp finishing, your acceptance criteria should include that crispness explicitly rather than relying on general “good seam” wording.
Comparison Table: Stitch-Out Planning Elements (No Links)
| Planning Element | What to Specify | Why It Matters | Typical Conditions/Requirements |
|---|---|---|---|
| Fabric & Finish | Exact fabric ID, finish type, GSM, and width | Seam behavior varies by construction and treatment | Use the same fabric lot or a documented equivalent |
| Thread & Color Match | Fiber type, thread count/denier, and shade target | Controls appearance, strength, and abrasion behavior | Provide a thread card or supplier spec; confirm top/bottom thread pairing |
| Needle & Stitch Settings | Needle size/type, stitch length, and tension approach | Determines stitch formation and fabric damage risk | Document settings so reruns are comparable |
| Seam Construction | Seam type, allowance, reinforcement points | Defines load paths and visual seam character | Provide a construction diagram or equivalent reference |
| Finishing Process | Pressing direction/temperature approach and trimming | Changes seam lay and stability after heat/moisture | Agree on pressing steps to mirror final production |
| Acceptance Criteria | Appearance tolerances + functional checks | Prevents subjective approvals | Set measurable guidance (e.g., allowable puckering or thread show-through) |
| Trial Format | Sample size and number of iterations | Controls risk and review efficiency | Define how many variations are stitched and compared |
Step-by-Step Guide for Running a Reliable 스티치 아웃 Trial
Below is a step-by-step guide designed for technical teams, sourcing coordinators, and supplier representatives. It focuses on repeatability and objective evaluation.
- Translate the product spec into machine-ready details
Convert design intent into explicit seam construction, allowance targets, and reinforcement points. If the spec is incomplete, request clarification before the trial starts. This translation stage is where misunderstandings often originate: “topstitching” might mean different stitch lengths, different seam positioning, or different visible thread effects depending on the manufacturer’s internal convention. If you provide exact diagrams and acceptance criteria, you reduce misinterpretation. - Lock down inputs (fabric, thread, needles)
Confirm fabric finish and thread system. If exact thread shade matching is important, align color expectations using supplier-provided cards and acceptance references. Also confirm whether the trial uses the same thread brand or only the same material type. For example, two polyester threads can behave differently in tension and abrasion. If brand substitution is unavoidable, require the supplier to document the equivalency basis and expected behavior. - Choose the evaluation outputs
Decide which outcomes matter most for your product category: e.g., flat seam appearance, edge stability, or resistance to pulling during handling. It helps to create a short checklist that includes both “must pass” features (clear pass/fail) and “nice to improve” features (review items). This prevents teams from getting stuck on minor aesthetic issues while major functional risks remain unresolved. - Run the first stitch-out with baseline settings
Start with the most conservative “known-good” settings (from prior comparable projects) rather than extreme experiments. Baseline settings should be chosen not only for appearance but also for transferability: the settings should be feasible within the supplier’s typical line configuration. If the baseline is not feasible, the trial might look good but cannot be reproduced during production. - Document results and mark failure modes
Capture consistent photos, note tension behavior, and identify where puckering or uneven stitch occurs. Use the same evaluation lighting conditions if possible. Documenting failure modes is crucial: instead of saying “poor seam,” note indicators such as “top thread show-through on face,” “fabric tunneling,” “edge wavy line after pressing,” or “needle cutting at seam edge.” These labels help engineers diagnose root causes and create corrective actions. - Run targeted A/B adjustments
Change one variable at a time: needle size, stitch length, or tension approach. This approach supports faster root-cause identification. When multiple changes are necessary (e.g., tension and stitch length together), perform them in structured stages: run one change, evaluate, then decide whether additional changes are required. This staged approach prevents compounding effects that mask the true cause. - Apply finishing and re-evaluate
Stitching alone can mislead; pressing, trimming, and any wash simulation can alter seam appearance and stability. Evaluate after finishing. For example, seam ripples might be hidden before pressing but become visible after heat sets fabric differently. Therefore, the evaluation should include the same finishing steps expected in production, not a reduced subset unless explicitly agreed. - Confirm readiness for production sampling
Only approve stitch-out results that meet your defined acceptance criteria and are consistent across variations you consider “within normal process tolerance.” In practice, you may not demand a single “perfect” sample from one run. Instead, you may approve a range where acceptable quality is achievable. But if your acceptance criteria are broad, you must justify why that range is acceptable for the consumer experience and durability expectations. - Record the final settings for supplier handover
Provide documented settings and acceptance notes so future runs match the approved baseline. Settings records should ideally include: needle type/size, stitch length, presser foot if relevant, top/bottom tension settings (as far as machine allows), seam allowance reference, and finishing parameters. Also include sample photos and reference labels so the line team can compare quickly.
To increase reliability, teams should also define sample naming conventions. For example: “SOUT-BASE-01,” “SOUT-NEEDLE-BALLPOINT-02,” “SOUT-STITCHLENGTH-03.” This reduces confusion when multiple trials are conducted in parallel. It also helps quality teams build a clear audit trail.
Another practical enhancement is to include a “stress handling simulation” during trial. Not destructive testing, but handling that approximates how garments are manipulated in production (e.g., folded, moved, pressed with standard pressure). If a seam fails cosmetically under normal handling, it will likely fail in bulk as well.
Conditions and Requirements for a Meaningful Outcome
To keep stitch-out results credible, require the following conditions:
- Repeatability: the supplier must be able to rerun the approved settings. Ideally, rerun at least one “approved” configuration to confirm stability rather than relying on a single trial output.
- Comparable materials: fabric lot and thread system should match or be explicitly documented as equivalents. If fabric equivalence is used, require supplier documentation for the equivalence basis (yarn composition, density, finishing chemistry, and mechanical properties where available).
- Consistent evaluation criteria: the buyer and supplier must share the same acceptance checklist. A single checklist reduces “approval-by-conversation” and enables faster sign-off decisions.
- Transparent scope: confirm what the quote includes (materials, finishing, number of iterations, and any test steps). If finishing and wash simulation are not included, you must decide whether to add them or adjust acceptance criteria accordingly.
When these requirements are met, 스티치 아웃 becomes a reliable decision tool for technical readiness rather than a one-off activity. It becomes part of the manufacturing engineering “setup discipline.”
It is also helpful to define the boundary between stitch-out and other testing. For instance, seam strength for durability might require standardized mechanical tests beyond typical stitch-out handling checks. If you require such testing, specify it in the trial scope. Otherwise, treat stitch-out as a validation for construction and appearance behavior rather than a final durability proof.
Industry Context: Quality Assurance Logic Behind Stitch Trials
From a broader manufacturing quality perspective, stitch-out aligns with common risk-management logic used in apparel and textile production: you reduce uncertainty by testing representative conditions before scaling volume. While the exact method varies by facility and product type, the principle is consistent—measure and verify early where defect costs typically rise later.
To keep this guidance objective and grounded, note that many industries use structured sampling and process validation concepts. For apparel, relevant frameworks often connect to general quality management standards (e.g., ISO approaches) and standard testing logic. Specific stitch-out methods, however, remain product-specific.
In practical terms, stitch-out is part of “process validation” thinking. You are not simply checking quality of a finished piece; you are validating a process configuration. That means you should consider not only whether the seam looks good, but also whether the process is stable enough to maintain that appearance over time. For example, tension settings might drift during a long production run due to thread spool changes or needle wear. Stitch-out should therefore be structured so the supplier uses a realistic line setup and, where feasible, runs enough time or enough length to simulate stability.
Another QA logic element is “prevention vs. detection.” Stitch-out is prevention because it aims to prevent the production line from generating defective seams in the first place. But it can also be detection because the trial reveals issues early. The key is that it is detection with an earlier feedback loop than bulk production, so you can correct course before costs accumulate.
Furthermore, stitch-out can support quality documentation. A well-run trial provides evidence to internal stakeholders: merchandising teams, production planners, and leadership can see that decisions are not random. This can help maintain trust and reduce the likelihood of late “rework due to disagreement” on whether the process was properly validated.
FAQs about 스티치 아웃
Q1: What does 스티치 아웃 typically mean in garment production?
스티치 아웃 generally refers to a stitching trial where a seam is produced under planned settings to verify appearance and behavior on the intended fabric and thread system before moving toward production sampling. The aim is to confirm that the planned seam construction, tension balance, and finishing behavior match the intended product requirements.
Q2: Is 스티치 아웃 the same as a full pre-production sample?
Not always. Stitch-out is often narrower in scope—focused on seam and construction performance—whereas pre-production sampling may include broader checks such as pattern fit, labeling placement, full garment finishing across components, and sometimes full compliance checks. Stitch-out can be an input into pre-production sampling by ensuring that seam quality risks are already addressed.
Q3: What should I ask the supplier to include in the stitch-out quote?
Request clarity on scope: fabric and thread usage expectations, number of stitched variations, whether pressing/finishing is included, how photos or test outputs will be delivered, and how acceptance criteria are applied. If pricing is provided, confirm what is included versus excluded. Also ask whether the supplier will record settings and provide them in a reusable format for production handover.
Q4: How many iterations are usually enough for a reliable decision?
There is no universal number. Teams should aim for the minimum iterations needed to confirm acceptance criteria while keeping the comparison method disciplined (e.g., one-variable-at-a-time adjustments). The complexity of the fabric (e.g., high-stretch knits vs. stable wovens), the number of seam operations, and how sensitive the fabric is to heat/moisture will strongly affect how many iterations are required.
Q5: How do we set objective acceptance criteria for stitch-out?
Define measurable or clearly observable targets: allowable stitch irregularity, seam lay-flat expectations, acceptable levels of puckering, and what constitutes unacceptable thread show-through or edge instability. Use consistent lighting and documented reference photos when possible. If your product has brand-specific appearance standards (e.g., “no visible loops on face,” “topstitch must be even within ±X mm”), include them explicitly.
Q6: Does stitch-out always involve mechanical testing?
Not necessarily. Many stitch-out trials focus on visual and handling-based checks first. Mechanical testing may be added depending on product category requirements (e.g., durability expectations for workwear or outerwear), risk assessment, and any relevant internal or external standards your brand must meet. If mechanical tests are required, specify the test type and method in advance.
Q7: What happens if stitch-out results don’t meet expectations?
When failures occur, pause approval and revisit the inputs and process parameters. Use documented failure modes (e.g., puckering cause, tension imbalance symptoms, needle damage indicators) and conduct targeted A/B adjustments aligned to the acceptance checklist. If multiple variables seem implicated, do not change them all at once; instead, narrow the suspected cause through staged trial adjustments.
Q8: Can stitch-out results transfer across fabric lots?
They can, but only if fabric lots are equivalent and traceability is maintained. Variations in yarn content, weave density, finishing chemistry, or coating thickness can change seam behavior, so suppliers should document materials used and communicate any deviations. If equivalence cannot be guaranteed, consider requiring an additional stitch-out verification before bulk cutting begins with the new lot.
Q9: How do we handle color matching when thread shades are close but not exact?
Thread color mismatch can sometimes be acceptable depending on seam visibility and fabric color tone shifts after finishing. However, stitch-out should clarify your brand tolerance. If the seam is visible (e.g., topstitching), you may need tighter tolerance. Ask the supplier to test thread shade differences under the same finishing conditions, because pressing and light exposure can change perceived shade.
Q10: Should stitch-out include washing or simulated consumer care?
If your product will be washed or exposed to heat/moisture before wearing, and if the fabric is known to change under those conditions, then including wash simulation (or at least heat conditioning and pressing after treatment) is valuable. If not included, your acceptance criteria should specify that the approval is based on pre-wash condition only, and you may need an additional check later.
Q11: How do we avoid “trial confusion” when multiple teams review outcomes?
Use consistent sample naming, standardized photo angles, a shared checklist, and a decision log. Assign ownership for final approval (who signs off), and keep a single source of truth for settings and acceptance outcomes. This avoids situations where one team approves based on appearance while another team later rejects based on functional concerns that were not captured in the acceptance criteria.
Q12: Can stitch-out be used for both knit and woven constructions with the same method?
The principle is consistent, but the priorities and risks differ. Knits may be sensitive to needle type (e.g., ball point for preventing damage), tension changes can cause stretch distortion, and puckering behavior may be more pronounced. Wovens may be sensitive to needle sharpness, edge fray behavior, and fabric feed stability. Therefore, even if you use the same overall structure, adjust the acceptance criteria and variable testing plan based on construction type.
Conclusion: Using 스티치 아웃 to Make Seams Predictable
스티치 아웃 is best understood as a structured trial method for seam validation: it turns uncertainty into evidence by confirming how a planned construction behaves with the chosen fabric, thread system, and finishing process. When you run the trial with disciplined documentation, agreed acceptance criteria, and transparent supplier collaboration, stitch-out becomes an efficient path to technical readiness and consistent quality outcomes.
Ultimately, 스티치 아웃 is not only about getting a seam that looks good once. It is about creating a process that can be repeated, evaluated against clear standards, and transferred reliably into production. When that happens, you gain schedule confidence, reduce rework, and protect the product’s intended experience for the end customer.
If you want, share your garment type (e.g., knit top, woven outerwear, workwear), seam construction style, and the supplier’s current process constraints. I can help you tailor a stitch-out checklist and acceptance criteria wording that fits your specific context.